Cabinet Making Tips and Tricks
If you are thinking of building cabinets, you MUST learn these things first. I share my knowledge of techniques, tools & tricks of the trade.
*I use affiliate links, please see details on my disclaimer.

Cutting in a standing position is more comfortable and helps you be more accurate with your cuts too.

And the Centipede folds up easily and gets out of the way when your done with it. If you'd like to get one of these for yourself, check it out here: CENTIPEDE WORK HOLDER 4x8
Cabinet Making Tips and Tricks
If you’ve followed my work, you know I’ve done a decent number of cabinet videos and you viewers always seem to have different variations of the same few questions.
I guess that means I’m bad at explaining myself.
So, to fix that, in this walkthrough I’m going to answer the most common questions my viewers ask about making cabinets, share my favorite cabinet making tricks.
and share the tools that I find most helpful and least helpful when making cabinets.

Alright, so the first question, and this is by far the most common question I get goes something like this:
“What plywood are you using? Does that plywood already have finish on it? What plywood is that, it looks shiny?”

And the answer to that is “Yes”
I build all my cabinets out of pre-finished maple or birch plywood. They call it “UV Coated” ply. I don’t know if that means the coating protects against UV light or if they use ultraviolet light to cure the coating… who knows!
I source mine at my local plywood distributor, Nashville Plywood Co.
The name is a little on the nose, don’t you think?

Now, You can make cabinets from pretty much any available sheet goods (particle board, MDF, Plywood).
They go up in price and quality in that order.
But getting your plywood pre-finished is like the cherry on top of what is already a nice product to work with.
It is more expensive as you might imagine, roughly 20-25 more expensive.

But oh my, the tradeoff is no sanding and no finishing (unless you’re painting, but more on that in a minute).
Basically, once you build the cabinet, the cabinet is done.
Usually finish sanding and then finishing your cabinets is going to be a couple days more work.
That’s hours and hours of labor savings when you multiply it out across a whole set of cabinets.

Paining Pre Finished Ply
And you may ask, well if I’m painting them why would I pay extra for pre finished plywood?
You can still prime and paint this plywood and one benefit of doing that is that there’s no grain raising, there’s no grain showing through the finish, you get a glass smooth paint finish because the plywood already has this perfect glass smooth coating from the start.

And before I leave this topic I do want to also say that I try to build my drawer boxes from 5/8” Baltic birch plywood for low visibility cabinets like built ins, laundry rooms and workshops.

For high visibility areas like a kitchen or pantry I stick to making them out of solid maple.
Face frames from maple too. It’s a very dense and hard which makes it durable and it paints very well too.

So now that you know the secret of the shiny ply wood I want to throw a quick tip your way.
Cabinet Tips and Tricks - Installing Drawer Slides
And it has to do with how I install drawer slides to make sure they’re the right height and they match on both sides.
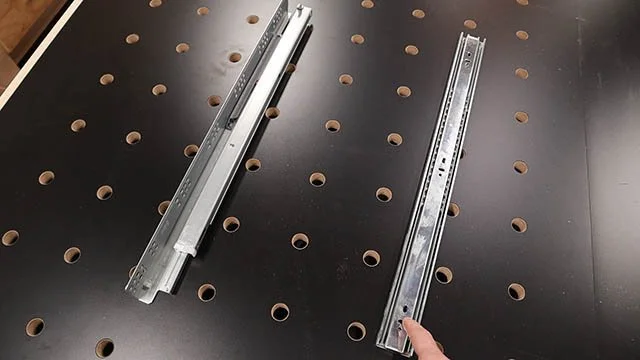
Whether you use side mount slides like this or undermount slides there are a lot of jigs you can buy to help you install them.

But for the most part they work by using one hand to hold it in place and rely on you having to mark reference lines on the cabinet accurately on both sides.

Cabinet Tips and Tricks - Installing Slides My Way
I think there’s an easier way and you probably already have what you need to do it.
Once you have determined where your slides will be located in the cabinet, rather than marking that location on the cabinet side, just grab a scrap of plywood and cut it to that length.
Trim the plywood to the height of your highest set of slides first.
Now set that inside the cabinet like this and install one slide.

Then just pop it over to the other side and install that one.
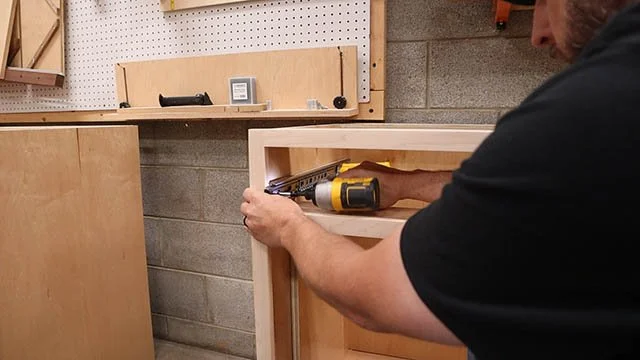
Next just trim your spacer down to the height of the next set of slides and repeat until you reach the bottom.
Using positive references like a plywood scrap guarantee that your slides will be at the exact same height no matter what.
You didn’t need to mark up the cabinet or hope that you lined everything up exactly the same on both sides.
x

The best part is you found a use for that scrap that you otherwise would have squirrelled away in your offcut pile because one day you’ll make something from it.
Two-Sided Tape FTW!
OK that’s one question answered and one tip, now let me show you a tool I think you should have.
Well, it’s not so much a tool as a secret weapon.

This is a roll of two sided tape and I use this stuff so much on projects and it doesn’t always get talked about in my videos but trust me it’s there helping me out.
Earlier I showed you how I stuck that jig to the bottom of the cabinet… two sided tape.

A lot of times those drawer slide spacers want to fall over while I’m installing a slide…. Two-sided tape.
And there are so many other circumstances where I want a temporary but secure hold on something like a second set of hands while I focus on the important tasks.

It was so useful when I was making this bit storage tray for my router table.
I could stick the slides exactly in place then install each side and guarantee that the slides would go back together again afterward.

There are a lot of brands but I have found this Spectape to be the best.
It has a strong hold, sometimes so much so that you need something to pry your work apart to break the bond.

Cabinet Tips and Tricks - We Have Standards!
Another very popular question I get from you guys is how the heck do you know what size to make your cabinets?
The snarky answer is you can make them whatever size you need them to be, which for things like built-ins or other custom spaces you need to fill with cabinet is actually true.
But if you’re planning cabinets for a kitchen or pantry you want to make your cabinets to a specific set of sizes and the good news is there are standards for that sort of thing.

There are of course books that will have all this laid out, one of my favorites is this one.
But a quick google search will do the trick as well.
And why these standards exist is because there are whole other industries that count on there being some kind of standard so they can sell things like dishwashers and ovens so everything goes together correctly.

This is by no means an exhaustive list but here are the standards for the most common cabinet types.
For base cabinets your two most important dimensions are height and depth which are almost always 34.5” and 24”.
21” is another common cabinet depth but that’s generally for bathroom vanities, not kitchens.
Disclaimer: All these are American standards in inches….. because I’m American and I don’t know anything else.
OK for the width you get a bit of freedom because there are a lot of standard sizes from 12” all the way to 42”. The most common sizes being 24, 30 and 36” and you’ll notice they tend to go in increments of 3”.

For upper cabinets your heights have a pretty wide range, the most common being 24, 30, 36 and 42”.
For depth it’s more limited. The most common depth is 12” and 24” for those cabinets that tend to hang over the refrigerator.
And the widths pretty much follow the same standards as base cabinets.
One other standard to know is that the width is measured from the outside edges of the cabinet.
If your cabinet has a face frame with an overhang then it would be measured from there, not measured from the cabinet side.
This Trick Will Blow Your Mind

OK next I want to share one of my favorite tips for cabinet building and that’s how I install drawer fronts.
Anytime I’m building a cabinet full of drawers, here’s how I get those fronts on quickly and easily.
Once I have my drawer fronts made, I go ahead pre drill the holes where the drawer pull hardware will go.
This’ll be really important soon.
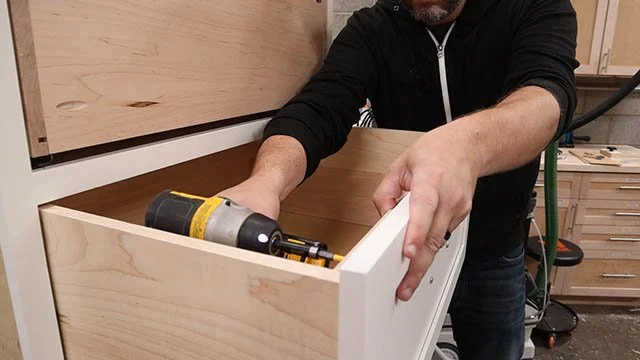
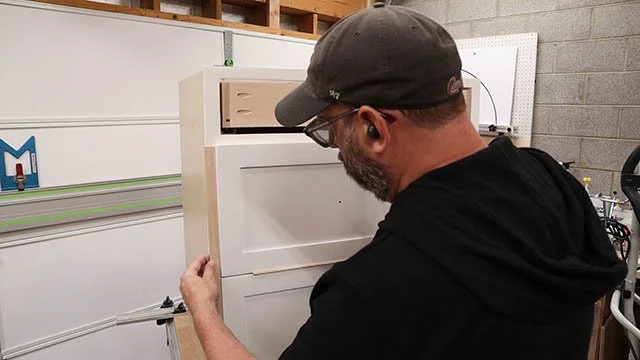
Then I head to the bottom of the cabinet and I like to make a quick jig that I stick to the bottom with two-sided tape like thus.
This is going to act like a ledge.
Then I set the front in place and make sure it’s nice and centered.

And here’s where those pre drilled holes are key.
I fasten the front to the drawer using two screws that go through those holes.
No need for spring clamps or hand-eye coordination.

Now I’m free to open the cabinet and fasten it from the inside with screws.
Then I can remove those screws from the front and drill my holes all the way through so I can add the hardware.

And now THAT becomes the ledge for the next one to sit on.
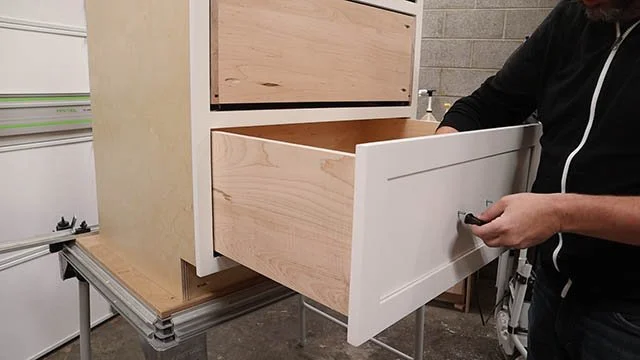
But you need to account for the small gap between the drawers. I usually like 1/8” and I made these special hardwood spacers that work perfectly.
I lay one down and then add the next front.
I use another spacer as a straight edge to ensure they’re lined up vertically.
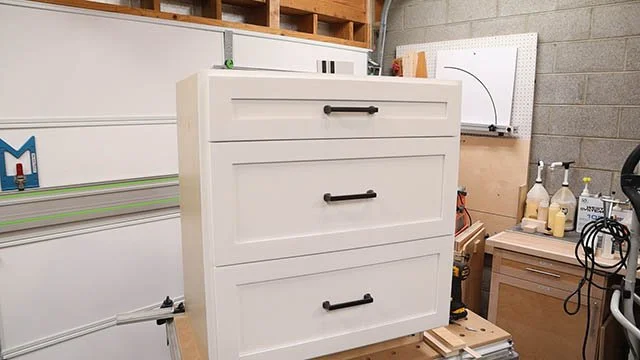
And then I can repeat the whole process over and over until I’m done.
Mind blown!
Really the Only Hardware Jig Worth Getting
In that tip, you saw me use this jig.
This is the True Position Cabinet Hardware Jig and I use this on every single cabinet project I do that has pulls on it.

I love this jig because once you have it set up you can drill the holes for your cabinet hardware really fast.
It has positive stops that allow you to position the jig in the center of the drawer front.

And then with these two guides you can set the exact width of your drawer pull
It could not be any simpler.


It also works on doors and with single knob pulls.

There are a lot of versions of this jig on line, but a lot of them are plastic.
I think True Position makes the best one IMO, its aluminum and is also made in America if that’s something that is important to your purchase.
Pocket Holes Don't Suck!

The next question I want to answer is related to joinery and how I like to put cabinets together.
My favorite method assembling cabinets is with pocket holes.
Pocket holes tend to get a bad rap and looked upon as a cheap DIY tool, however they have been a common method of building cabinets in cabinet shops for decades.

While it’s true that you won’t find a shop floor full of Kreg jigs, there are a lot of production level pocket hole cutters like this one from Castle and they even make floor standing models.
Personally I think cabinets, drawers and face frames are exactly where pocket holes are meant to be used.

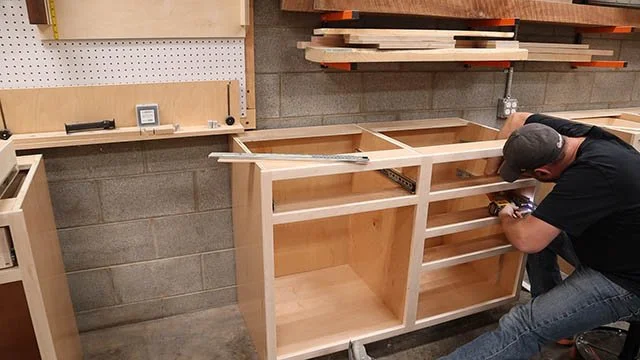
Cabinets built this way are plenty strong enough for daily use.

This entire bank of cabinets was built using pocket holes and I’m storing a ton of stuff in there.
You can add glue to the joint if you want but I don’t think it’s going to make much difference because of the end grain to long grain glue joint and if you are using pre-finished ply like I am then the glue is most likely not going to adhere well anyway.

Aesthetically, you won’t see any of the pocket holes in the finished cabinet so the user won’t even know they are there.

Dominos are AMAZING but not for cabinets!
Another option for joinery is to use a Domino. However, I think this is overkill for common cabinetry and an expensive option too. I’d save the domino joinery for your furniture builds.

Cabinet Tips and Tricks - Math Is Hard but Pictures Help!
The last viewer question I have is all about the mystery of drawer spacing “How do you figure it out?” “Are there rules?” “How do you know how big to make the drawers?”
OK so this seems confusing and a lot to figure out and there’s some math, but you can break it down by using this methodology and once you’ve done this a couple times you can almost do it in your head.

The first thing you need to do is decide how many drawers you want in your cabinet.
For this example, let’s use four (4)
Next, measure the inside opening of your cabinet.
This one has a 29” opening.

A good rule of thumb for spacing your drawers is to have a 1” gap above each drawer and a ½” gap at the very bottom.
So, if your cabinet is going to have 4 drawers, you’ll need four 1” gaps and one ½” gap.
Now, add up all your gaps and subtract that from your opening.

That leaves us with 24 ½” of “drawer space”.
OK now it’s time to make another decision. If you want all your drawers to be equal in size then divide this by 4 and your drawer boxes will be 6 1/8” high.

The to figure out the different heights for your drawer slides, just measure up from the bottom of the opening to the bottom of each drawer.
I always mount my drawer slides right at the bottom of the drawer to make this calculation easy.

Cabinet Tips and Tricks - Shelf Pin Holes
If you’d rather have shelves in your cabinets instead of drawers then you’re going to need shelf pin holes and to make those I use two very different tools in different situations.
The first one is this shelf pin jig from Kreg.
I’ve had this for I don’t know how many years, a really long time.
I like it because it has metal bushings where you drill instead of just plastic or a wooden jig.
It also comes with it’s own drill bit and stop collar and an indexing pin.
Using it is simple.

x

The base has a reference that you butt up against your cabinet side.
You can drill your first hole and then use the indexing pin to start your next set of holes.
I like using this jig on cabinets that are already assembled because it’s nice and portable and allows you to get inside the cabinet easily.

But for all my new cabinet builds, I’ve begun to use the LR32 system from Festool.
This utilizes a router with this indexing plate that moves along this rail and locks into place at set intervals of 32mm which is an industry standard dimension.

This method creates runs of shelf pin holes faster than with the Kreg version and using a router bit instead of a drill bit makes much cleaner holes.
So for me I will always have a Kreg shelf pin jig around because they are so handy for previously built cabinets and are a good budget solution.

OK so that’s it! Questions answered, tips given, tools shared.