How to Build Cabinets for Kitchens and Pantries
In How to Build Cabinets I'll walk you through my method of building two different styles of standard base cabinets. One with a door and a drawer and the other with a bank of four drawers. I then show you how to combine them into one unit!
Materials & Supplies*
3/4" Plywood
1/4" Plywood
5/8" Plywood
True Position Tools Cabinet Hardware Jig
*I use affiliate links, please see details on my disclaimer.
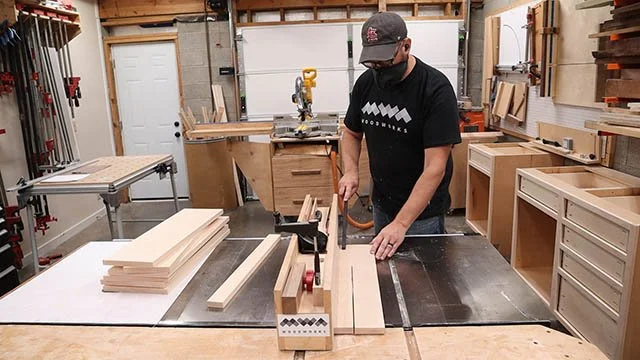
How to Build Cabinets - Cabinet Part Cutting
Once I have all my plywood blanks cut I can use the table saw to cut them to final dimensions.

I'm not removing much material, just ripping off the raged factory edges so I get a nice clean edge on my parts.

Next, I’ll cut out a bunch of strips that will be for the stretchers and toe kicks. The stretchers are all the same at 4” wide and the toe kicks are 4 ½” wide.

The next step is to cut a notch out of the bottom corners which will be where the toe kick is.

My favorite way to do this is using my bandsaw. I set my fence to my mark and cut until I reach the depth I want and to mark that depth I’m using a magswitch as a positive stop.
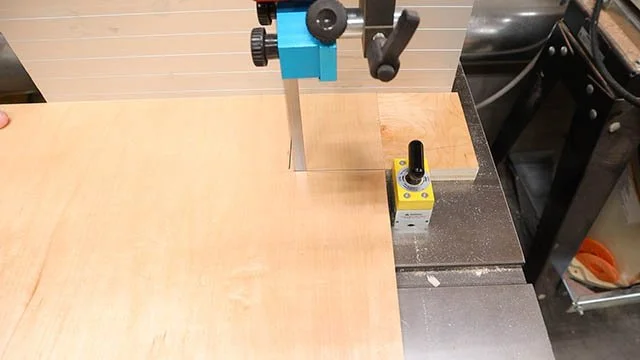
This is a great way to make sure all your cuts are repeatable so your parts all end up the same.

Now, if you don’t have a bandsaw, you can also cut these out with a jigsaw and a square for a guide. I can just clamp everything down and carefully run the jigsaw along the square.

If you use a fine tooth blade your jigsaw will produce a really nice clean cut on the plywood.
Cabinet Joinery

After the notches are cut I need to work on cutting grooves in the sides of the carcass which will house the bottom and the back of the cabinet. One way to make these dadoes is using a router bit. I have one that is sized for ¾” plywood to give me a nice snug fit. Since the bottom of the cabinet will sit just above the toe kick, I’m going to use the toe kick itself to set the distance from the fence.

This will ensure a perfect fit with no gap at the bottom of the cabinet and I don’t have to measure anything.

Each side gets one of these grooves.

Then I need to do the same thing but this time making a ¼” groove along the back of each side.

This is another bit that is sized specifically for ¼” plywood.

An Alternate Method

If you don’t have a router table you can also cut these using a table saw.

You can use a set of dado blades, or you can do what I'm doing here and just use a single saw blade and take multiple passes.

Once you make the first cut, just move the fence a tiny bit and make another pass, sneaking up on the cut until your plywood fits perfectly into the dado
How to Build Cabinets - Shelf Pins

OK one thing you should do now if you want an adjustable shelf in your cabinet is add the shelf pin holes.

This is way easier to do now than when the carcass is built. There are lots of ways to drill these holes but I like using this little Kreg shelf pin jig. You don’t need very many holes, maybe 6-8 depending on spacing.
Cabinet Joinery - Pocket Holes

With that, the sides are done and its time to build the carcasses. I’m going to use pocket screws as the primary joinery and so I need to add pocket holes to all the stretchers.

In my opinion cabinet construction is the perfect application for pocket holes. They are plenty strong even without glue and make building the carcasses quick and easy.
How to Build Cabinets - Assembly

To get started assembling the carcass I add some glue to the bottom dado. This is the only place I need glue because I wont be using screws here.
I slide the bottom panel into the dado and do the same on the other side before adding clamps.

Next, I’m going to spin the cabinet so I can add the back stretchers.

Once the stretchers are in place I clamp the heck out of them so they don’t move and then I screw them into place.


I then flip the cabinet on its top to add two more stretchers.

On the back stretcher I’m using a scrap of ¼” ply as a spacer representing the back of the cabinet.

I’ll show you what this looks like and why this matters in a minute.

I then flip the cabinet one more time, which will let me install the drawer divider.

Here I’m using two scraps of ply to act as spacers.

I can just clamp the drawer divider to the top stretcher like this before screwing it into place.

Now you can see here the slot I created for the back panel to slide into. This is the reason I used the ¼” plywood as a spacer.

OK, with all the stretchers installed I can add the toe kick. This attaches with pocket screws also.

At this point the quick setting glue I used is dried and the cabinet is held together with pocket the screws so the clamps aren’t needed anymore. And this carcass is almost done.

The last thing I need to do is cut some of the ¼” ply to use as the back of the cabinet.

And that just slides right into that pocket in the top and gets nailed to the back stretcher with a brad nailer.

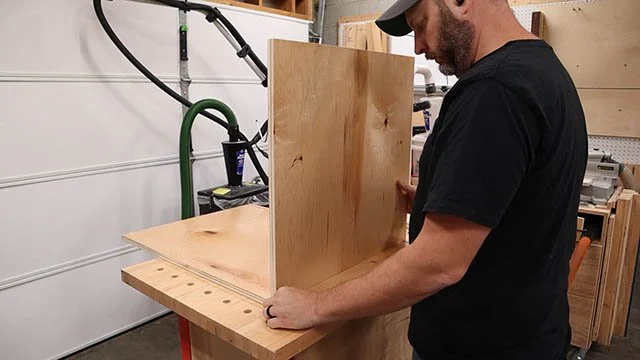
You could also add a couple screws or even glue it to the stretchers if you don’t have a brad nailer. And just like that, the first carcass is complete. This one has a spot for a single drawer and a door on the bottom.
Four Drawer Cabinet

Now if you want to make one with a bank of four drawers instead of the door it super simple to do that. The carcass is built in the exact same way the only difference is the number of drawer dividers you add.

After installing the first drawer divider, I just use the spacers again and add a second divider and then a third using the same method. Spacing of the dividers will depend on how big you want your drawers to be.

I’m making mine with three drawers the same size and one bigger drawer at the bottom.
Joining Cabinetry

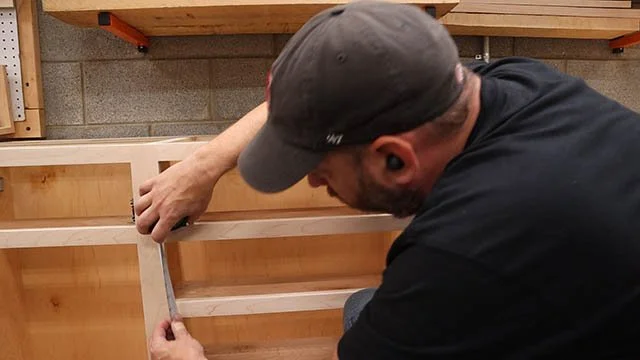
Now, if you want join two or more cabinets together into one unit, just clamp them together so the edges are all flush and screw them from the inside of the cabinet.

In this case I put the screws in the four drawer side so they will never be seen.
How to Build Cabinets - Face Frames

One benefit to combining cabinets is you can make one face frame to cover them both and that’s what we’re going to work on next.

For my face frame I’m using hard maple to match the maple plywood I’m using. If you’re painting your cabinets you could also use poplar as a slightly cheaper option here.

After I cut my lumber into rough blanks I jointed one edge just to make sure it’s nice and straight

Next I need to rip all these down to final width. My face frame will be mostly 1 ¼” to give me a ¼” overhand on both sides. The Center stiles where the cabinets join together will be 2".

I can then cut everything to length using a crosscut sled. A miter saw could be used here too if you don’t have a sled.
Face Frame Assembly

To join my face frame parts I’m going to use pocket screws again. This is another thing pocket screws are really good for because they’ll never be seen.

One tip I have if you’re screwing into really hard wood like this maple is to wax your screws to keep from stripping or breaking them.

Another tip is to make sure to clamp down each joint to keep the parts from shifting.

And tip number three is to use a spacer to help line up your frame parts evenly.

Here I’m using a spacer to make sure I get the proper distance for all my drawer dividers.

And that’s pretty much it for making a face frame.

I then give each of my face frames a once-over with 120 grit and then 180 grit sandpaper to get rid of any mill marks and make sure the joints are all flush
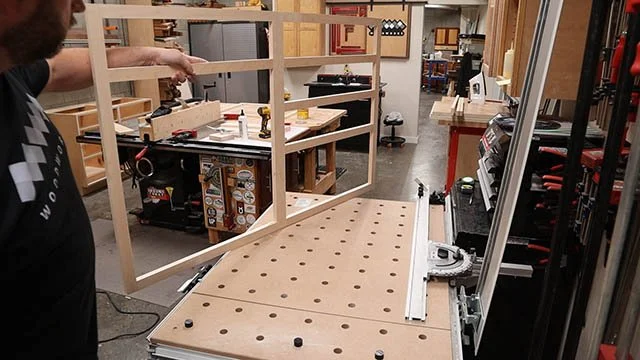
The face frame is just glued on. You could use brad nails if you are painting the cabinets.
How to Build Cabinets - Attaching Face Frames

That way you can fill the holes with wood filler before sanding flush and painting.

Since I'm not painting, I don't want nail holes, so I'm just going to clamp and let the glue dry.

And this thing takes a lot of clamps!

The double face frame goes on the exact same.

I used a clamping caul to clamp the center stile because I couldn't reach it with my clamps otherwise.
How to Build Cabinets - Drawer Boxes

Now when it comes to drawers, you have a couple different choices of material. You could use hardwoods like poplar, maple or oak which I would do in a kitchen or bathroom project. But for all other cases I like using 5/8” Baltic birch ply.

I think it looks really nice sanded and finished and works well for offices, pantry and other built in projects or in my case shop cabinets.

After cutting up the parts that will make up the four sides of each drawer I need to cut a ¼” dado along one side.

This can be done on the table saw the same way I cut the dado in the sides of the carcass to hold the back panel.

To assemble the drawer lay out your parts with the grooves facing out.

The front and back parts will have the pocket holes in them and the sides will not.

Arrange the parts so the front and back sit inside the sides and clamp them together making sure the dadoes line up all the way around the drawer.

Then screw everything securely together.

Now you can just slide the drawer bottom into the grooves from the back side nice and easy.

Then you can use screws or brad nails to fasten the bottom in place.
Installing Drawers

OK, now on to drawer slides. For these cabinets I’m going to install full extension side mount slides.

To attach the slides to the drawer, set the drawer on a flat surface and set the slide on the same surface lining up the front of the slide with the front of the cabinet like this. This is the easiest way I have found to consistently install these slides on both sides perfectly.

To install these slides into the cabinet I get myself a scrap piece of plywood that is cut to match the height of my first set of slides on the top of the cabinet.

I then rest my slide on top of that and screw it into place.

I repeat the same process on the opposite side. You’ll also see that I’m using a ¼” strip of ply to act as a spacer so the slide wont be blocked by the face frame.
After repeating that process on all my cabinets I take my scrap plywood and cut it down to match the height of the next set of slides.


I then install those slides the same way.

Then I measure for my next set and repeat that process all the way down the cabinet.

I can then slide my drawers into place and now we have something that really looks like a cabinet.

All I need to do now is dress up the front.
Doors and Drawer Fronts
To begin making the frame and panel fronts I need to cut my frame parts and again I’m going with hard maple.

All of these parts will be 2” wide as I think that looks the best, but this is really up to you what size you choose.

After cutting all the frame parts to length I’m going to put a ¼” groove down one side of each piece. This is where the center panel will go.

I then need to cut a tongue or tenon on the ends of the top and bottom frame pieces. These will be used to connect the frame together. To do this I’m using a special jig called a tenoning jig. It attaches to the auxiliary fence of my table saw. By the way I have a video on how I made this auxiliary fence and have plans too if you want to make your own. I’m also using a dado stack to make these cuts mainly for speed.

This is what the tenon looks like. Isn’t that awesome, and I made it all on the table saw.

For the center panels I like to use ½” plywood and I cut a rabbet around all four sides.

Doing this will allow the sides of the panel to go in the grooves of the frame.

To begin building the door I add glue to the tongues and insert them into the grooves on the frame sides. I can then slide a panel into place like this.
Door Assembly

Then I can add the final frame side with more glue and tap everything into place and clamping it together.


I also like to get rid of any squeeze out now around the joints.

To build the drawer fronts I do the exact same process just on a smaller scale. The benefit of using ½” plywood here is that the center panel will be flush with the back side of the frame. This will help when by giving you a completely flat back to mount them to the drawers.

Once everything is out of the clamps I give them a sand to 180 grit just like the face frame this will flush up all the joints.
Hardware Installation

Alright the last detail we need to attend to is hardware.

I need to drill the holes for the drawer pulls and I’m using this really cool jig to do it.

There are lots of jigs on the market like this, but this one is from True Position. It has adjustable stops that allow you to line up the drill guides to the top and side of the drawer to perfectly position the pull.

You can adjust the two guides to line up perfectly with whatever side pull you’re using. This makes adding pulls to multiple drawers fast and repeatable.

And for the door I’m going to use hidden cup hinges, sometimes called Euro hinges.

And to drill the pockets for the hinges I’m going to use another fancy jig. The drill bit has a depth stop that cuts the perfect size pockets.

The hinge drops right into the hole and I can predrill the screw holes using a self centering drill bit.

This will put the pilot hole right in the center so the hinge doesn’t wander off square when you add the screws.

This is what the self centering drill bit looks like.

And these hinges just screw into place and bam, done!
Installing Door and Drawer Fronts

To install the door I make a makeshift spacer out of scrap ply that I attach to the bottom of the face frame with two sided tape.

I then set the door on that spacer and I know my door is right at the height I want it at.

I can then drill pilot holes and screw the door into place.

To install the drawer front I have a dead simple process that makes installing drawer fronts much less of a headache.

To begin I add a spacer strip 1/8” thick on top of the door to create the reveal I want.

For the spacer you can also use washers or playing cards, anything with a uniform thickness. I then make sure it’s lined up with the door on both sides.

My trick for installing drawer fronts is to screw the front into the drawer using the two holes I drilled for the drawer pull. This gets the front firmly attached while I screw it into place from the back side.

I can then drill pilot holes and add screws from the inside.

Then I can remove the screws from the front.

Then drill all the way through to accommodate the hardware screws.

I can then add the hardware for the pull and fasten it into place.

That's by far my favorite cabinet trick! Love it!

I do the exact same process on the four drawer cabinet, just adding a spacer between each drawer as I work my way up the cabinet and bam…. done

Here you can see the finished 48" combo cabinet. So much awesome!

The Finished Cabinets
I made a total of five 24" cabinets and combined four of them together into these 48" units for my shop.
