
If you have followed me on Instagram over the last few years you’ve seen a LOT of cutting board pictures and videos. I’ve made and filmed literally hundreds of them. I’ve also received literally hundreds of questions about how I make them and so I’ve decided to document the whole process from start to finish to use as a reference for new woodworkers who have questions. Please check out the tutorial and if you still have questions be sure to leave them in the comments below. I want to make this as thorough as possible. I hope you find this useful!

DID YOU KNOW: You can follow me on these social media platforms!
Instagram · YouTube · Facebook · Pinterest
Tools & Materials For This Project
DISCLAIMER – As an Amazon Associate I earn from qualifying purchases.
| Materials & Supplies* | Tools* |
| Hardwood Lumber (various) | Table Saw Ripping Blade |
| Water Resistant Wood Glue | Table Saw General Purpose Blade |
| Foam Brush Applicator | Parallel Clamps |
| Butcher Block Conditioner | Glue Scraper |
| Digital Angle Gauge | |
| Square | |
| Bench Cookies | |
| Spray Bottle (for water) | |
SEE A LIST OF ALL THE TOOLS I USE IN MY SHOP
The Whole Enchilada Plan Bundle
The Whole Enchilada Plan Bundle! You want it all? You Got it! Get every plan I offer in one bundle at a savings of over 65%!
This product is a DIGITAL DOWNLOAD. You can immediately download your product off the order receipt page after the purchase. You will also immediately receive an email titled “Your MWA Woodworks order is now complete” that contains the download link in the “Downloads” section of the email.
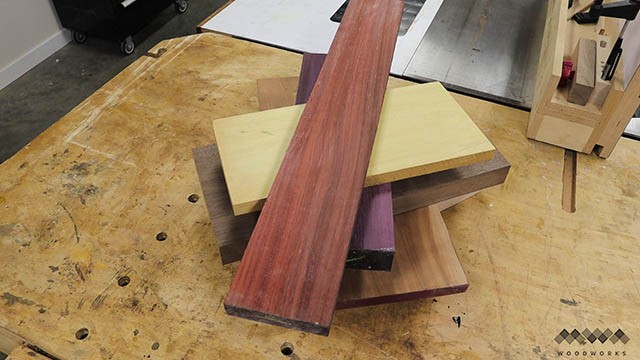
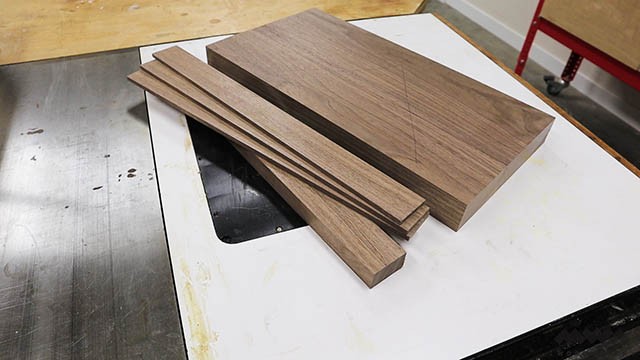
Selecting Cutting Board Materials
Every project starts with material selection and this is no different, but perhaps you need to be a bit more picky than usual for a couple reasons. First your cutting board isn’t going to be very big and so every square inch counts for beauty. Pick woods that will look appealing and have no defects. You absolutely want to use hardwoods over softwoods and the harder/denser the better for durability. I probably don’t have to say it, but I will anyway: Stay away from pressure treated lumber, plywood, MDF, oak, poplar, cedar, pine or really anything that comes from a big box home improvement store. Those materials are meant for, well, home improvement. There, I said it. Lets move on.
My Favorite Cutting Board Hardwoods
American (domestic) hardwoods:
- The “big three”: walnut, hard maple, and cherry
- Others that work well: ash, hickory, pecan, sycamore
Tropical hardwoods (usually used for accent coloring):
- Purple heart, yellow heart, canary wood, paduak, bloodwood, zebrawood, bubinga
Now here are a few hardwoods you may be familiar with that I would personally avoid using (with my biases opinions sprinkled throughout)
- Red Oak, grain is too porous for cutting boards (also ugly as sin and smelly when wet and basically good for firewood)
- White Oak, while it is used to make my favorite whiskey (bourbon) and I tip my hat to it for that reason alone, it is also too porous to use in cutting boards
- Poplar, not hard enough nor pretty enough. Basically a paint-grade hardwood one step up from pine unless you get real knotty or colorful purple poplar.
- Butternut, basically soft like pine. Pass.
In no way is this an exhaustive list of woods you can use or avoid, but it covers the one’s I know best. I welcome your input, of course.
PRO TIP: KEEP YOUR SCRAPS! A great use for all the off-cuts that you end up with from other projects is cutting boards! I keep all mine in bins by size and species for easy “shopping” when I need to make a quick board.
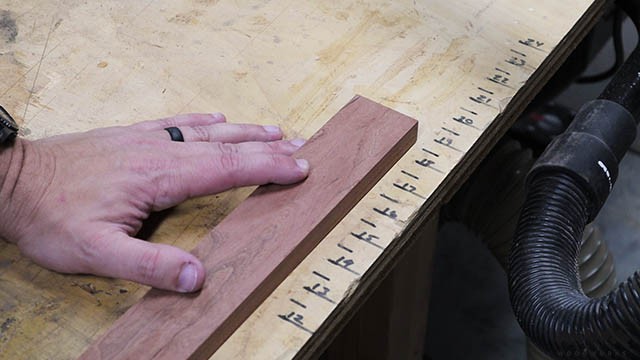
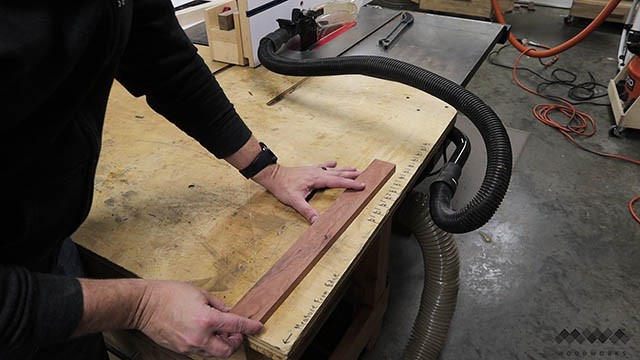
I even made this crude ruler on the side of my work bench to measure the length of the boards I want to use to make sure they will work in my board!
Preparing The Cutting Board Parts
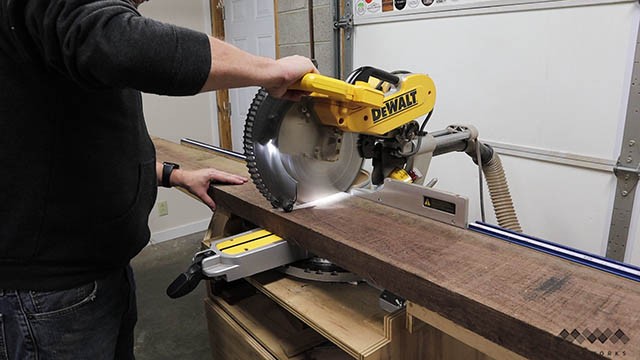
If you’re using long pieces of rough lumber, be sure to cut carefully at the chop saw because any bow in the wood can create a gap between the wood and the fence which when you complete the cut can cause pinching of the blade and KICKBACK! Be sure to complete the cut on the INSIDE portion (closest to the fence) first ans then the OUTSIDE portion. If your board is narrow enough to cut in one downward cut, then you should be fine.

Take a quick moment to make sure you have rough cuts of all the woods going into your board now. This is just good planning before we move on to the next step!
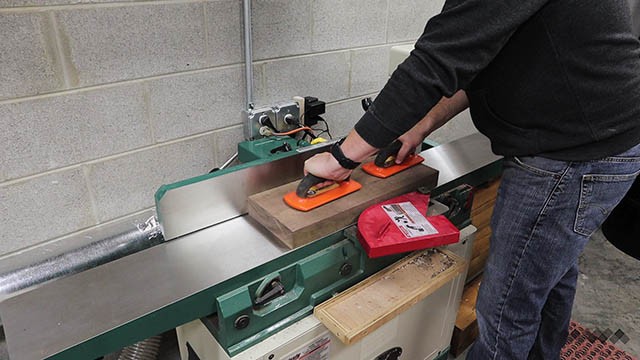
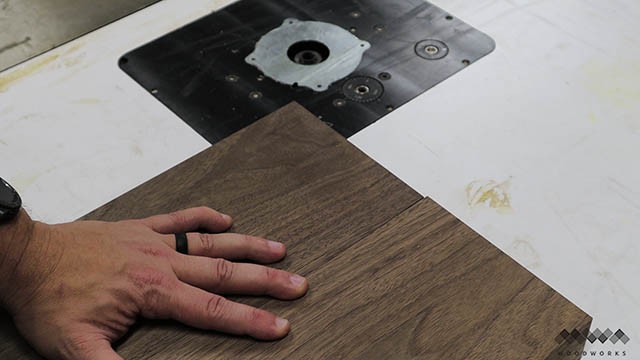
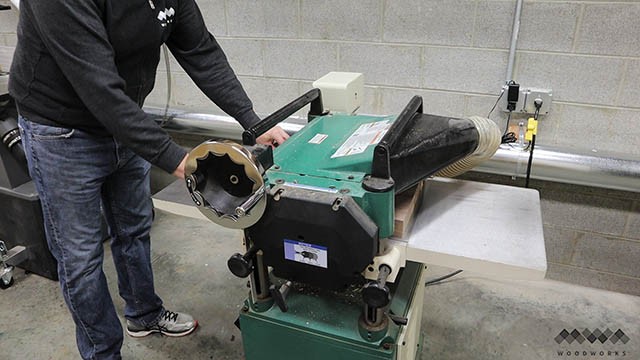
The first thing we need to do is flatten one face of our stock at the jointer.
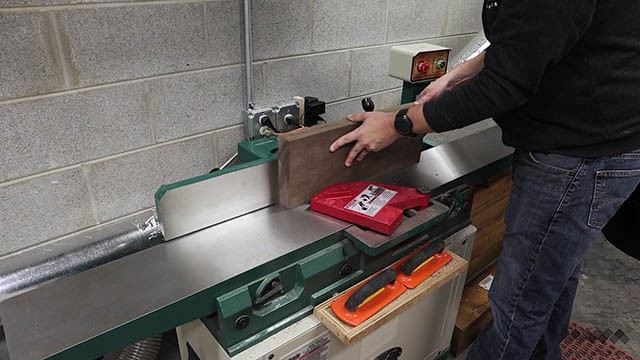
Then place the flattened face against the fence and run one edge across the jointer. This will square up that edge to the flattened face.
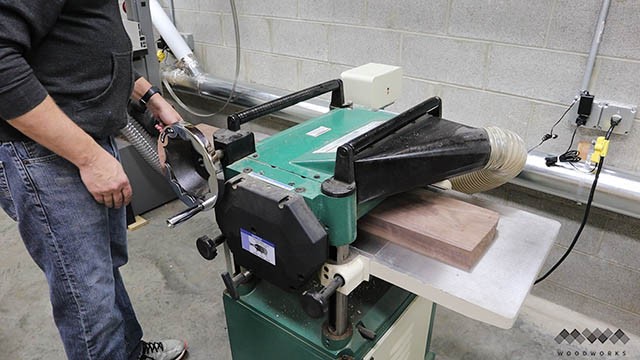
Next, take your parts to the planer and put the flattened face DOWN on the planer bed and flatten the opposite face. Now you have three flat and squared sides.

The fourth side can be take care of by ripping it at the table saw (well, most of the time it can)
The Whole Enchilada Plan Bundle
The Whole Enchilada Plan Bundle! You want it all? You Got it! Get every plan I offer in one bundle at a savings of over 65%!
This product is a DIGITAL DOWNLOAD. You can immediately download your product off the order receipt page after the purchase. You will also immediately receive an email titled “Your MWA Woodworks order is now complete” that contains the download link in the “Downloads” section of the email.
Getting Nice Glue Joints
You can see here that this edge I ripped at the saw is kind of gappy on one end. That will cause a glue joint that can fail in the future, so we want to take care of that.
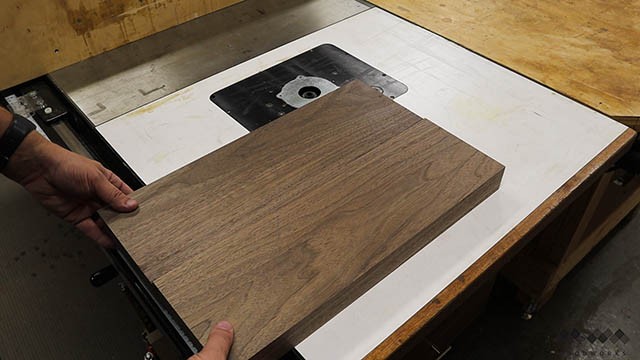
The best way I know to ensure a tight and seamless glue joint in your cutting board is to do the jointer trick.
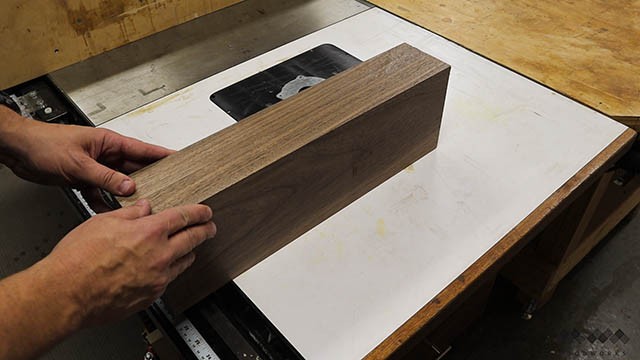
PRO TIP: To get tight seamless glue joints, fold your work pieces in half like a book at the glue joint. Then run these pieces across the jointer at the same time.

Doing this will cause you to cut supplementary angles on the edges of your work pieces. What this means is that even if your jointer fence is slightly off square, the resulting angles will add up to 180 degrees (flat) and this will match up to one another perfectly.
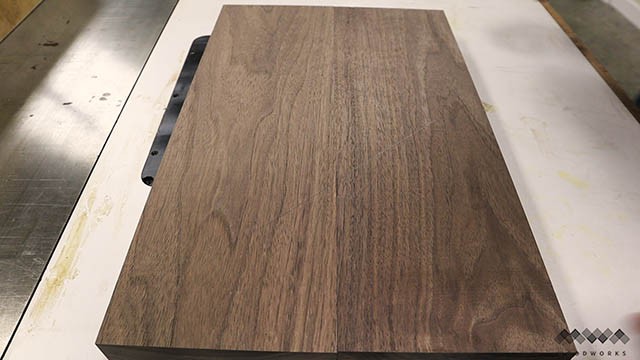
You can see the resulting glue joint here. A tight and seamless joint! Lets move on!
Cutting Thin Strips Without a Jig
Now that all our parts have been flattened and squared to one another we need to make room for our accent strips.
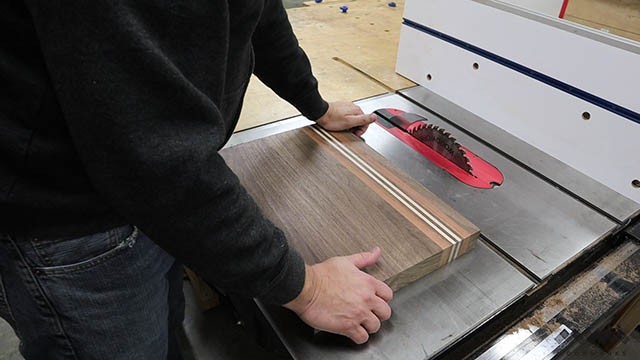
To start, I am ripping 1 inch off the end of this board.
Then I need to make a series of 1/4″ strips for the cutting board.
After I cut the first strip, I can line it up against the outside of the blade and move the fence and my work piece until the edge is flush with the outside of the strip. Now when I rip the work piece on the saw it will create a duplicate strip.
I want a total of three of these 1/4″ strips for my cutting board.
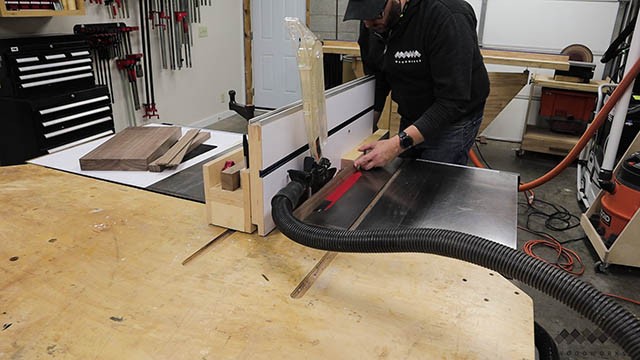
I also want two 1/4″ hard maple strips, so I repeat this process for those.
The Whole Enchilada Plan Bundle
The Whole Enchilada Plan Bundle! You want it all? You Got it! Get every plan I offer in one bundle at a savings of over 65%!
This product is a DIGITAL DOWNLOAD. You can immediately download your product off the order receipt page after the purchase. You will also immediately receive an email titled “Your MWA Woodworks order is now complete” that contains the download link in the “Downloads” section of the email.
Assembling The Cutting Board
My two cherry accent strips already happened to be flat and square (sometimes I get lucky). So the next thing to do is arrange all the strips of your cutting board to get a visual of what the final board will look like. This gives you a chance to change things up or add other accent strips if you like before you go to the glue-up stage.
This glue up is simple enough. There are only a few parts and I’ve definitely tackled way more complicated board glue-ups than this one. It shouldn’t take long at all. I like to lay out my parts on the clamps so I don’t accidentally glue the wrong parts together. I then apply a water resistant wood glue using a foam brush. Over the years this has become my go-to way to spread the glue evenly without a fancy applicator.

Next I apply pressure with the clamps. Two on top and two on bottom to help prevent warping the cutting board blank. You don’t need a ton of pressure here, just enough to get good even squeeze out along each joint.
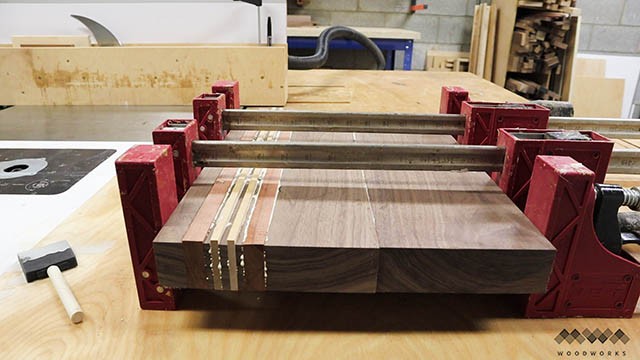
You can see here what the squeeze out looks like. There’s not a ton of excess glue either. Now just let the board sit just like this so the glue doesn’t run down the board.
Cleaning Up The Cutting Board
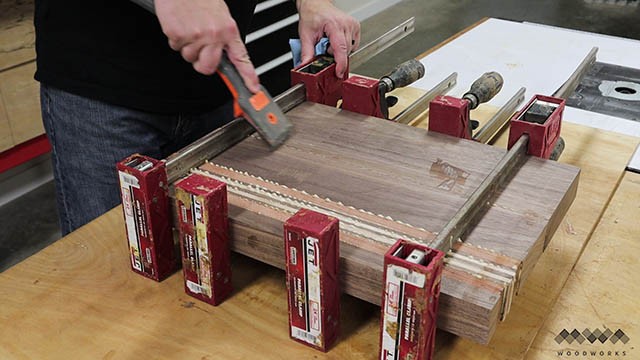
PRO TIP: After waiting 30 to 45 minutes, the glue will be skinned up and rubbery which is the perfect time to scrape it off. It should come off neatly and with a single pass. Just get as much as you can (the clamps will cover some of it and that’s OK). I generally wait overnight to let the cutting board fully cure in the clamps before I move on. If I’m in a hurry, a minimum of 3 hours wait time is best.
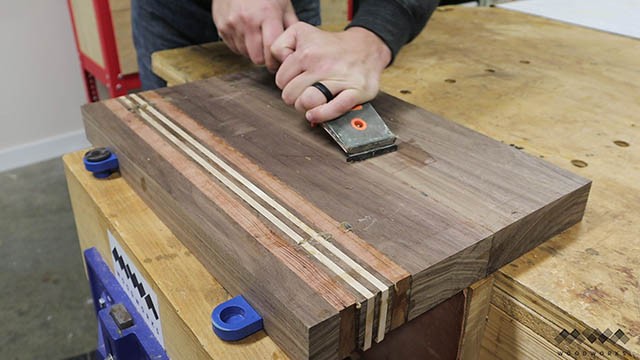
Now with the glue cured and the board out of the clamps, I use a scraper to get any of the left over hardened glue off the surface. This is a good ideas to do now because the next step really works in your favor if the bottom of the board (which you referenced off the clamps to keep flat) is free of glue bumps which can throw off the planer in the next step.
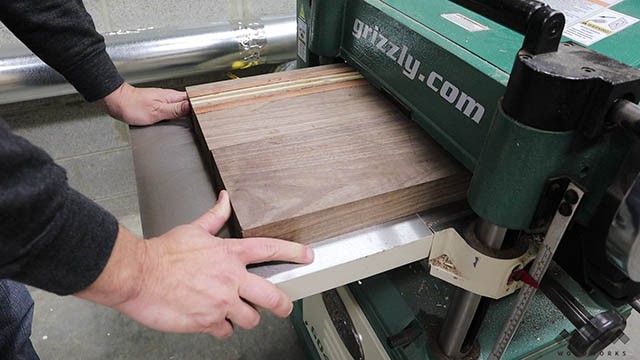
Next we will do a technique called “skip planing” in which we put the flattest side of the work piece down on the bed of the planer and take a very light pass. Then we flip and rotate the board and send it through again taking a shallow skim cut.
The Whole Enchilada Plan Bundle
The Whole Enchilada Plan Bundle! You want it all? You Got it! Get every plan I offer in one bundle at a savings of over 65%!
This product is a DIGITAL DOWNLOAD. You can immediately download your product off the order receipt page after the purchase. You will also immediately receive an email titled “Your MWA Woodworks order is now complete” that contains the download link in the “Downloads” section of the email.
Square Up The Cutting Board
Repeat this process of flipping the board over and rotating it 180 degrees until both sides of the board are planed flat. This process helps preserve as much of the thickness of the board as possible and helps make the cutting board as flat as possible.

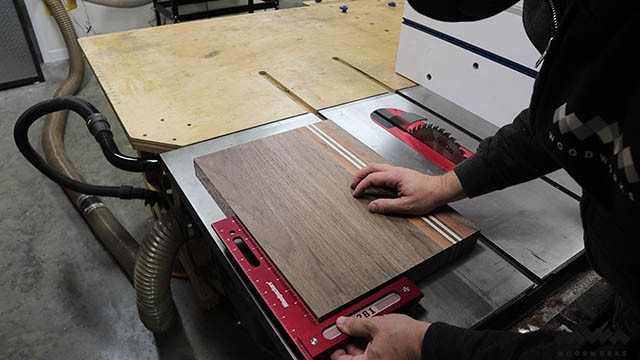
Now that we have a flattened board, we need to square up those rough glued ends. The best way to do this is with your cross cut sled. Pick one long side of your board and place it against the cross cut sled fence. Trim off one end of the board and then flip the board over, keeping the same long side against the fence. Then trim the other end of the board. Doing this ensures that the two ends are square to the one long side which is generally all you need to do. However it may bee necessary to then rip the fourth side parallel to ensure all four sides are square.
Its also a good idea now to check to see if the board is still flat and hasn’t moved on you. Sometimes doing all this cutting can relieve stresses in the wood causing warping. I use the flat cast iron top of my table saw to check this. You can also use a granite counter top in your kitchen if you don’t have a trusted flat surface in your shop.
Normally I don’t check all four sides for square because for regular cutting boards there’s no real point. But I want to do something different with this board and it really only works well if the board is square. If you just want a standard cutting board, you can skip down to sanding the board. Otherwise keep reading on!
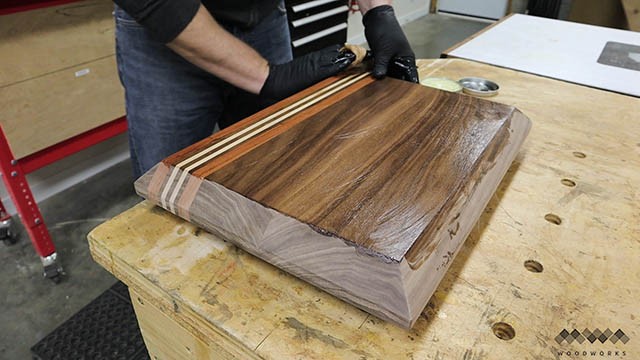
Adding Bevels as a Feature

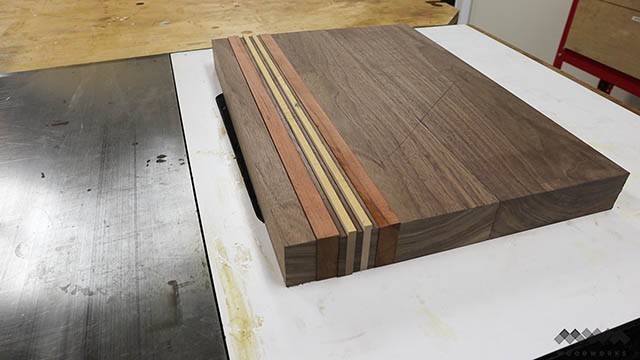
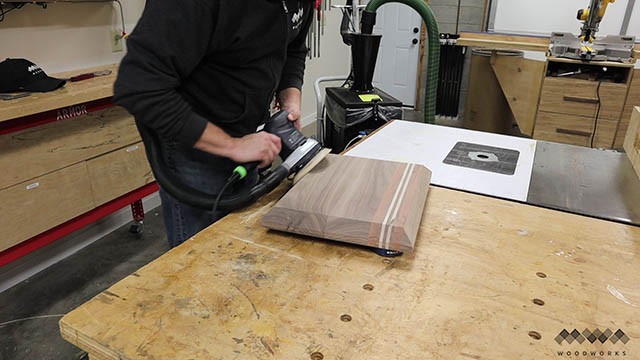
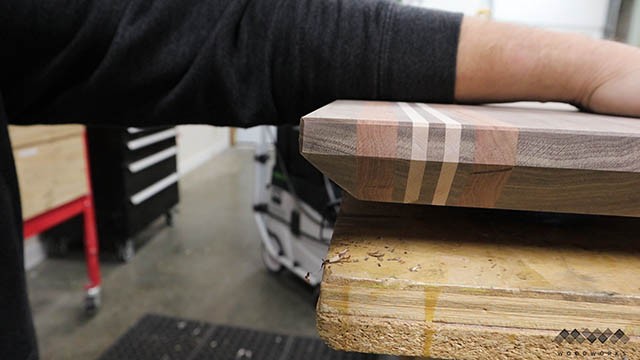
I like to add an under bevel on my thicker cutting boards. I do this for two reasons, one practical and one aesthetic. The practical reason is that it gives the user a place to grab the board on all sides making it convenient to pick up and move.
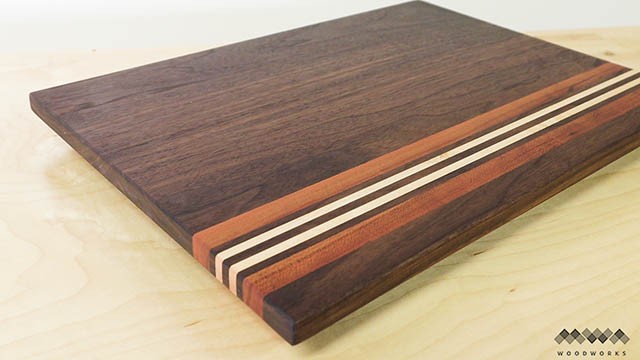
Aesthetically, it gives a thicker board a very light, almost floating look. You can see from the picture that this board looks pretty thing although it is almost 2 inches thick!
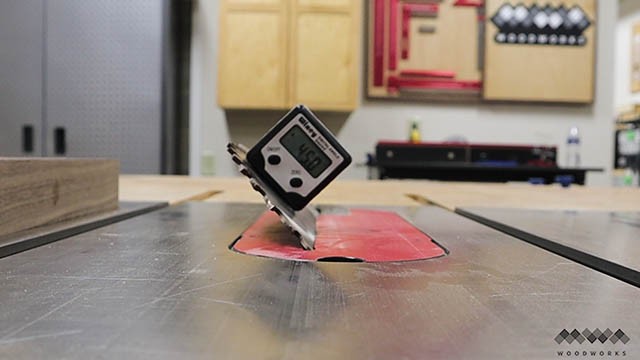
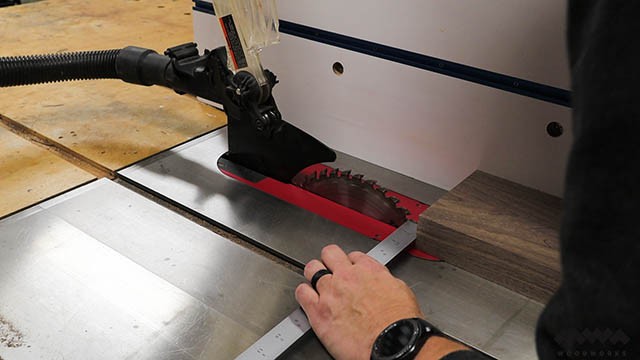
To get started cutting the bevels on our cutting board we need to set the blade of the table saw to 45 degrees. This handy digital angle gauge takes all the work out of setting the angle. These things are relatively cheap and very handy!
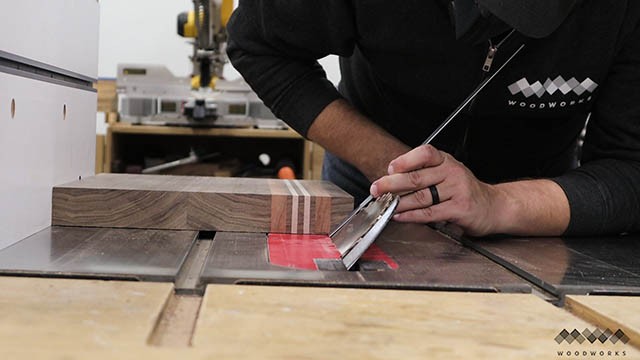
I like to use a straight edge against the blade to visualize where the bevel will be cut on the cutting board. Just adjust the fence until the bevel is where you want it to be. This is really a personal preference but I generally want the top edge of the board to be 3/4″ to 1″ thick once the bevel is cut.
The Whole Enchilada Plan Bundle
The Whole Enchilada Plan Bundle! You want it all? You Got it! Get every plan I offer in one bundle at a savings of over 65%!
This product is a DIGITAL DOWNLOAD. You can immediately download your product off the order receipt page after the purchase. You will also immediately receive an email titled “Your MWA Woodworks order is now complete” that contains the download link in the “Downloads” section of the email.
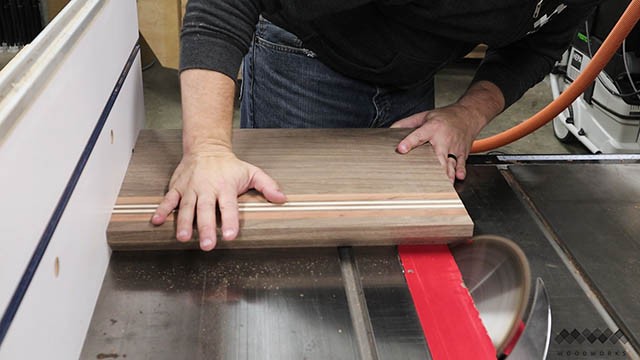
Making The Cuts
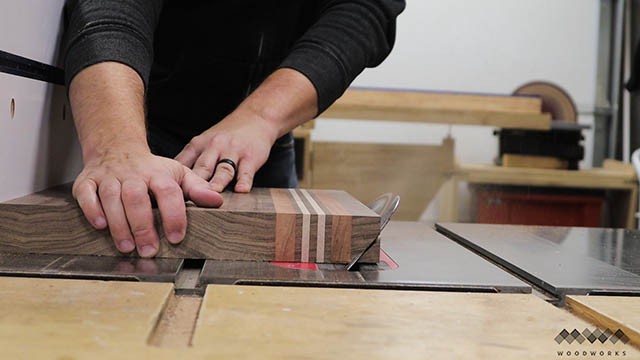
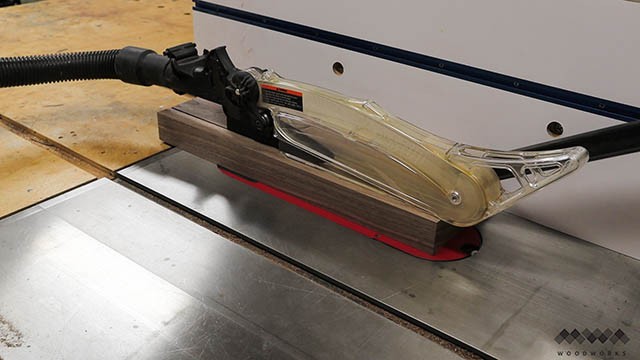
Now carefully make the first cut. I like to use my hands here because the risk of kickback is small given the blade is angled away from the work piece and I am using a riving knife on the saw. I need this cut to be accurate and my hands provide the best control over the work piece.
**WARNING: IF YOU ARE NOT COMFORTABLE EXECUTING THESE CUTS IN THIS MANNER, I RECOMMEND USING A PUSH BLOCK OR PUSH STICK TO MAKE THESE CUTS. SAFETY ALWAYS TRUMPS EVERYTHING! BE CAREFUL PLEASE!**
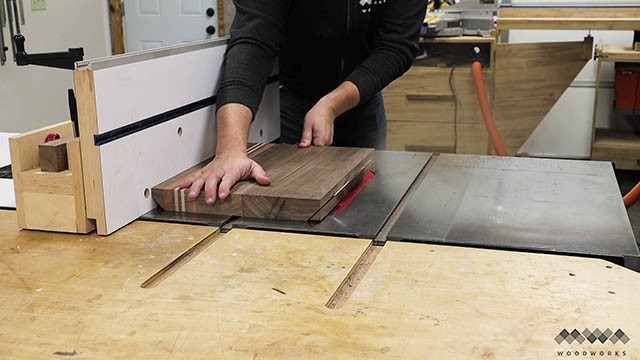
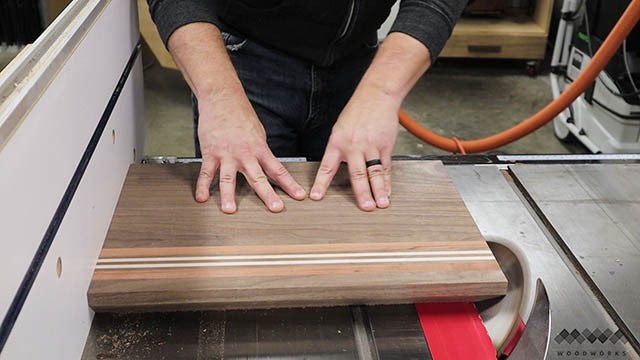
Once the first cut is complete, turn the board around and place the cut side against the fence to make the cut on the opposite side.
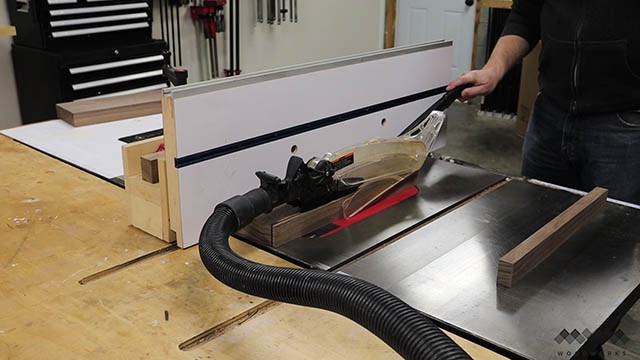
Now to match up the bevels on the two ends to the bevels on the sides takes some trial and error. I like to take small probing cuts until the fence is at the right distance so that the bevels meet at an exact point.
Once you reach that distance, make the cut. If your board was squared, the bevel on the end will perfectly intersect the bevels on each side and you’ll have a nice point!
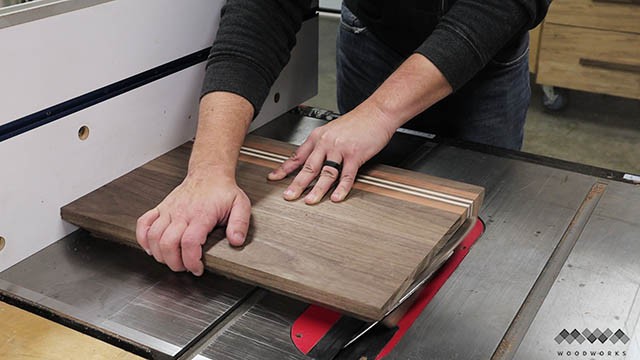
Now, again, flip the board around and cut the bevel on the opposite end. There should be no reason to move the fence here since you already found the correct distance on the previous cut.
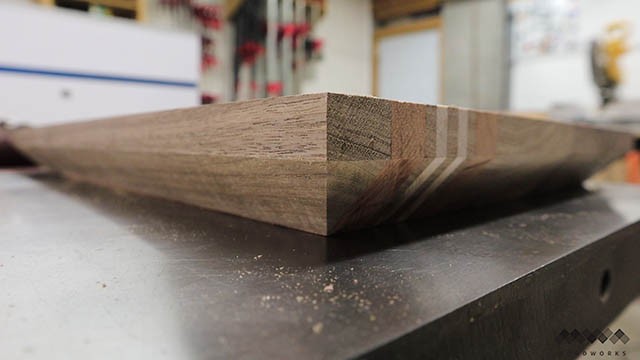
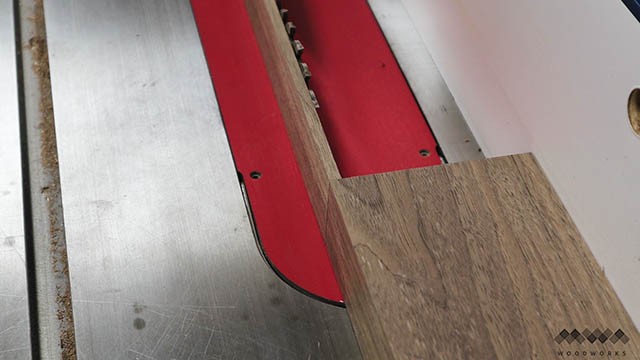
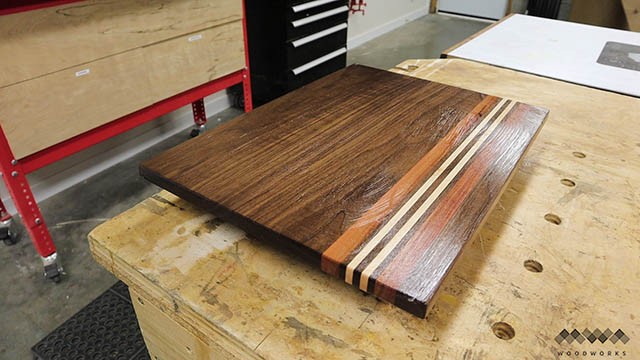
If everything goes as planned the result will look like this! I love it when a plan works out!
Sanding The Cutting Board
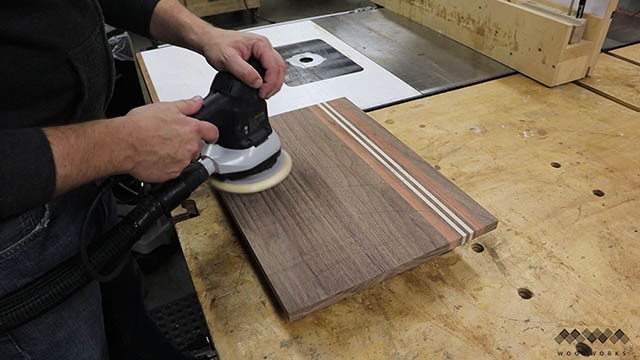
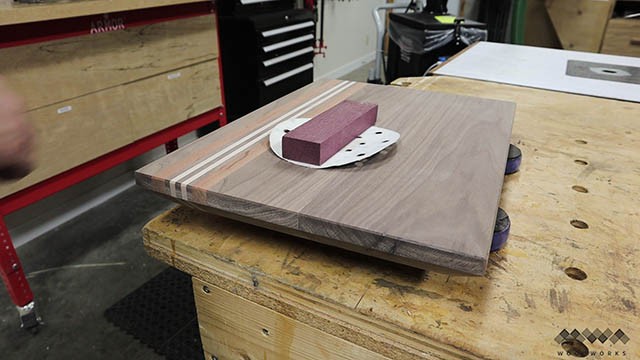
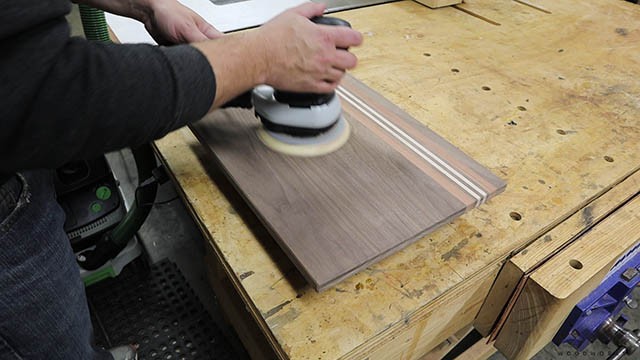
The next step is sanding your work piece. I like to go through 120, 180 and 220 grit sandpaper with a random orbit sander on my cutting boards.
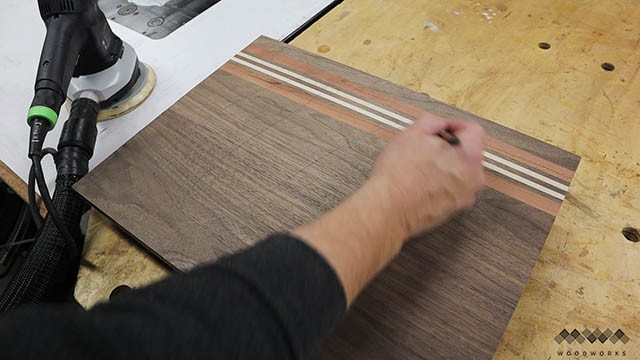
PRO TIP: How do you know when to stop sanding with each grit? EASY, just use the pencil trick! Before you sand with each grit, mark lines on the work piece with a pencil like this. Don’t press too hard or you’ll leave an impression in the wood. Mark just firmly enough to leave a nice dark line. Now, just sand until the pencil lines are completely gone. This is an indicator that the whole surface has been abraded and you can move on to the next grit!
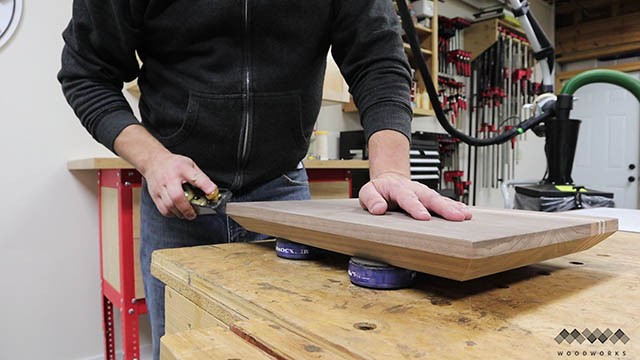
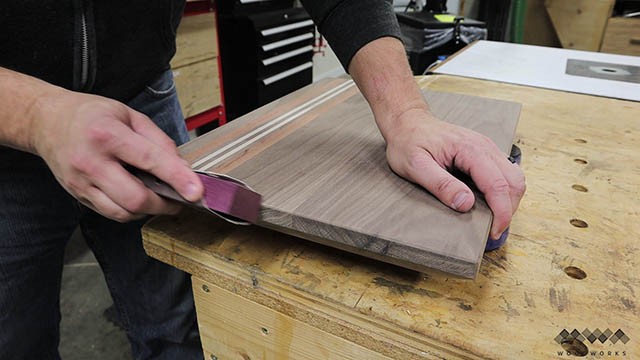
Be careful sanding all the facets of the edges of the cutting board. You want good positive registration on all the angles to make sure you don’t round over any of those sweet edges. If you have to, switch to the smallest sander you have or even think about using a sanding block!
The Whole Enchilada Plan Bundle
The Whole Enchilada Plan Bundle! You want it all? You Got it! Get every plan I offer in one bundle at a savings of over 65%!
This product is a DIGITAL DOWNLOAD. You can immediately download your product off the order receipt page after the purchase. You will also immediately receive an email titled “Your MWA Woodworks order is now complete” that contains the download link in the “Downloads” section of the email.
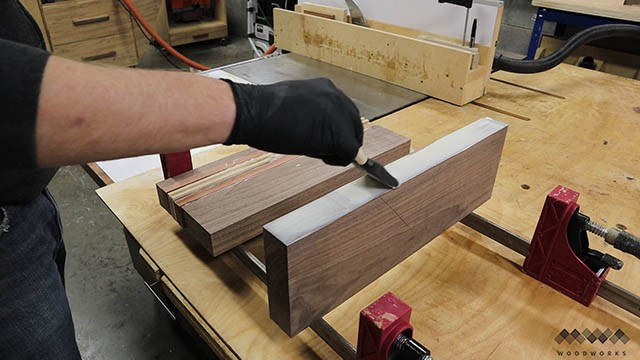
Using A Block Plane
For the top edge of the cutting board, I prefer to break the edge with a block plane. Here’s why… Its fast and easy and safe. I used to use a chamfer bit on the router table for this operation but way too often the bit tore a small chunk out of the top edge right where you don’t want a chunk to be missing!! It’s right in view of the user of the cutting board every time they use it. You don’t want that eyesore visible like that! So, instead the block plane can do this work in like 5 minutes and if you do the long edges of the board before you do the ends you wont get any blowout. And also you get to make cool little curly shavings. It’s the small things that create joy 😉
Oh and don’t forget those corners! Those can be sharp and you don’t want to poke yourself like that using the cutting board.
Now, sometimes on the end grain, the block plane can leave a fuzzy surface on the edges. The best way to deal with that is to use 220 grit sandpaper wrapped in a block of wood. The block of wood ensures you don’t round over these edges when you sand them down.
Just three to four passes with the sandpaper will remove the rough edge. Don’t go wild here, you don’t want to mess up those clean edges!
Raising The Grain

PRO TIP: Here’s a secret everyone should know. Once you’re done sanding through all your grits, spritz the surface of the board with water, just enough to cover the surface. It will make the board feel very rough again, like you never sanded it. But don’t worry, this is called “raising the grain”. What does this mean? When you sand, you tear and abrade the fibers of the wood making tons of tiny broken fibers all over the surface of the cutting board. You know already that wood likes to move, especially when wet. so what ends up happening is that when the wood gets wet all those tiny broken wood fibers curl up and stand proud of the surface just like the hairs on your arm when you get cold.
Once the board dries completely, sand over it again with the 200 grit paper and the board will very quickly be smooth again. What has happened is that your sander clipped off all those fibers that were standing up and the good news is that they wont come back. So when you clean the cutting board after using it, it wont get rough again!
Applying Finish To The Cutting Board
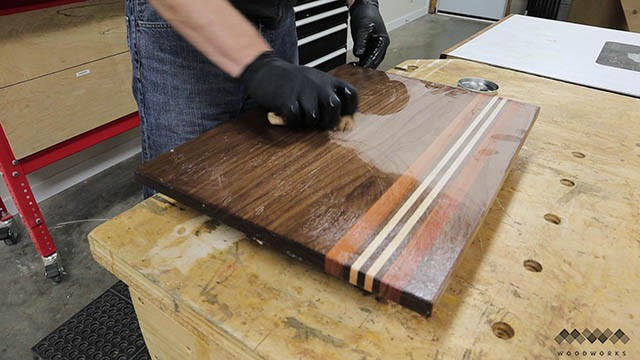
Now comes the very very very best part of making a cutting board. You get to apply the finish and watch that grain come to life! I like to use a mixture of food grade mineral oil and beeswax. It’s 100% safe for consumption and is dead simple to apply. You can get butcher block conditioner from the big box store. It’s basically the same thing.
Just liberally coat all side of the board with this pasty mixture. Man, look at that grain!
The next step is the easiest. Just walk away! Seriously, just walk away…. for several hours if you can. This will allow the board time to soak in all that mineral oil and leave the wax behind to solidify on the surface.
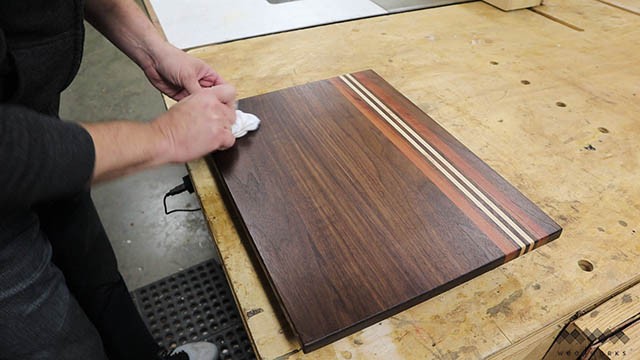
The final step is to grab a clean cotton cloth and buff the surface of the cutting board until it has a nice buttery smooth sheen to it. It should no longer feel oily or look wet and will have a soft glow from the wax. There is no need to repeat this step because the wax will have created a hard shell on the surface so any further applications will result in a huge mess because the mineral oil will be prevented from soaking into the wood like it should.

And there you have it! You have an awesome new cutting board and also a few new tips and tricks to throw in your tool belt!
The Whole Enchilada Plan Bundle
The Whole Enchilada Plan Bundle! You want it all? You Got it! Get every plan I offer in one bundle at a savings of over 65%!
This product is a DIGITAL DOWNLOAD. You can immediately download your product off the order receipt page after the purchase. You will also immediately receive an email titled “Your MWA Woodworks order is now complete” that contains the download link in the “Downloads” section of the email.


What the size of this board?
12×18
Did you have for sale
nope
Nice looking board , what is the size of it?
12×18
Beautiful work! Thanks for teaching this old dog some new tricks.
Is acacia wood good also for making cutting board?
yeah I just made one of those!
Great instruction, and beautiful outcome! If I only had a planer!
Buy S4S (Surfaced on four sides) lumber and you wont need a planer. I just did a video on youtube about making cutting boards with simplified tools!
He has very impressive credentials for wood working. I love his cutting board. But the list of tools is not accurate. He used a joiner and a plainer but other wise I love the project and will build one, actually 2 of them. Nice project thanks.
Regards,
Wheels for legs said all that?
There are ways to do this without milling tools like a jointer and planer if you buy S4S lumber! The jointer and planer are not required.
Hello just wanted to give you a brief heads up and let you know a few of the images aren’t loading properly. I’m not sure why but I think its a linking issue. I’ve tried it in two different web browsers and both show the same results.|
Great tutorial. Thank you for posting.
Just as a matter of interest, what is the ideal thickness for a cutting board and also the minimum thickness you would recommend?
Many thanks, Joe.
Not seeing teak mentioned amongst the wood choices or stay away froms. Any thoughts on teak as it seems it could make for a beautiful board but how does it stand up against the big 3 or the others?
Perfect timing on this post.the cutting boards are beautiful! Great idea for gifts!
Thank you for your interesting artical!