
Ever since I built my ultimate table saw fence a few years ago, people who have seen it on social media have asked questions about the design and how I built it. This article is written to do that. I’ll walk you through the features and design of this fence. I also have plans you can download below if you want to make your own.

DID YOU KNOW: You can follow me on these social media platforms!
Instagram · YouTube · Facebook · Pinterest
| Materials & Supplies* | Tools* |
| (1) 4×8 sheet 3/4″ Baltic Birch Ply | Table Saw |
| 48″ Aluminum Miter Track Set | Trim Router with Flush cut bit (for formica) |
| 48″ T-Track | 5/16″ Drill bit |
| T-Track w/ Accessories | 3/4″ Forstner Bit |
| 1/2″ Rare Earth Magnets | Feather Boards |
| Tee-Nuts 1/2 20 | Star Knobs |
| 1/4 20 Hex Bolts – 1″ & 1.5″ | |
| Contact Cement (for attaching formica) | |
| (1) 4×8 sheet white Formica (if desired) | |
| Screws | |
| Wood Glue |
*I use affiliate links, please see details on my disclaimer.

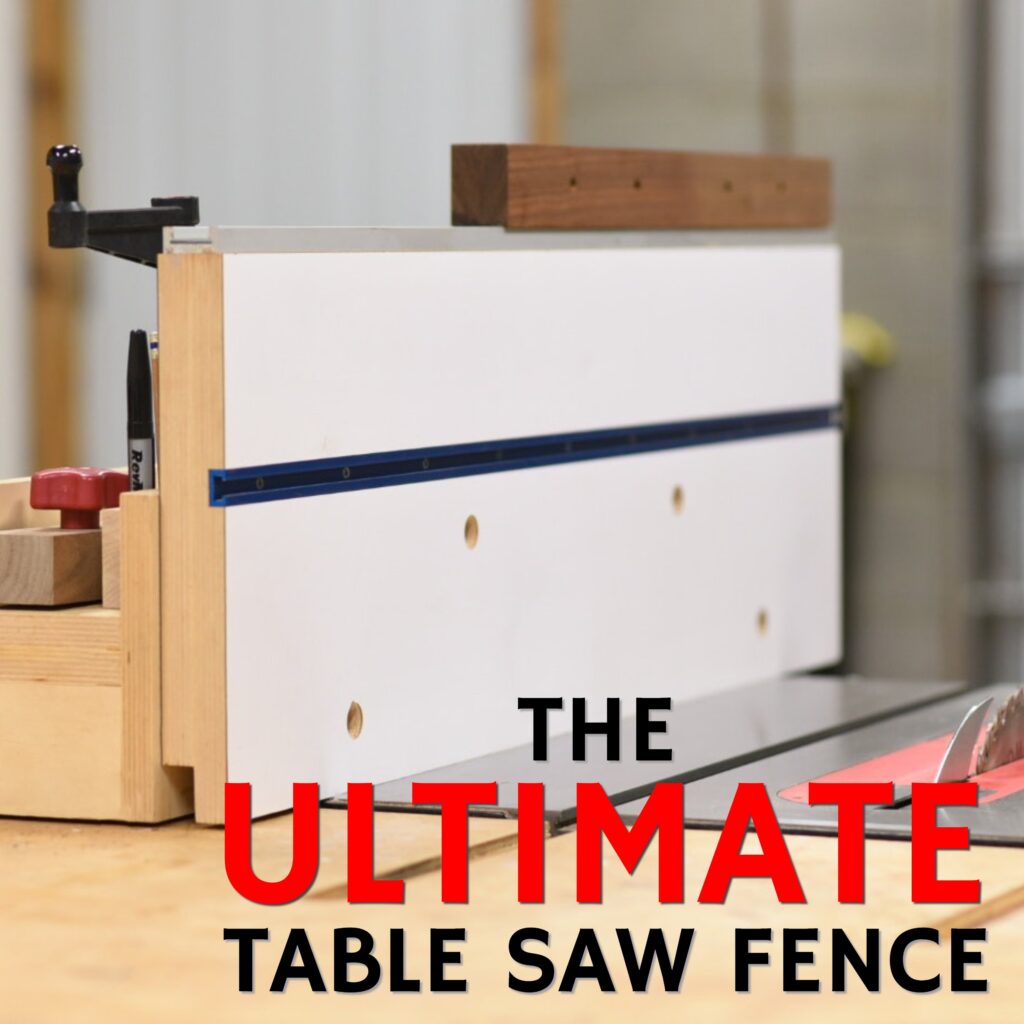
Table Saw Fence and Accessories Plans
Are you interested in making the most of your table saw’s capabilities? With these plans you can turn your stock rip fence into multiple valuable shop jigs to perform a host of tasks at the table saw.
This product is a DIGITAL DOWNLOAD. You can immediately download your product off the order receipt page after the purchase. You will also immediately receive an email titled “Your MWA Woodworks order is now complete” that contains the download link in the “Downloads” section of the email.

The Whole Enchilada Plan Bundle
The Whole Enchilada Plan Bundle! You want it all? You Got it! Get every plan I offer in one bundle at a savings of over 65%!
This product is a DIGITAL DOWNLOAD. You can immediately download your product off the order receipt page after the purchase. You will also immediately receive an email titled “Your MWA Woodworks order is now complete” that contains the download link in the “Downloads” section of the email.
Why Do You Need An Auxiliary Fence?
The rip fence that comes standard on every table saw is good for doing what it was designed for, making rip cuts. A good rip fence is rock solid, doesn’t move out of calibration after a few uses and is easy to adjust when needed. The better biesemeyer style fences will have a 3-4″ face on them and that’s enough to clamp some very low profile things like stop blocks to but at the end of the day there just aren’t a lot of things a standard rip fence can help with outside of it’s core function. What you really need if you want to transform your fence into the best version of itself are two things: HEIGHT and VERSATILITY.
Height allows for better support of vertical cuts on the saw. Think about making raised panels at the table saw. You really need a solid vertical support to move a door panel across your saw blade. Or think about cutting the cheeks of a tenon.
And if you’re going to add all that height, you might as well build some way to attach other things to it. That way your fence can hold things for you while you work.
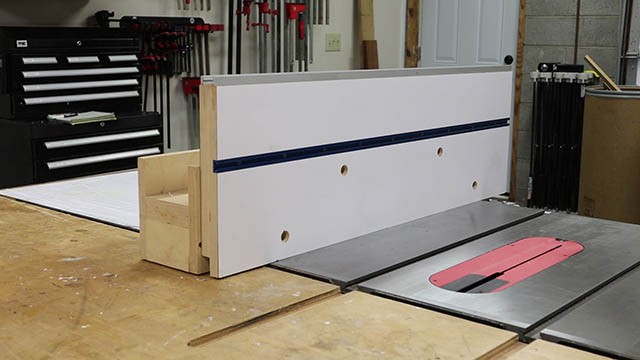
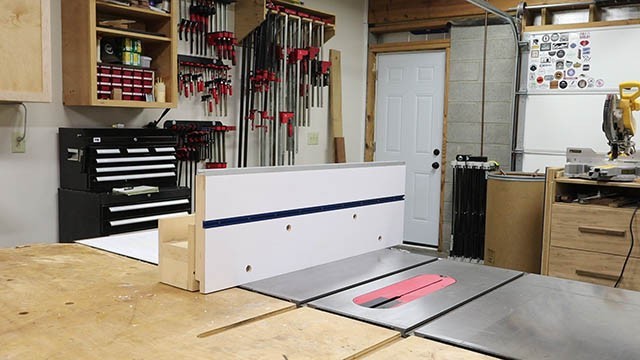
My ultimate table saw fence was built to accommodate just about every type of operation I might want to do at my table saw. It has an almost 1 ft high face, it bolts solidly into the sub fence for rock solid stability and has a t-track and miter track built into it to allow for all sorts of attachments anywhere along the length of the fence.
I also thought about storage. If you have all that space on top of the fence, you might as well keep your most used tools close at hand right? More on this later.
Making A Solid Sub Fence
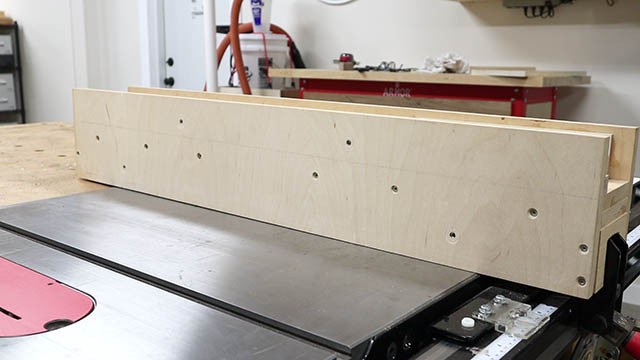
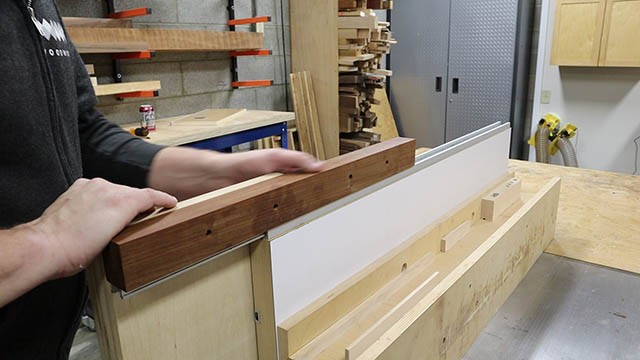
The core of this whole thing is the sub fence. It provides the stability and basic attachment points for other things like the tall fence. You want to make sure to take care in making the sub fence snug to your rip fence. The key here is you don’t want it moving or rocking on you, especially with that tall fence attached to it.
The sub fence is made entirely of 3/4″ (19mm) baltic birch ply and consists of two vertical parts that are 6″ tall
Those are screwed to a horizontal piece that is made of two strips of the baltic birch laminated together. I used two strips in order to give a solid surface to screw into and a nice flat 90 degree reference for the vertical sides. the horizontal strip should be the exact width of your rip fence minus a tiiiiiiiiny bit. Maybe 1/128″. This makes it so when you screw the sides to it, it will pull snugly to the rip fence making a piston fit.
the front and back also have small pieces screwed in so that the entire fence doesn’t slide but fits on the rip fence like a glove. You will have to cut a notch out of the front side to allow for the lever on the rip fence to come through. This is going to be different for every saw, so just make the notch fit your fence specifically.
You can see here that I countersunk some 2″ screws into the sides to assemble the sub fence. Make sure to countersink them so they don’t interfere with the operation of the fence.
Here you can see how the sub fence slips over the rip fence. I recommend chamfering the inside edge of the subfence by 1/8″ to make the process of slipping the sub fence on and off easier.
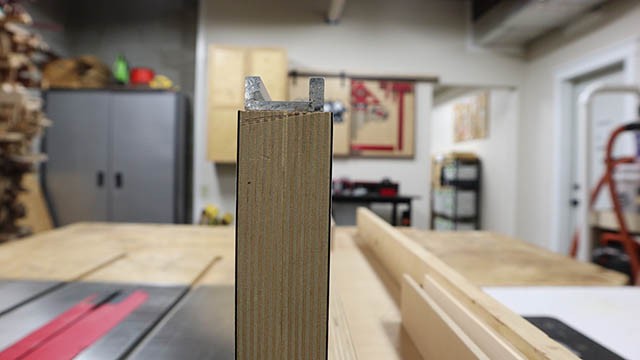
Tee Nuts!
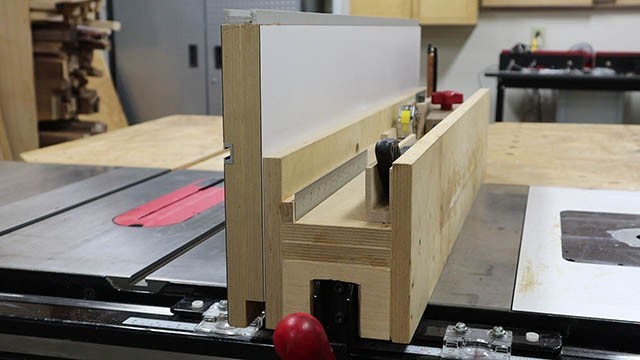
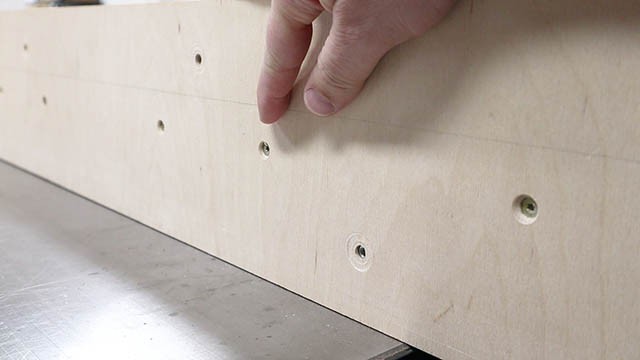
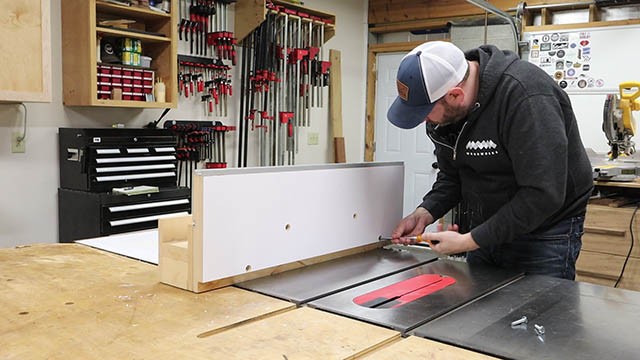
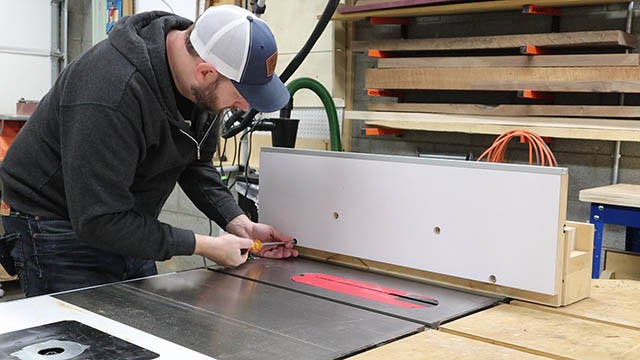
Another key feature of the sub fence are the tee-nuts I put into it. There are four tee-nuts on each side of the sub fence to allow me to bolt on my tall fence. These tee-nuts are countersunk in from the opposite side prior to assembling the subfence.
You can see here how this tee-nut is countersunk into the side from the back
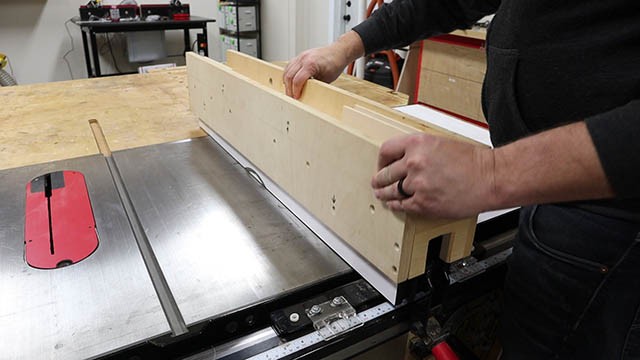
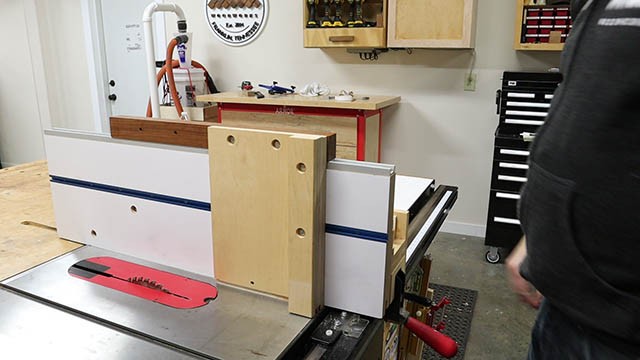
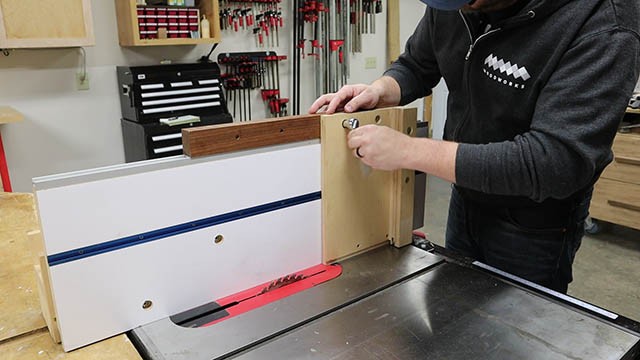
Attaching the Ultimate Table Saw Fence
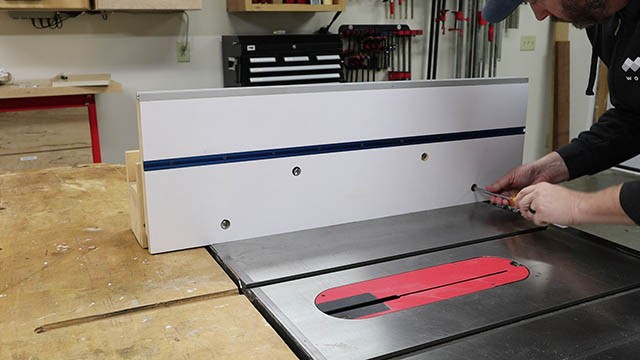
Those tee-nuts allow me to bolt on the tall fence easily and securely.
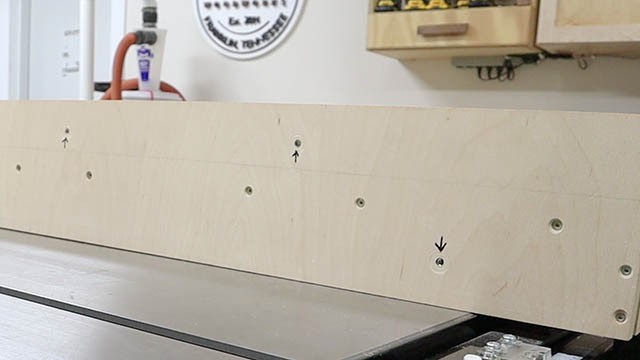
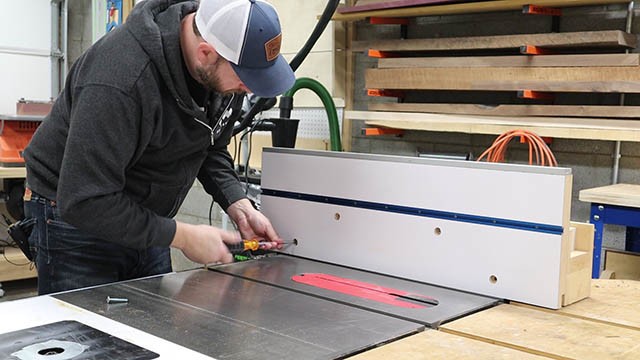
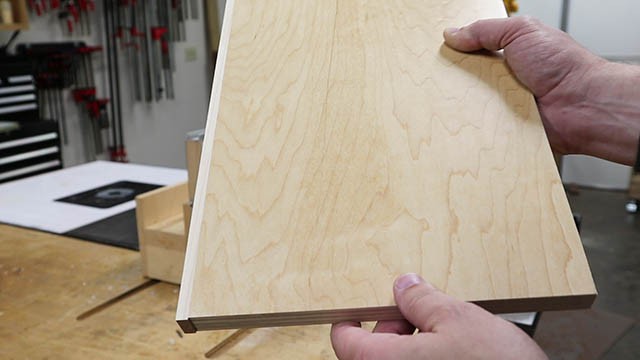
The tall fence is made of 2 pieces of the 3/4″ Baltic birch laminated together and skinned with formica. The formica is optional but it provides durability and toughness as well as a smooth easy to clean surface that you can make very visible reference marks on.
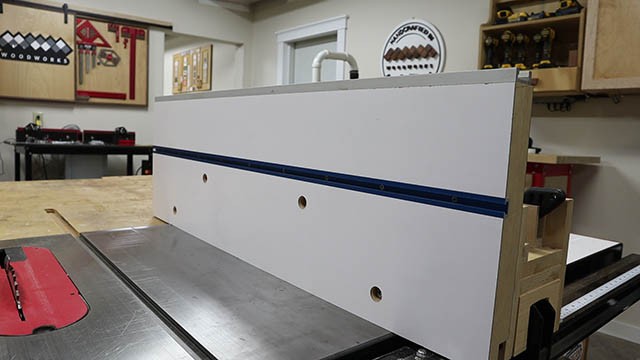
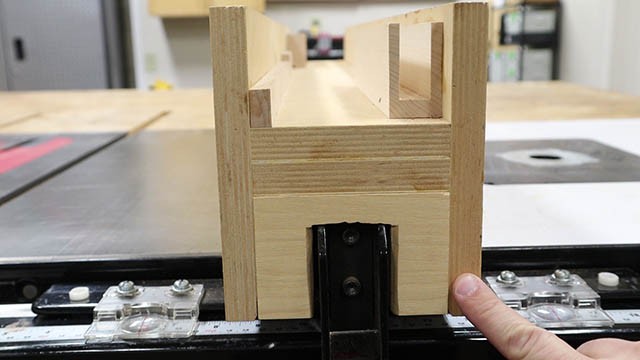
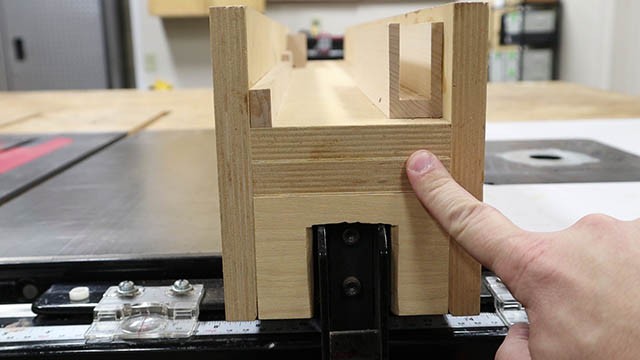
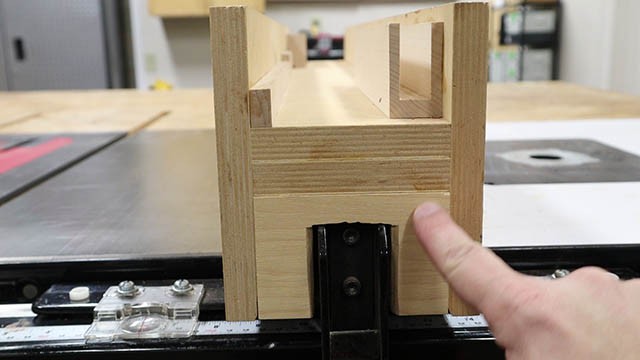
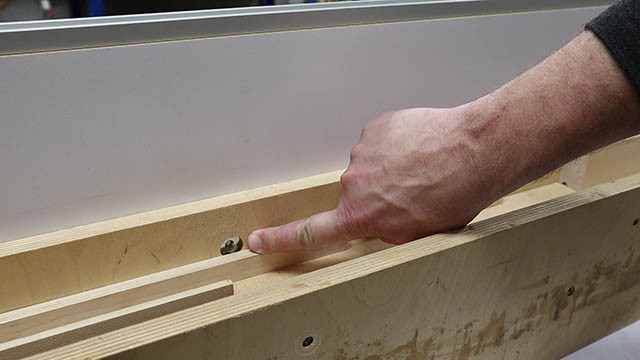
One side of the fence has a t-track in it. This allows for adding all kinds of attachments to the fence.
The other side has a notch cut out at the bottom to allow you to make flush cuts at your table saw.

And the top has a miter track built on it. This is to aid with jigs that require sliding across the blade (I’ll show you a couple of my jigs below).
The way that I positioned the tee-nuts allows me to bolt the tall fence on from any position.
Creating Maximum Versatility
I can turn it around to use the notched side.
I can do the same on the opposite side of the blade.
Its fully reversible for maximum versatility.
Feather Boards on the Ultimate Table Saw Fence
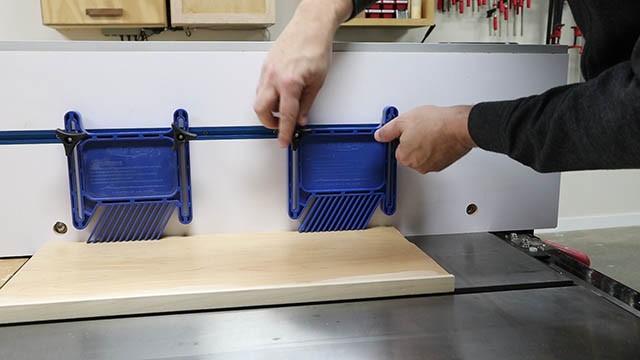
So the first thing I recommend as an attachment to the ultimate table saw fence are feather boards. Feather boards are like a pair of extra hands that can provide downward pressure on the work piece as it passes through the saw blade.
One feather board is good, but two is better. That way you can have control of the cut before and after the blade. Here’s a link to the feather boards I have here.
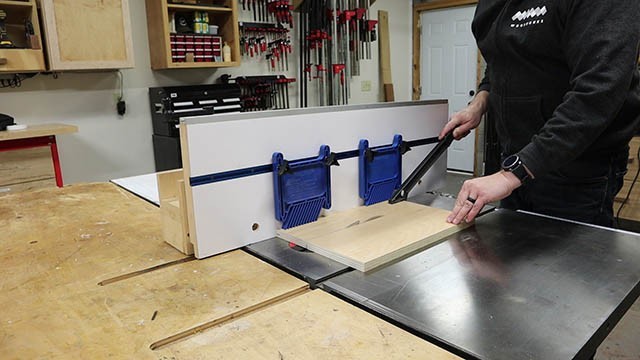
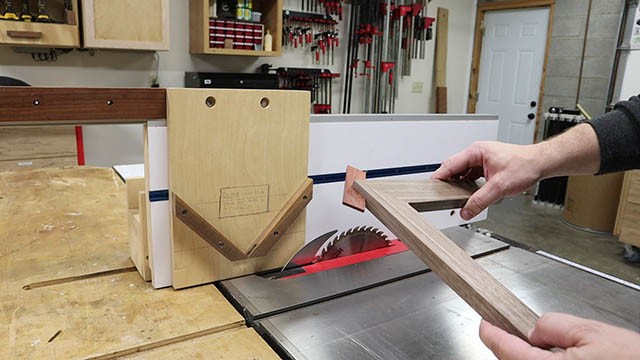
The Versatile L-Fence
Another very versatile attachment is the L-fence. The L-fence makes quick work of rabbets and straight or tapered cuts, miters, bevels and making precise cuts on awkwardly sized parts. My L-fence is just two boards fastened along their edges at a right angle. One side is attached to the fence; the other side extends horizontally for a work piece or template to ride against. And because this fence floats over the blade, it doesn’t get damaged like a sacrificial fence would.
To make a tapered cut on your work piece, just mark the beginning and end points of the taper.
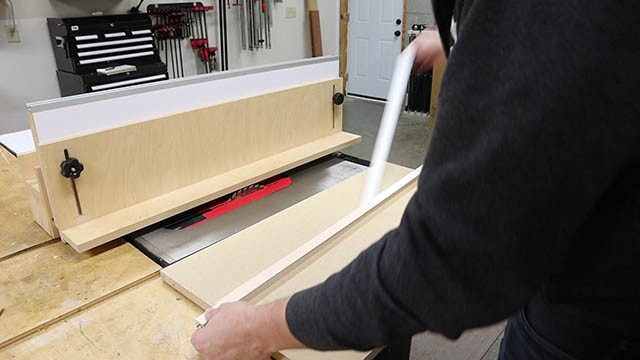
Then get something with a straight edge (I’m using a piece of hard maple that I verified was straight). A straight edge works too.
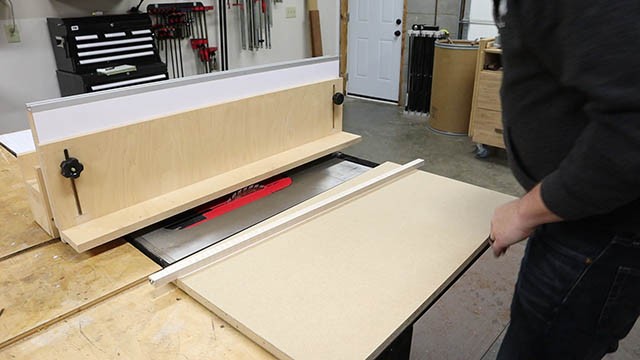
Attach it to your work piece using two-sided tape. This tape makes a solid, non destructive bond. Make sure the saw blade height is just high enough to cut through the work piece. Also, position the rip fence so that it sits just above the blade without touching it and make sure the edge of the L-fence is flush with the outside edge of the saw blade.
Now with the edge of the L-fence flush with the edge of the saw blade, keep the runner in contact with the L-fence as you pass the work piece across the blade. Anything beyond the runner will be cut by the blade.
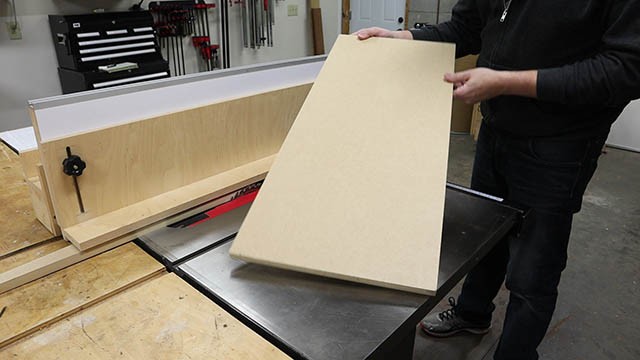
And there you have it. a clean cut taper using the L-fence!
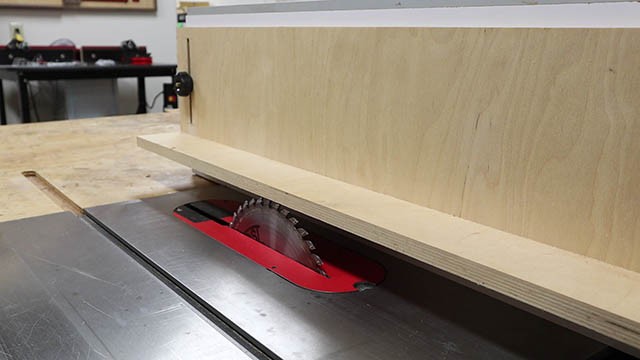
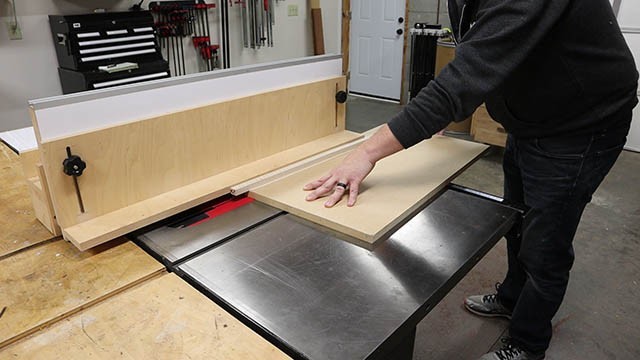
Making Flush Trim Cuts
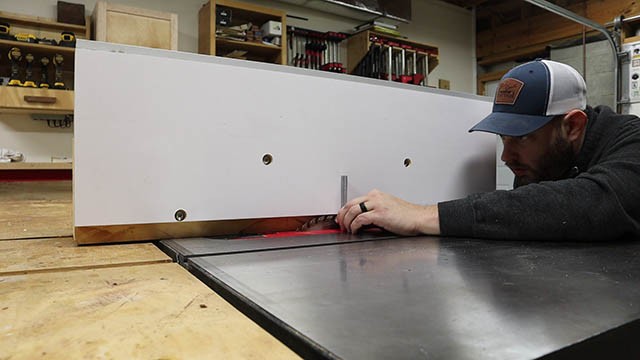
You can do a similar type operation using the notches side of the fence. Again position the outside of the blade just flush with the fence and under the notch.
Now if you have something to cut flush like edge banding can be done so easily. Press your work piece against the fence as you pass over the blade and anything that sticks under the notch will be cut off.
a simple way to make flush trim cuts!
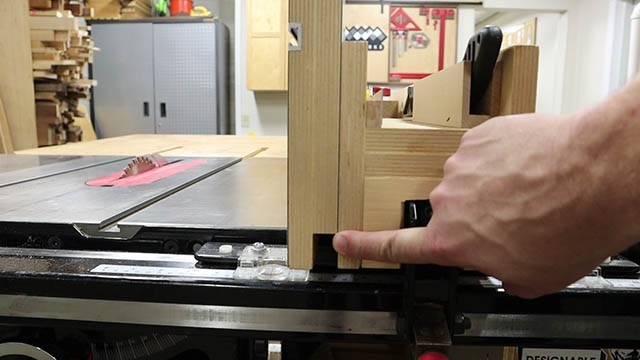
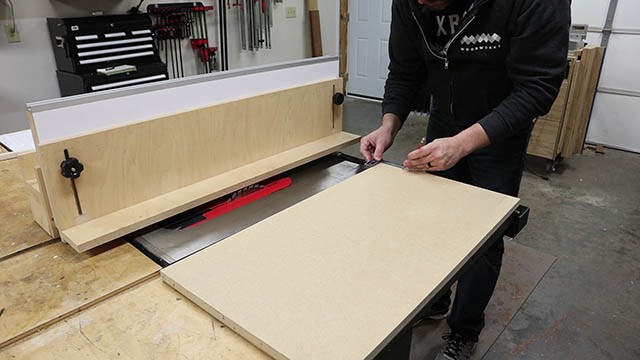
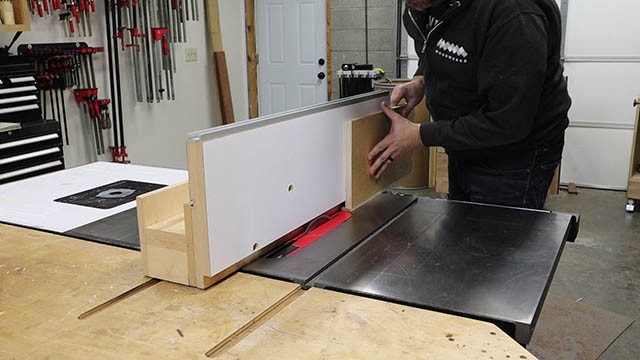
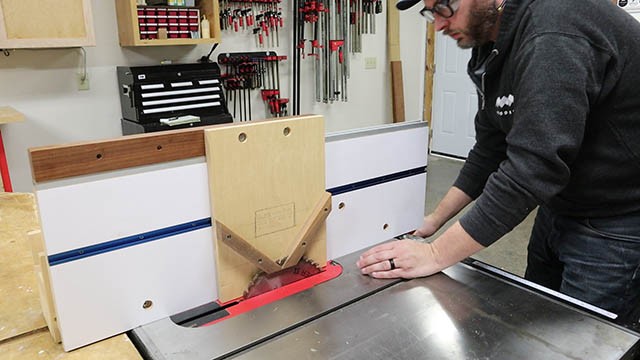
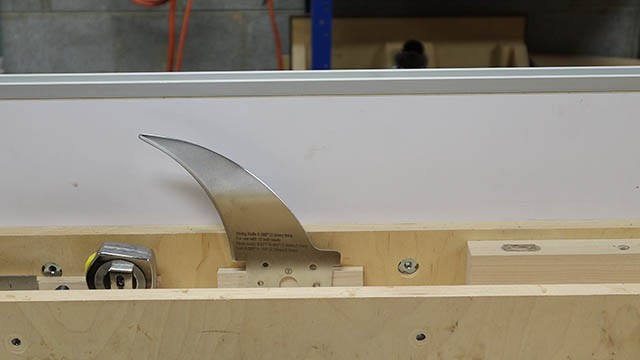
Using the Tenoning Jig
The top miter track is perfect for jigs that have to slide across the saw, like a tenoning jig.
I made the slider that has the mating rail which slides in the miter track. The slider has tee-nuts embedded in it that can be used to bolt anything you want to the fence.

As you can see here, my tenon jig allows me to make safe and accurate vertical cuts, like tenon cheeks easily.
Its super easy to attach different jigs using 1/4 20 hex bolts.
Using The Spline Miter Jig
Another commonly used “sliding” jig is a spline miter jig.
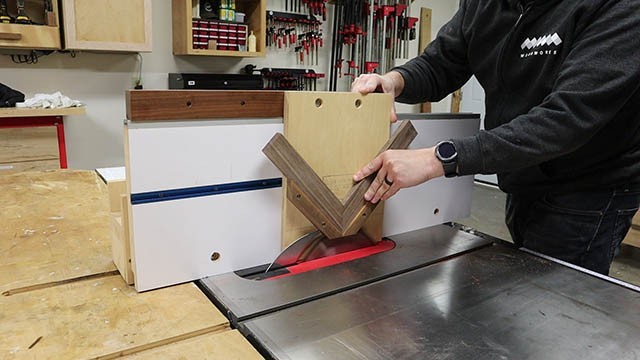
This jig allows you to make slot cuts into miter joints safely.
You can glue splines into the slots to reinforce the miter joint!
Creating a Tool Caddy

The last thing I want to show you is the tool caddy. The ultimate table saw fence is also the ultimate tool caddy.
I keep every tool that I commonly use at my table saw right at my fingertips. I use magnets to make sure my steel tools don’t shift around during operation.
Making a Magnet Bar
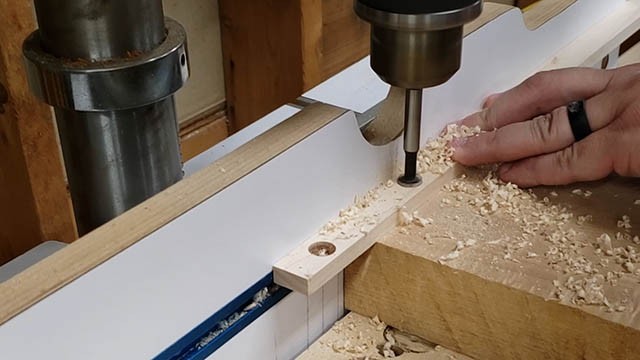
To make a magnet bar just drill some 1/2″ holes into a strip of hard wood.
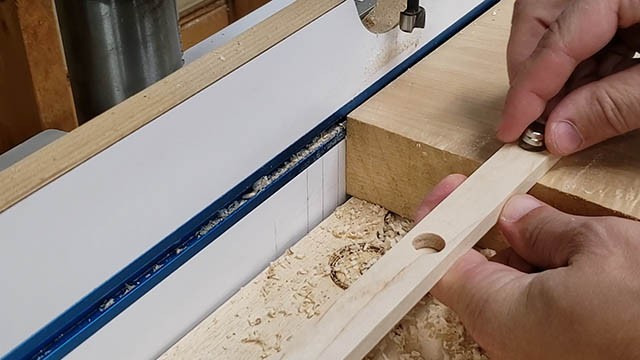
Add a couple magnets to each hole you drilled.
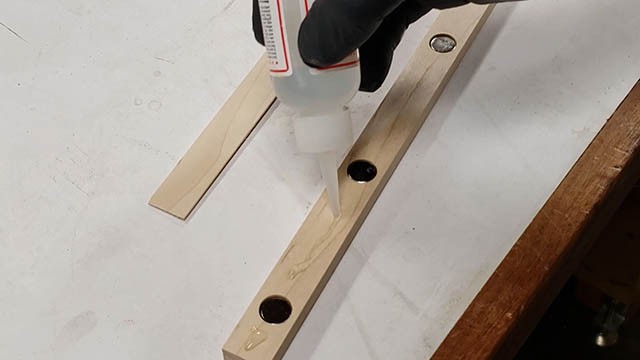
Then add some fast drying glue and add a thing 1/16th thick veneer over the magnets like so.
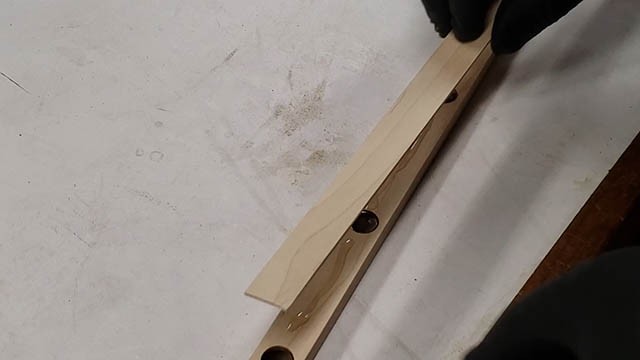
This will conceal the magnets and hold them in place.

Now you can glue as many of these as you want into the tool caddy!

As you can see, I have one long magnet bar that holds my rules, tape measure, riving knife and anything else made of steel that is small and that I want to keep safely in place.
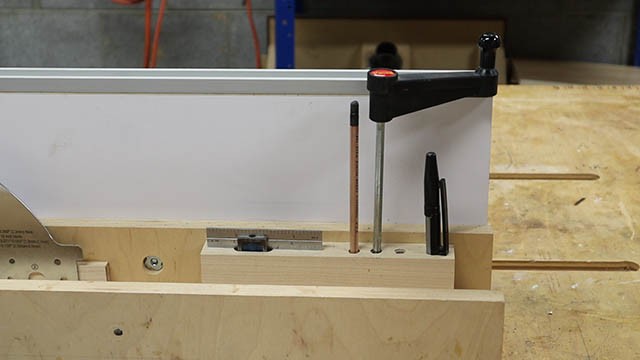
Also, I made this other block which isn’t magnetic but does hold my square, pencils, markers and my router table height adjuster (I have a router table in the wing of my table saw).
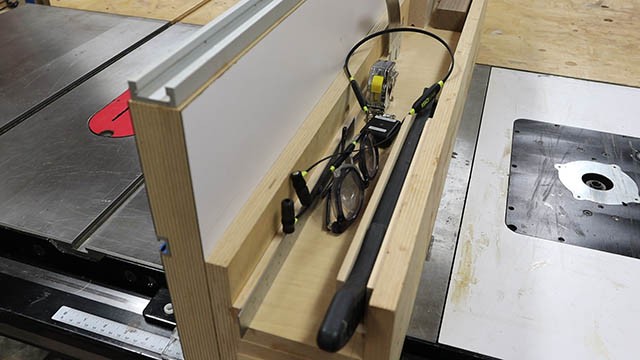
I also added a custom holder for my push stick. With all the small stuff secured I can throw other things like my safety gear in there and they wont get tangled up with the other tools. This makes the ultimate table saw fence truly ultimate!


Like your plans and the additional attachments you’ve made, BUT one thing that is missing from the plans is an exploded view of all parts. This helps to show how things go together (not all the descriptions are clear).
I’ve modified a few bits to make it fir my saw and I’m quite happy with it.
That’s a great suggestion Mark!
I am building this fence using plans bought from your website.
Question: Why do you not notch the far side (Part 10) of the sub-base?
Will the back end not swing on you? Or does this allow you to align or fine tune the square table saw to the fence? Is there something other than the original YouTube video on further use of the fence?
Note: I have a DEWALT 10-Inch Table Saw, 32-1/2-Inch Rip Capacity (DWE7491RS)
I think I have a resolution. My table saw does not have an indented area or a lever extending away from the front, rather to the side. In order to get the sub-fence flush to the fence side I re-engineering the sub fence design to better match the table saw fence.
Always a challenge but that’s what makes it interesting.
I love this fence design, and only have a few comments about the plans:
1) On page 8:11, the picture shows the 1/4″ dust notch on the fence side rather than toward the work piece.
2) On page 9:11, I believe you may have intended the 1/8″ route slot to be 3/8″ as it would be too small for the 5/16″ accessories provided with the T-Track.
My silver top rail miter track had a very narrow tolerance and would rub metal-on-metal instead of sliding smoothly, despite the edges of the slider and fence being jointed. Having such a nice fence, I ended up improvising by using the leftover blue T-Track on the slider which fits perfectly and allows the slider to move effortlessly while maintaining a the same tight tolerance!
I’m hoping to build this for my 1991 Craftsman contractors saw, but…. The design seems to assume that the existing rip fence is 4″wide and that the auxiliary fence will fit snugly over it. Other wise it will just flop around. Unfortunately the original fence is only 1 1/4″ wide. I’m thinking of first building the original fence up to 2 3/4 by adding 3/4 inch hardwood to both sides then modifying part one on the accessory plans to 2 3/4 instead of 4″.
Am I on the right track or did I miss something?
I purchased the plans and made the fence. I really like it but had a couple small issues.
1) The bottom holes to secure the fence ended up 0n the very bottom edge of the L-Fence side. my 3/4 inch insert hole was on the very edge of the bottom and did break through. Moving the center line from 1.5 inches to 1.75 inches would be better in my opinion.
2) The plan shows the sawdust relief cut on the back of the tenon jig. The video shows it on the face as it should be.
3) The plan calls for 1/8 inch slots in the L-Fence. I think it should be 1/4 inch slots.
4) The plan calls for 1 1/2 inch bolts to secure the fence. They were not long enough to reach the threads on my tee-nuts. That may be because I bought my tee-nuts at a big box store and they are shorter than others. Anyway a 2 inch bolt with a washer worked for me.
5) To keep my cost down I made my tall fence with melamine coated MDF cut-offs I already had. I line in a rural area and formica can only be ordered by the sheet and costs as much a a sheet of the melamine MDF. I ran the coated MDF through my drum sander on one side to be able to glue them.
I really like the fence. It is very versitile.