
If you’re like me, you pretty much keep any usable scrap of hardwood that you have for that mythical time when “you might need it.” Well, follow along to see how I actually did need it! Below I created this beautiful succulent planter out of a relatively small amount of scrap wood.

DID YOU KNOW: You can follow me on these social media platforms!
Instagram · YouTube · Facebook · Pinterest
| Materials & Supplies* | Tools* |
| Scraps of hardwood | Digital angle gauge |
| Water resistant glue | Magswitch featherboard |
| Live Succulent | Miter Gauge |
| Small scrap of 1/2″ ply | Table Saw |
| Straws | Jointer & Planer |
| Small River Stones | Random orbit sander |
| Spanish Moss | Drum sander (for final thickness on figured woods) |
| Tried & True Wood Finish | Bandsaw (for resawing material) |
| Blue Painters Tape | |
*I use affiliate links, please see details on my disclaimer.

The Whole Enchilada Plan Bundle
The Whole Enchilada Plan Bundle! You want it all? You Got it! Get every plan I offer in one bundle at a savings of over 65%!
This product is a DIGITAL DOWNLOAD. You can immediately download your product off the order receipt page after the purchase. You will also immediately receive an email titled “Your MWA Woodworks order is now complete” that contains the download link in the “Downloads” section of the email.
Scrap Wood Gifts
Being able to take beautiful scraps of otherwise unusable woods and make something special from them is so rewarding. This succulent planter was very much appreciated by its new owner. Score one for the woodworker!
For this scrap wood project, you will be practicing the following skills… you’ll resaw material at the bandsaw, cut miters at the table saw, and glue up a mitered box.
Identify your raw materials from your scrap collection. If you’ve got highly figured woods those work well for these typed of projects, but are not necessary.
Succulent Planter
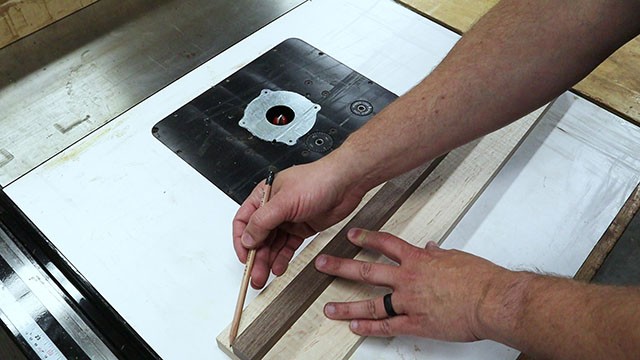
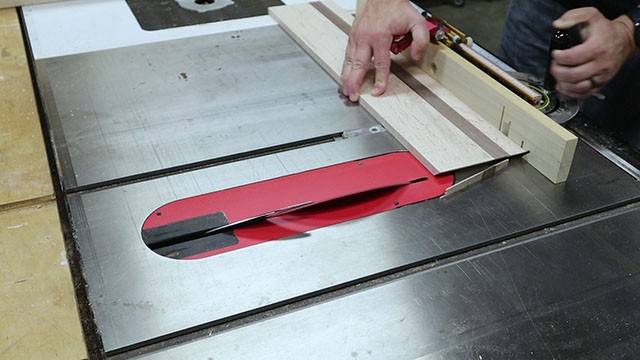
To start, I marked where I wanted my accent stripe to go with a pencil.
Then I cut it at the table saw.
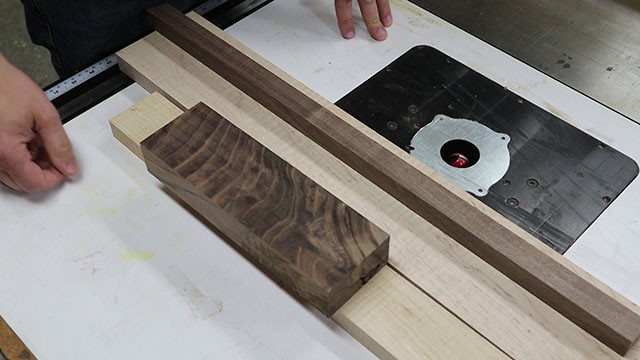
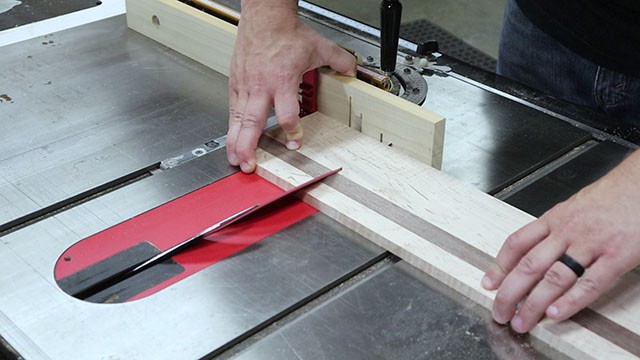
I then inserted my accent strip of walnut to see what the succulent planter would look like
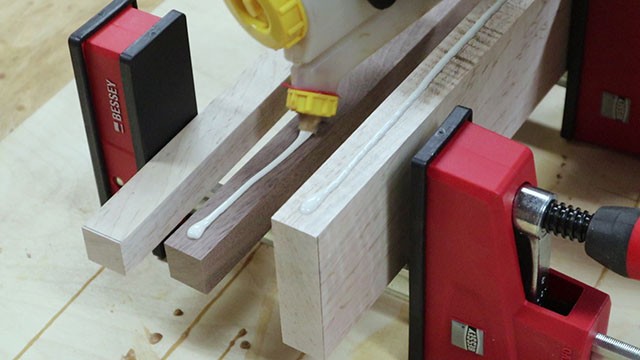
I then glued up my strips using water resistant glue since this succulent planter will come in contact with water, although not much.
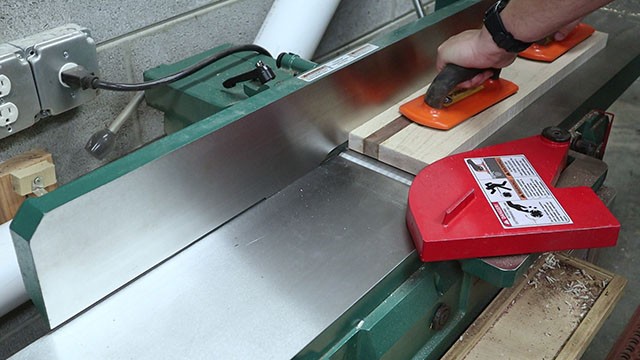
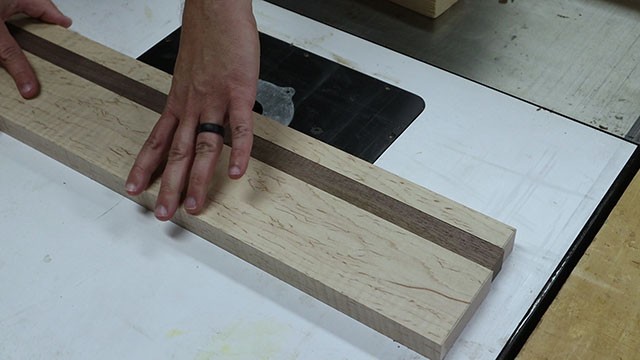
Once the glue dried I flattened one side on my jointer
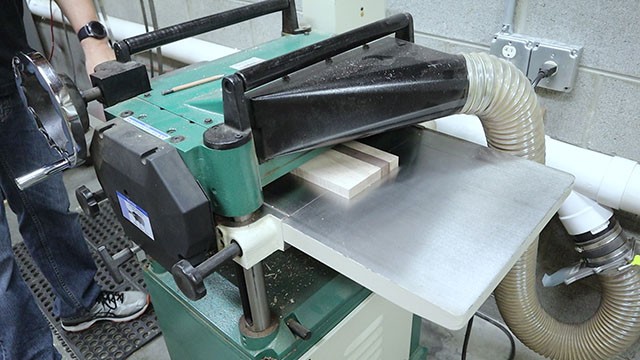
I then planed the other side to thickness using the planer until I reached about half an inch in thickness.
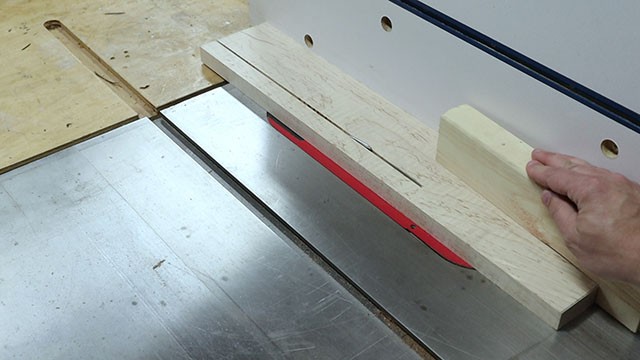
Cutting the Miters for the Succulent Planter
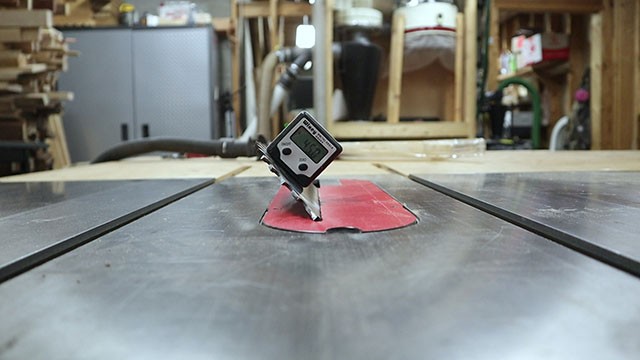
I set my bevel gauge to 45 degrees. If you’re interested in the bevel gauge I used, you can GET IT HERE.
I began by cutting the miter on the end of the work piece.
I then put the mitered edge against the stop on the miter gauge and cut the first side of the succulent planter. After each cut, I flipped the remainder over so the miter was facing down and against the stop and repeated the cut until all four sides were cut.
I then cut all my sides to a uniform final width (to set the height of the succulent planter.
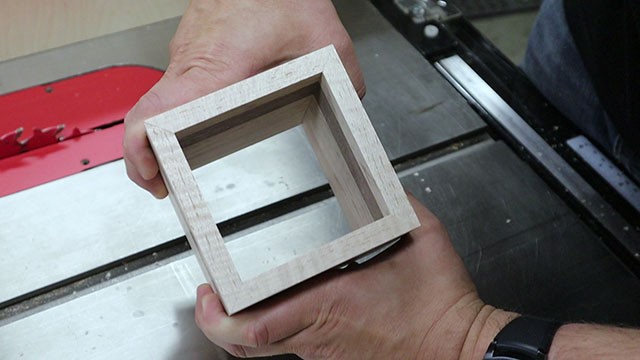
Make sure to do a dry fit to make sure all the mitered corners look good. If you find that there are gaps, finesse them with sand paper or a hand plane until there are no gaps.
The Whole Enchilada Plan Bundle
The Whole Enchilada Plan Bundle! You want it all? You Got it! Get every plan I offer in one bundle at a savings of over 65%!
This product is a DIGITAL DOWNLOAD. You can immediately download your product off the order receipt page after the purchase. You will also immediately receive an email titled “Your MWA Woodworks order is now complete” that contains the download link in the “Downloads” section of the email.
Assembling the Succulent Planter

I made a simple jig to help with this glueup. Its nothing more than a scrap of MDF with another scrap of plywood screwed to it at 90 degrees to make a “reference fence” that I covered in packing tape to keep glue from sticking.
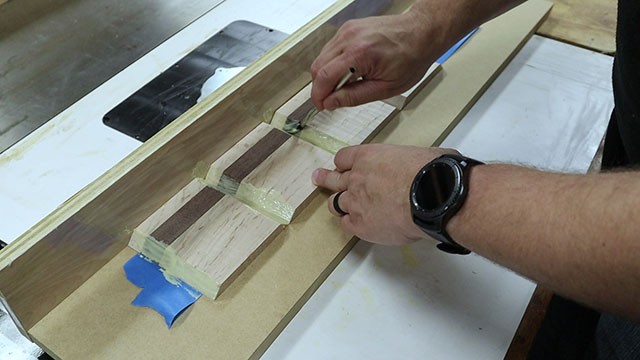
When I laid out my sides I put some blue tape down to act as a clamp. I pressed my pieces against the reference fence and the miters tight to one another. This ensures everything is lined up properly and now due to the blue tape everything is “stuck” in position.
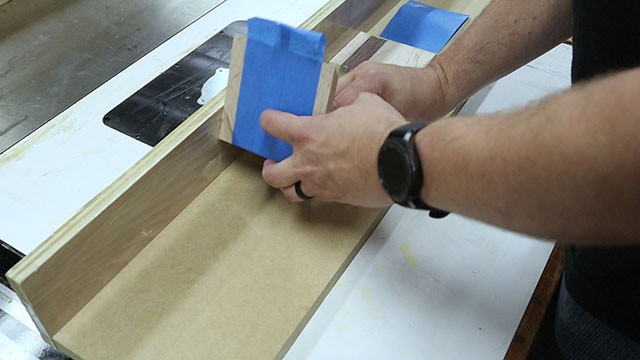
All I did then was roll everything up and fold the tape on the ends over the edge to create a clamp.
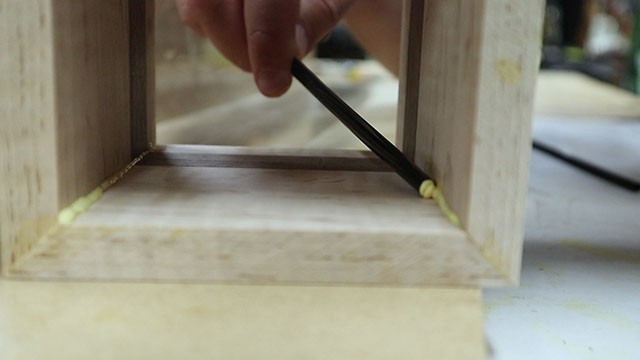
I made sure to scrape out any squeeze out with a straw before it dried.
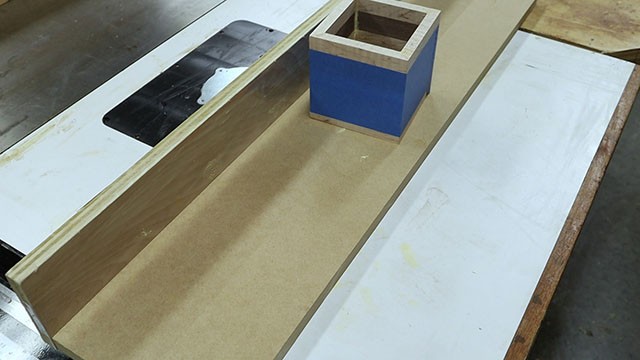
Then I set it aside to dry.
The Whole Enchilada Plan Bundle
The Whole Enchilada Plan Bundle! You want it all? You Got it! Get every plan I offer in one bundle at a savings of over 65%!
This product is a DIGITAL DOWNLOAD. You can immediately download your product off the order receipt page after the purchase. You will also immediately receive an email titled “Your MWA Woodworks order is now complete” that contains the download link in the “Downloads” section of the email.
Adding Finishing Touches

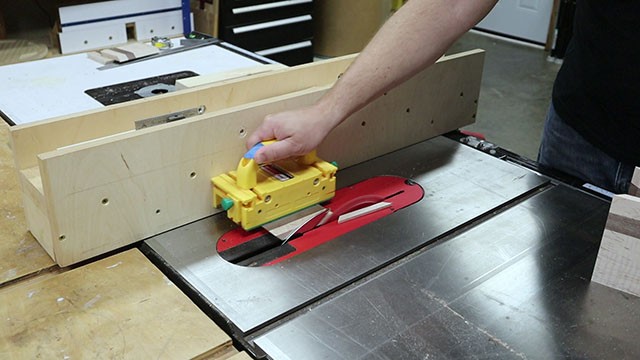
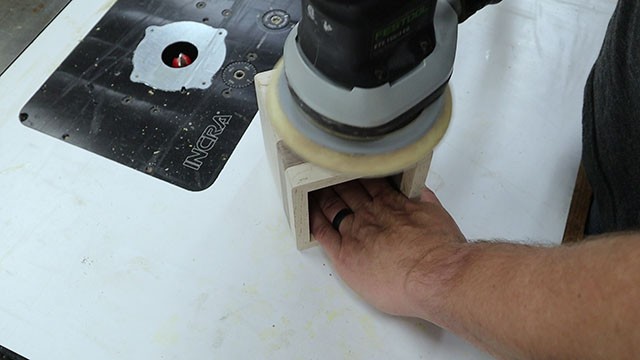
After everything was dry, I rounded over the edges at the router table.
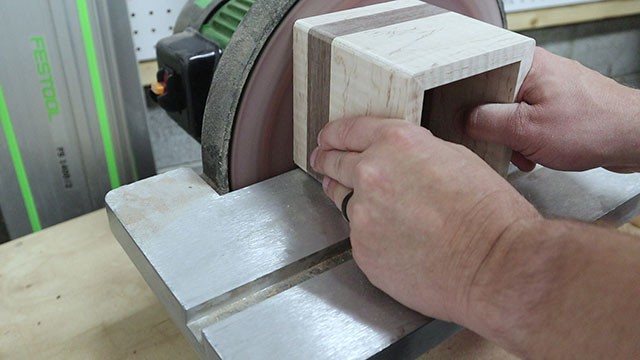
I then pressed the top and bottom to the disc sander to ensure everything was flush.
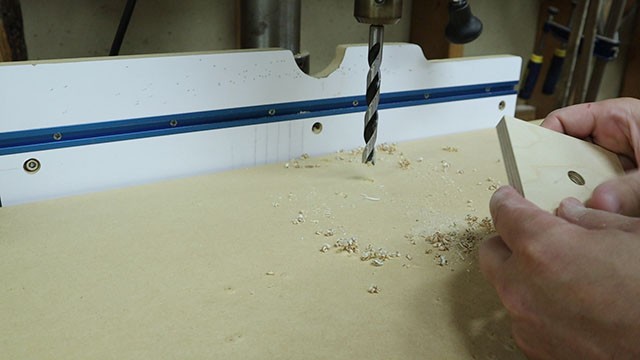
From a small scrap of 1/2″ ply I made an insert for the bottom with a 1/2″ drain hole. Although succulent planters don’t always have drains and succulents require very little water to begin with, I was just playing safe with this step.
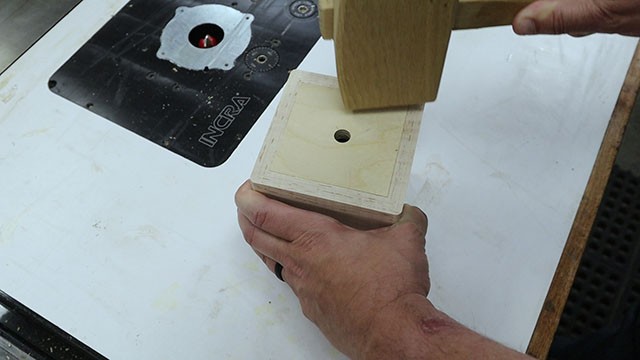
Next, I brushed on some glue and gently tapped the bottom into place.
Then I gave my succulent planter a quick sanding with 120, 180 and 220 grit paper.
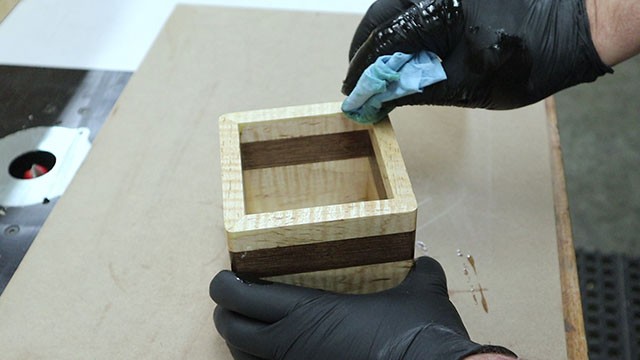
Finally, I applied an oil/wax finish called Tried & True. I love the raw wood feel it gives and the silky smoothness of the wax is great to the touch.
The Whole Enchilada Plan Bundle
The Whole Enchilada Plan Bundle! You want it all? You Got it! Get every plan I offer in one bundle at a savings of over 65%!
This product is a DIGITAL DOWNLOAD. You can immediately download your product off the order receipt page after the purchase. You will also immediately receive an email titled “Your MWA Woodworks order is now complete” that contains the download link in the “Downloads” section of the email.
Filling The Succulent Planter
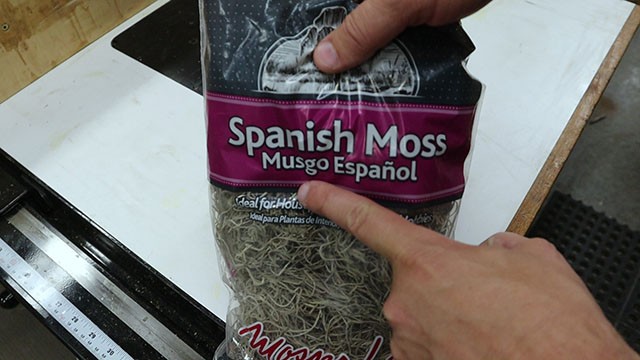
To fill the planter, I started with an inch or so of Spanish moss.
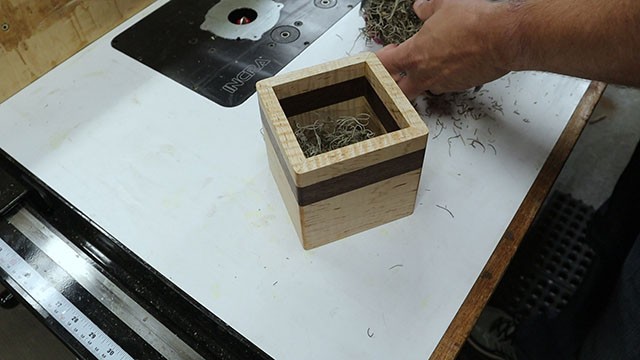
This acts as a bit of moisture control. It also gives a cushy and conforming surface to add the succulent to.

I then added my succulent INSIDE its plastic planter from the store. This helps prevent any water mishaps from the start (don’t worry it will be completely hidden).
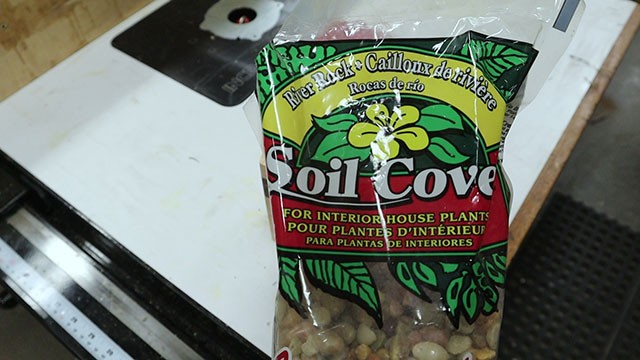
Finally I used river rock for the finished look.
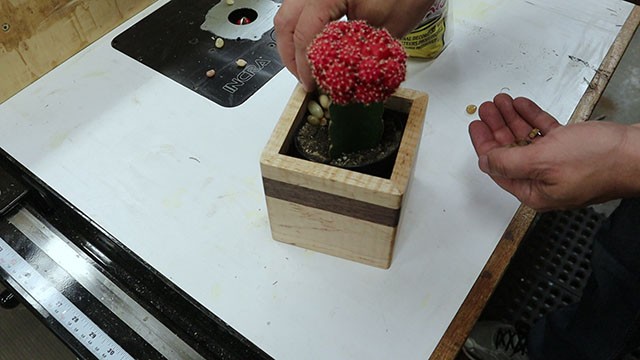
I first added the rock to the gaps between the plastic and wood planters. This helps fill the voids and keep the planter in one spot.
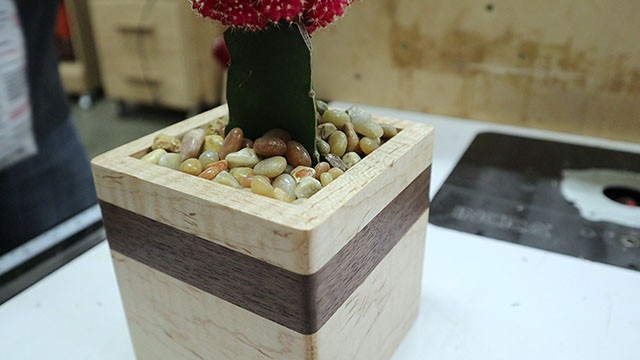
I then covered over the top with more rocks and it’s done!


