
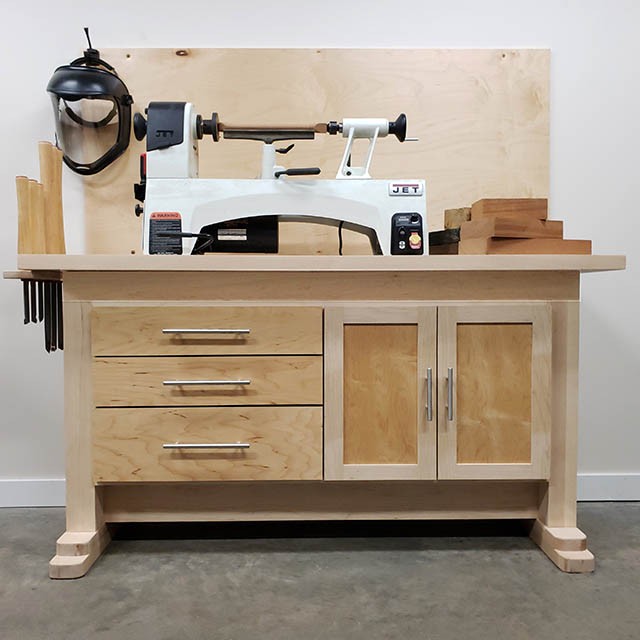
Getting a lathe means making a stand for it. I made this lathe stand stout, with lots of storage and room to grow as future upgrades happen. This stand is made from hard maple and maple plywood and weighs over 200 lbs without the lathe on it! It has lots of storage for lathe tools as well as turning blanks. I also added a sand box to add weight and vibration dampening to the stand. Follow along below to see how I made this one-of-a-kind piece of shop furniture!

DID YOU KNOW: You can follow me on these social media platforms!
Instagram · YouTube · Facebook · Pinterest

| Materials & Supplies* | Tools* |
| (1) Sheet 3/4″ Plywood | Bosch Plunge Router (if no CNC) |
| 10mm Domino Tenons | DeWalt Drill/Driver Set |
| Dowels or pocket screws are alternatives | Square |
| (1) Sheet 1/4″ Ply | Countersink Drill Bit |
| (1) Sheet 1/2″ Ply | Miter Saw |
| 8/4 Hard Maple Lumber | Table Saw |
| 4/4 Hard Maple Lumber | Jointer/Planer if using rough lumber |
| Wood Glue | Parallel Clamps |
| (3) Sets 12″ drawer slides | |
| (2) Sets euro cup hinges | |
| 2.5″ Construction Screws | |
| 70 lbs All purpose sand | |
| 1 1/4″ Screws |
*I use affiliate links, please see details on my disclaimer.


Milling Rough Lumber
This project is half hardwood furniture and half cabinetry. So for the hardwood parts I started with roughsawn maple stock.

The Whole Enchilada Plan Bundle
The Whole Enchilada Plan Bundle! You want it all? You Got it! Get every plan I offer in one bundle at a savings of over 65%!
This product is a DIGITAL DOWNLOAD. You can immediately download your product off the order receipt page after the purchase. You will also immediately receive an email titled “Your MWA Woodworks order is now complete” that contains the download link in the “Downloads” section of the email.
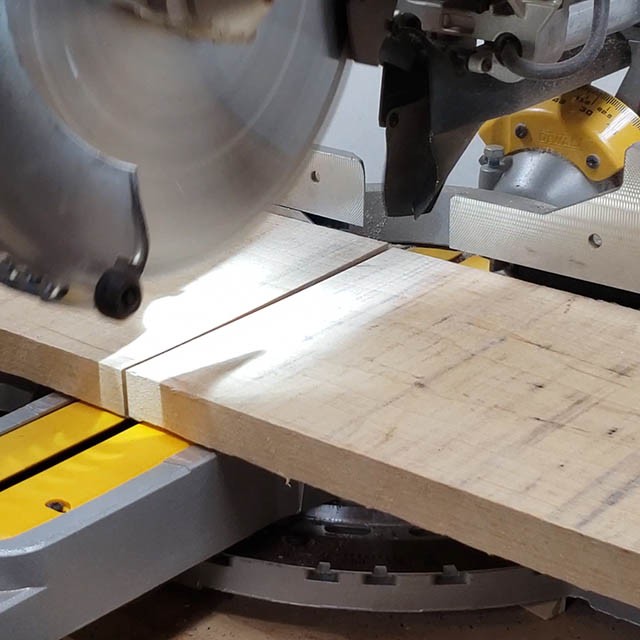
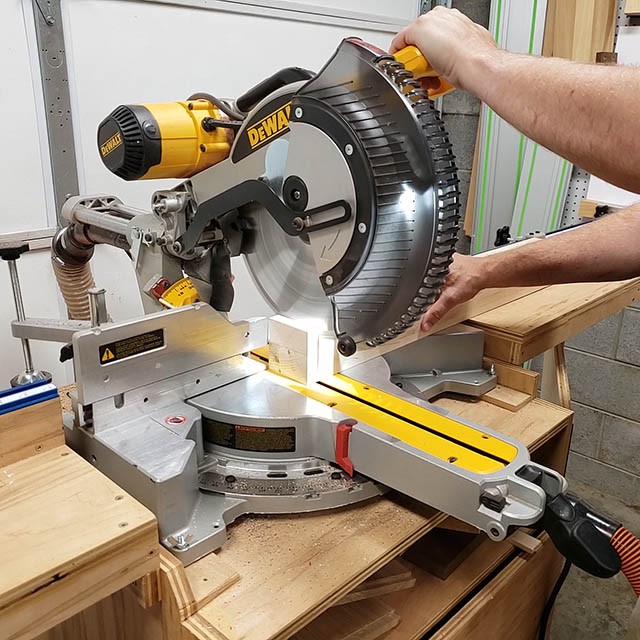
Cutting all my rough parts down at the miter saw first makes them easy to handle at the table saw.
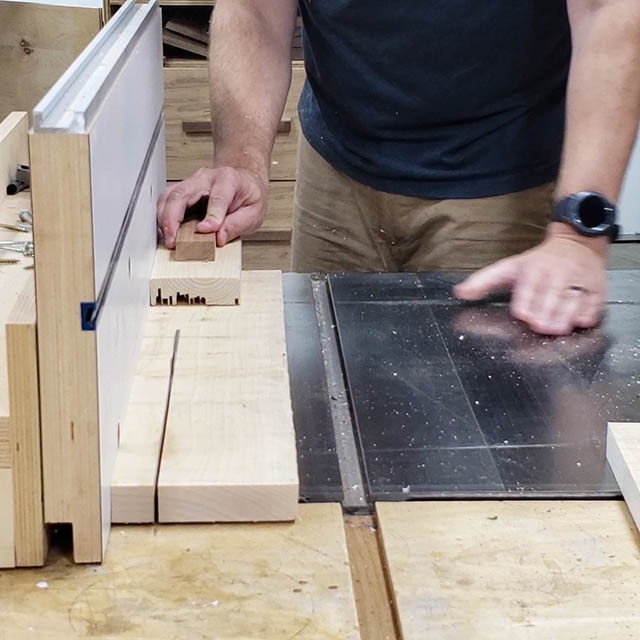
Next I make a trip to the table saw to cut everything to rough dimensions before milling.
I have a mix of 4/4 stock and 8/4 stock for different parts.
The Whole Enchilada Plan Bundle
The Whole Enchilada Plan Bundle! You want it all? You Got it! Get every plan I offer in one bundle at a savings of over 65%!
This product is a DIGITAL DOWNLOAD. You can immediately download your product off the order receipt page after the purchase. You will also immediately receive an email titled “Your MWA Woodworks order is now complete” that contains the download link in the “Downloads” section of the email.
Forming the Leg Blanks
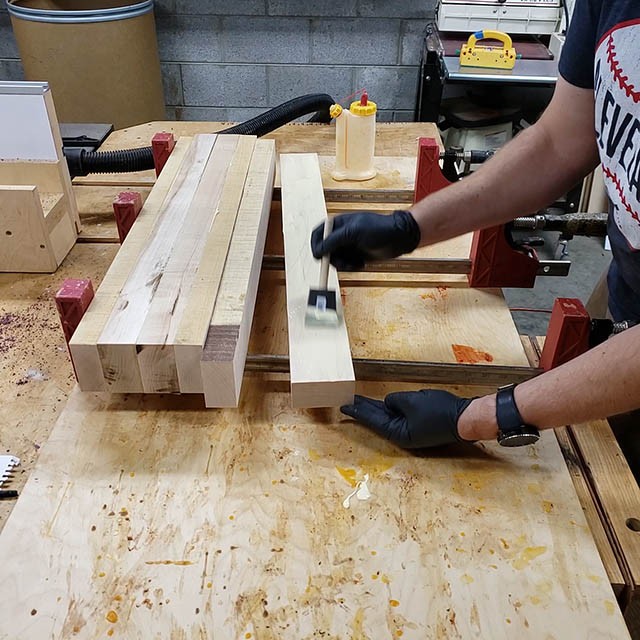
To form the legs of the lathe stand, I am gluing pairs of 8/4 stock together (I put all four legs in the clamps at once like a big cutting board). Just be careful to only put glue on the parts you want to stick together!
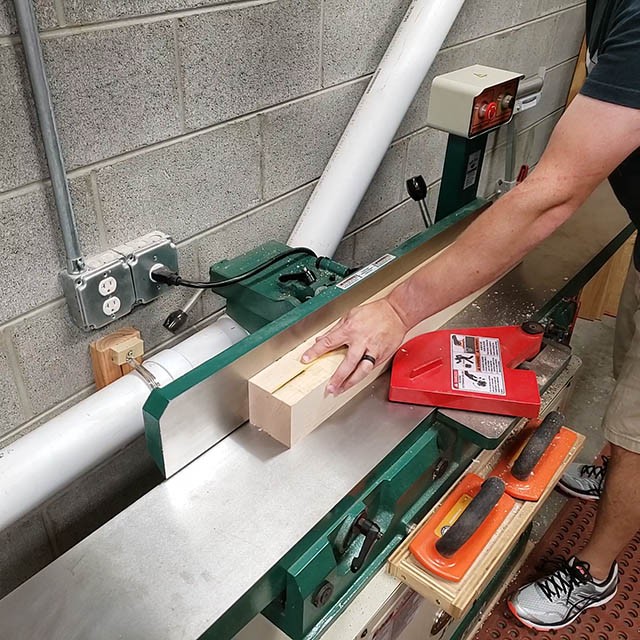
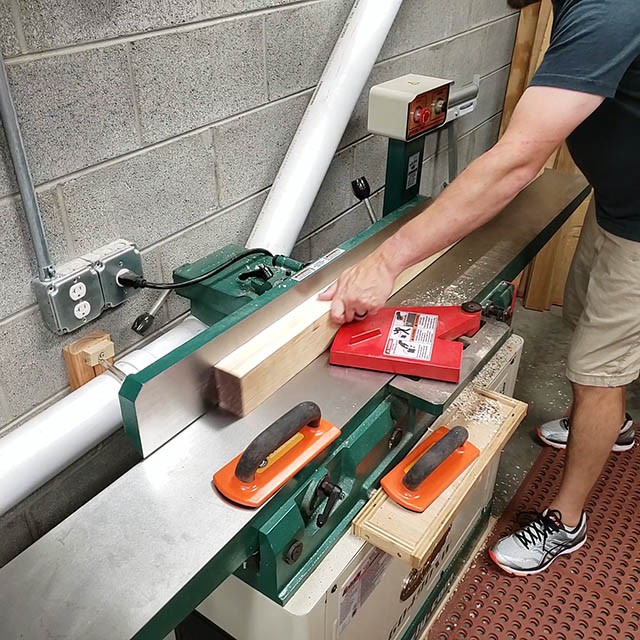
After the glue is dried I square my parts up at the jointer on two sides.
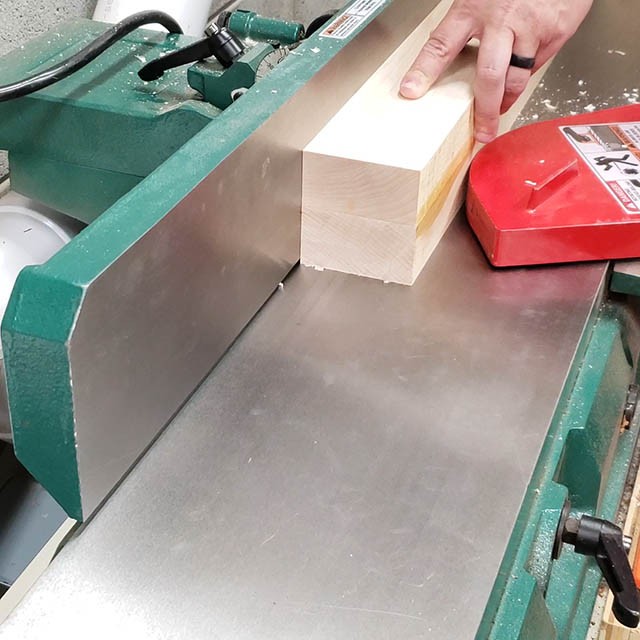
All I need to do is flatten one face and then square up an adjoining face and then the planer can get the other two sides!
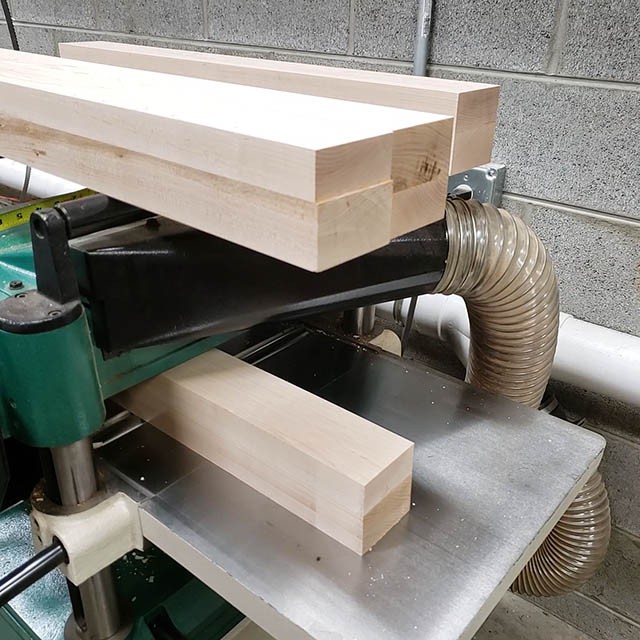
Stick one of the flattened faces down on the planer table and run it through, Magically the opposite side will be flat and parallel! Then just rotate 90 degrees to the other side you flattened on the jointer and get the opposite side parallel again and you’ll end up with 4 square sides! Just make sure to run all four legs through at once so you ensure each one is cut to the same dimensions.
I then chop off one end of each leg to have a clean and squared end. Then I set these leg blanks aside for a while because I need to build the feet of the stand next.
The Whole Enchilada Plan Bundle
The Whole Enchilada Plan Bundle! You want it all? You Got it! Get every plan I offer in one bundle at a savings of over 65%!
This product is a DIGITAL DOWNLOAD. You can immediately download your product off the order receipt page after the purchase. You will also immediately receive an email titled “Your MWA Woodworks order is now complete” that contains the download link in the “Downloads” section of the email.
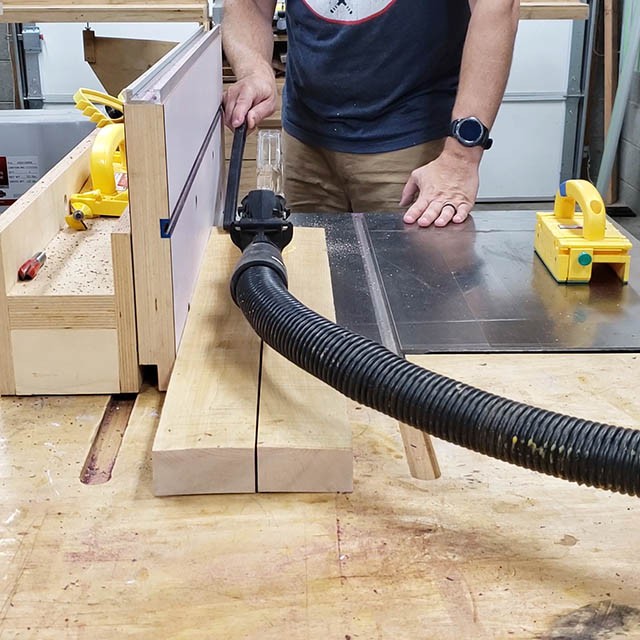
Milling the Apron and Top for the Lathe Stand
After repeating the milling process at the jointer…..

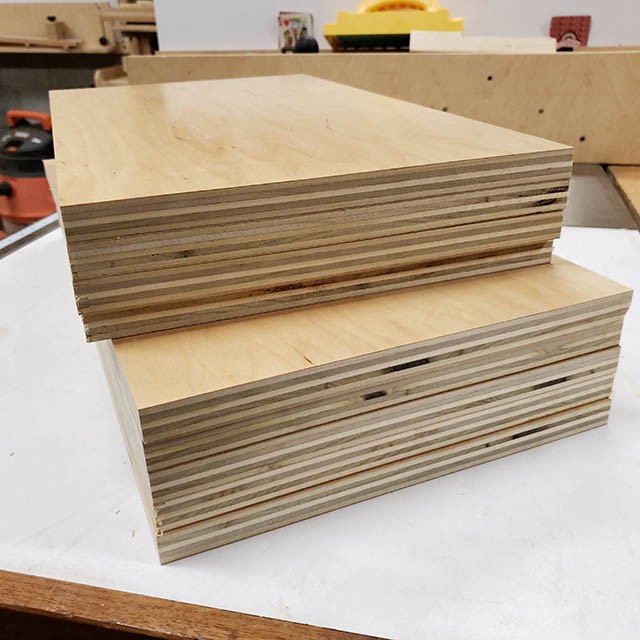
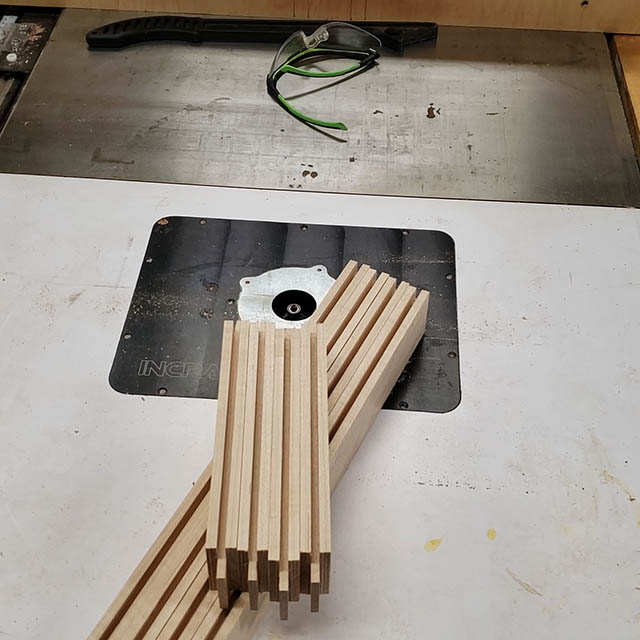
….and then the planer, I have this 8/4 stock milled to 1.5″. Basically I made hard maple 2x4s. I also took the time to mill the apron parts as well as the planks that will form the top of the stand too. Everything out of 8/4 stock milled to 1.5 inches.
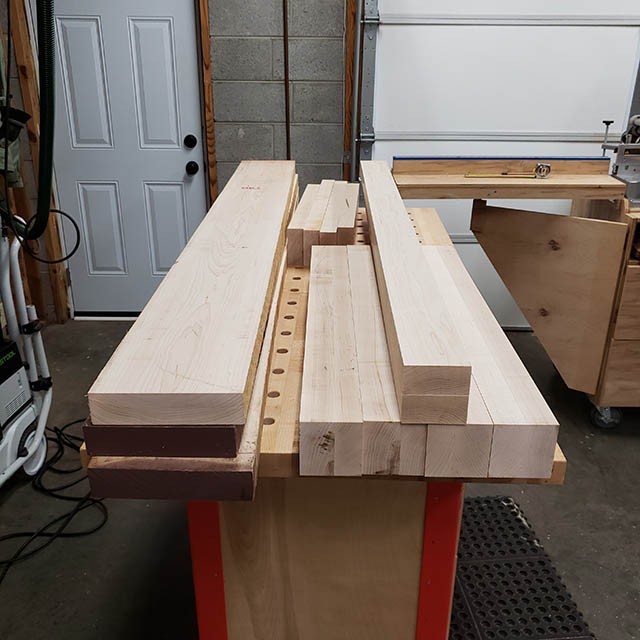
Here’s a picture of the parts to make the top, apron, legs and feet. It’s not so much (but I did empty the dust collector several times, ha!)
Shaping the Feet
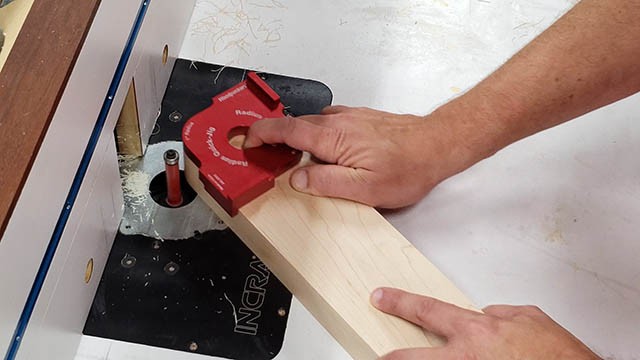
OK, back to the feet. I wanted a 1.5″ radius on the ends of the feet so they weren’t pointy. I can only imagine stubbing my foot while turning a project. That wouldn’t end well.
Once I cut those radii, I put a roundover on the the top edge of each leg part for contour and to keep the edges from getting dinged up.
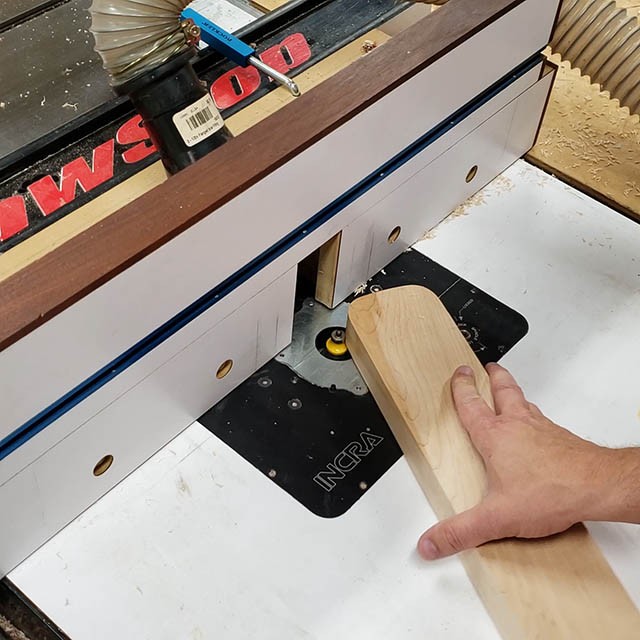
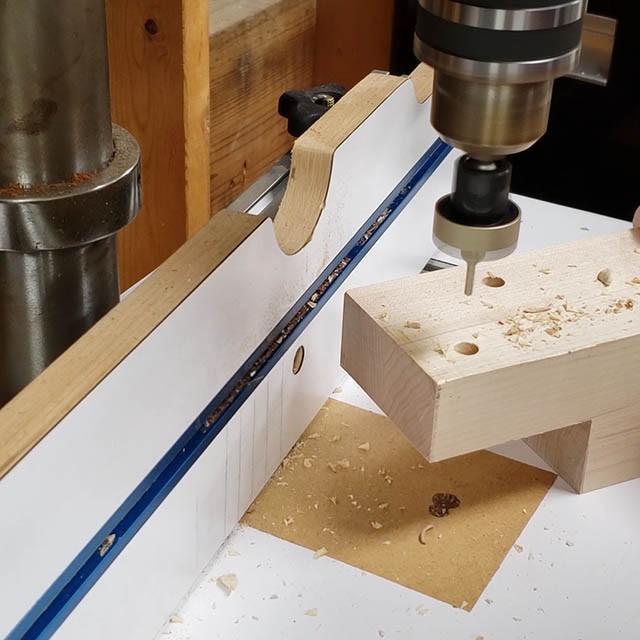
I needed to cut a through mortise on each end of the feet to fit the legs into. Now I used my CNC for this but you could do it with a router and template too. There’s no part of this project you must have a CNC to complete, but I have one and I use it to make my work easier.
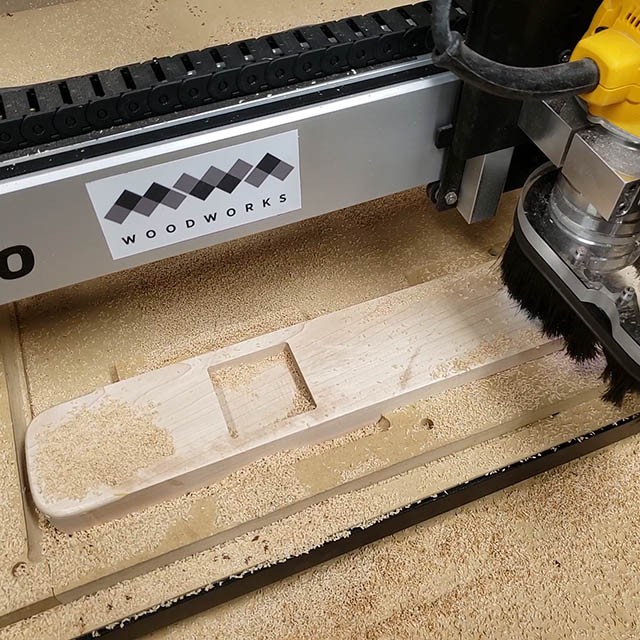
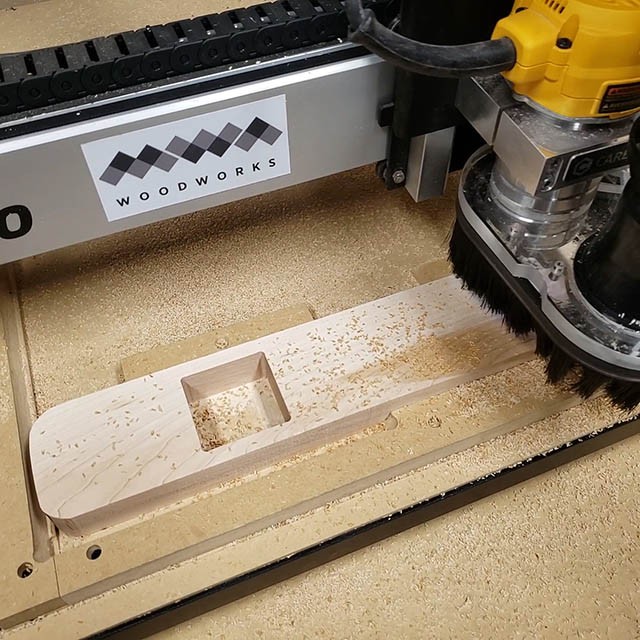
For the bottom of part of the feet I need to make matching mortises but these don’t go all the way through, but rather an inch deep. In hindsight I probably didn’t need to do this step as the through mortises in the top were probably enough, but I did it and now it’s done. What can I do?
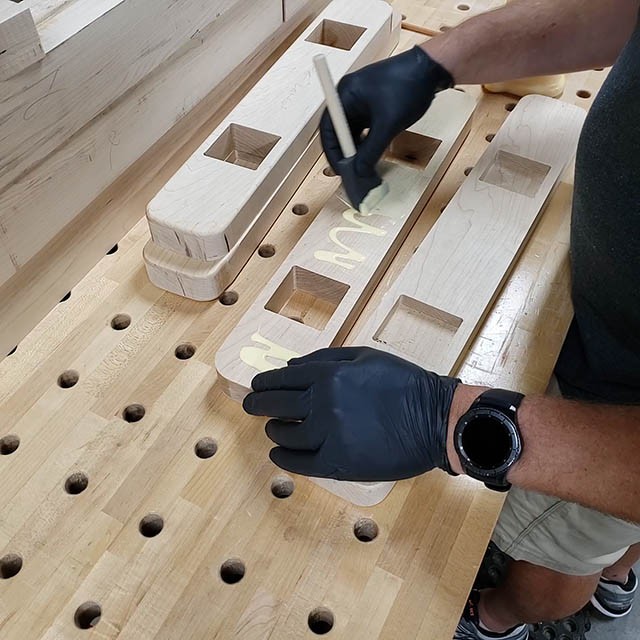
Next I need to stick these together with glue and line up those mortises. Again, I think I could have made this easier on myself by just cutting the mortises in the top part of the feet.
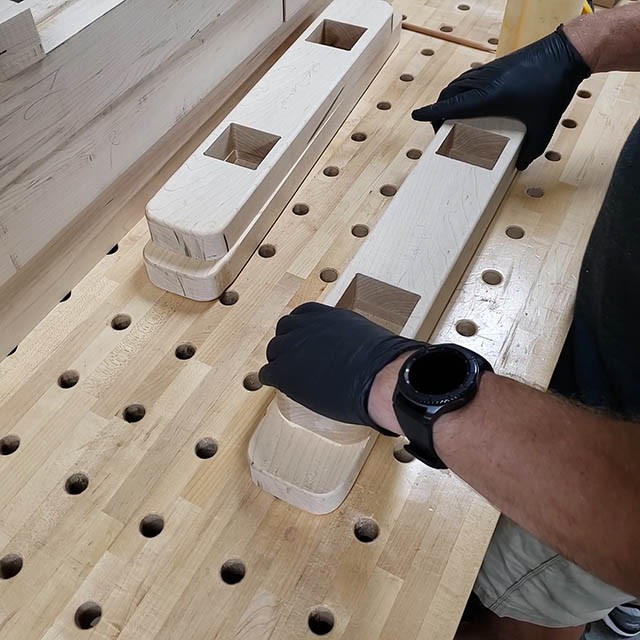
The mortises luckily lined up!

I just clamped the parts together and let ’em dry.
The Whole Enchilada Plan Bundle
The Whole Enchilada Plan Bundle! You want it all? You Got it! Get every plan I offer in one bundle at a savings of over 65%!
This product is a DIGITAL DOWNLOAD. You can immediately download your product off the order receipt page after the purchase. You will also immediately receive an email titled “Your MWA Woodworks order is now complete” that contains the download link in the “Downloads” section of the email.
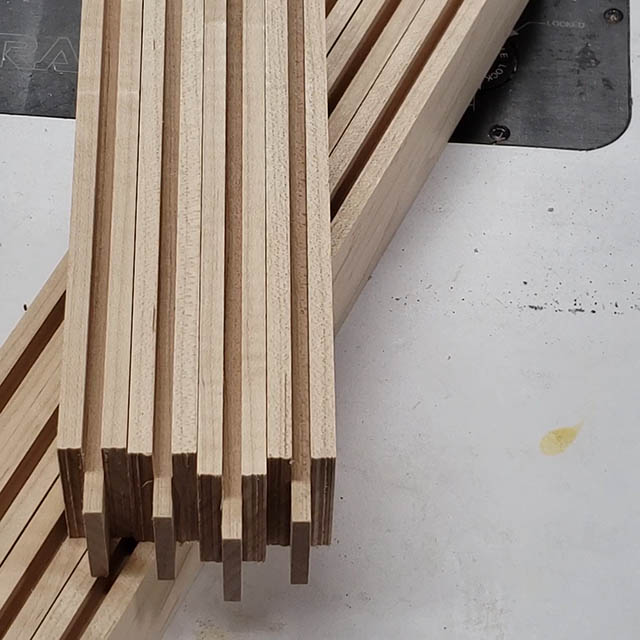
Cutting the Joinery in the Legs
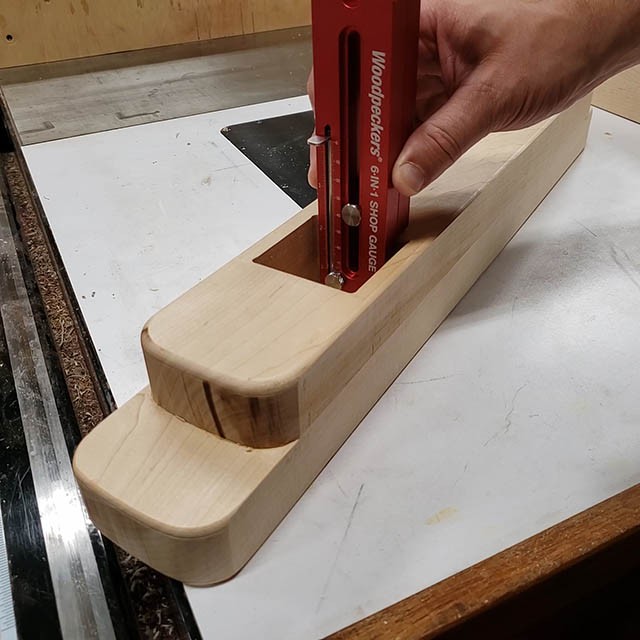
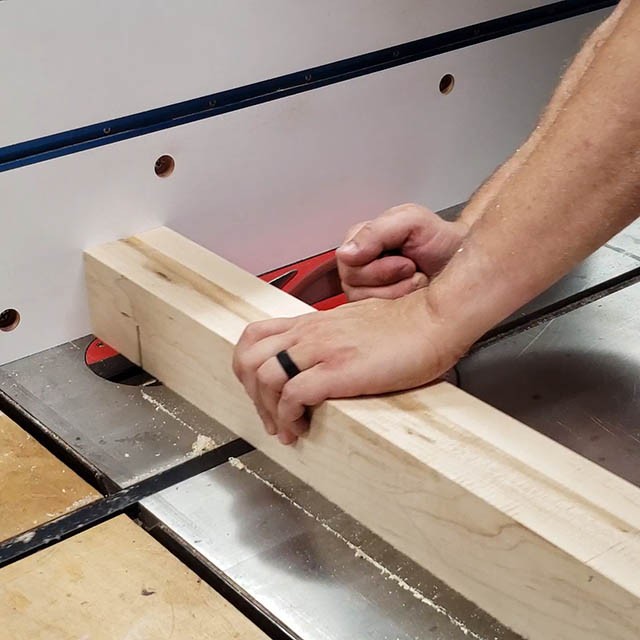
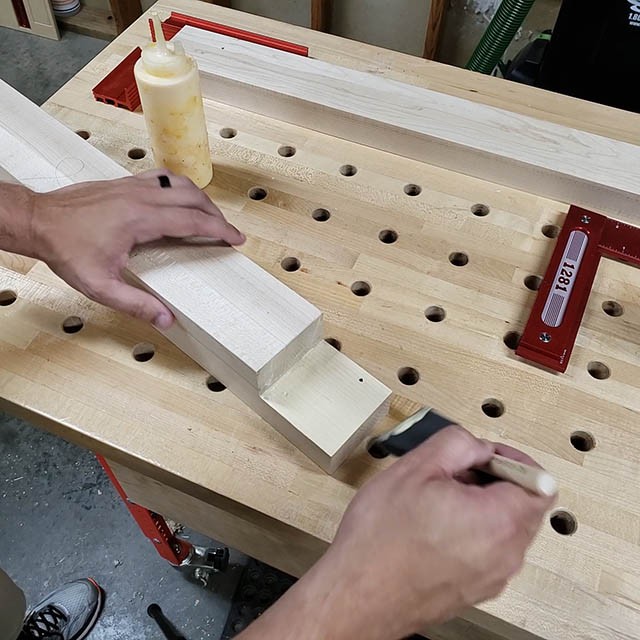
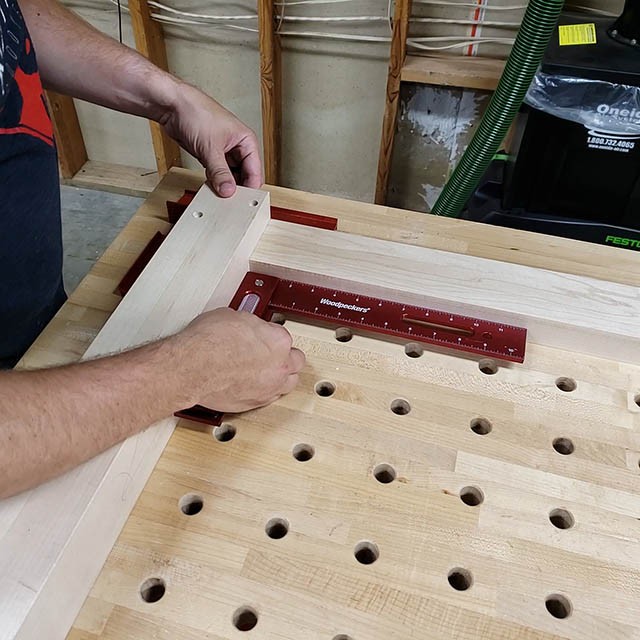
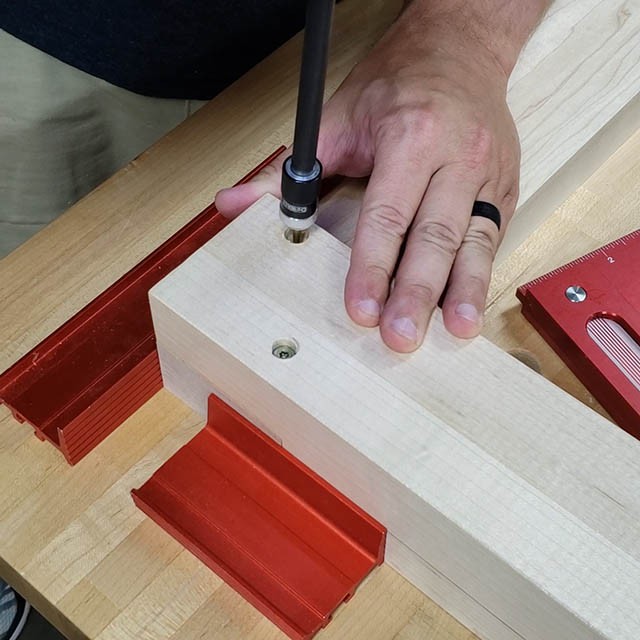
Once they were dry I measured the total depth with my depth gauge. I did this so I could set the height of the table saw blade when I cut the tenon on the end of the legs to fit in these mortises.
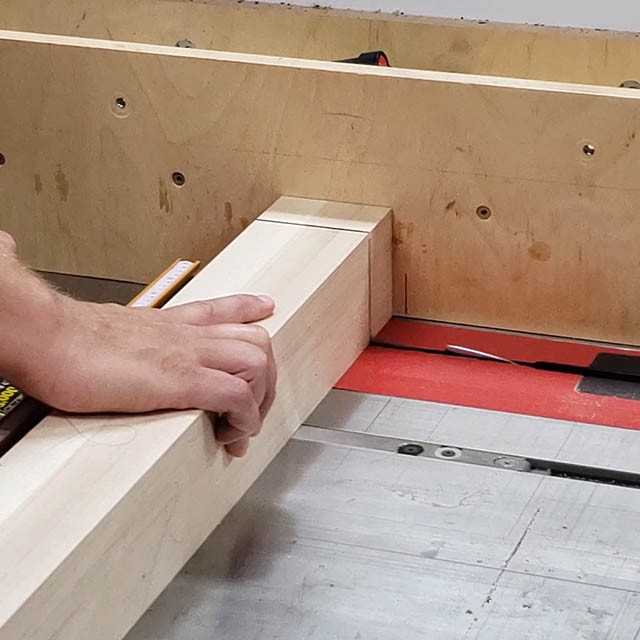
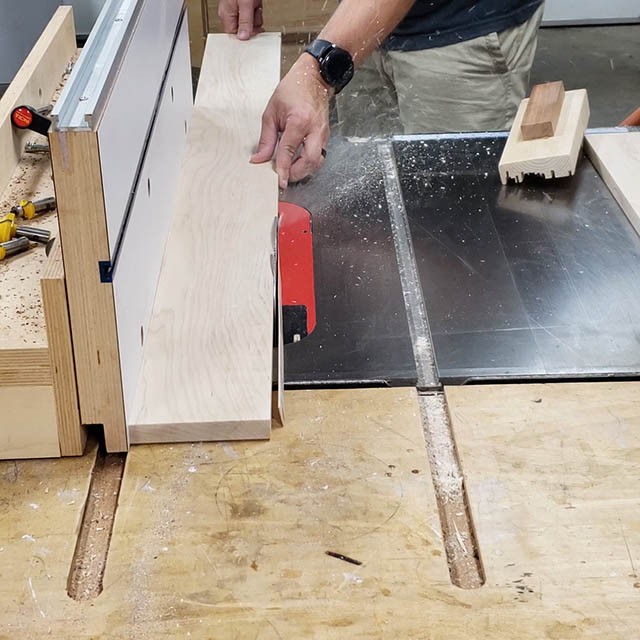
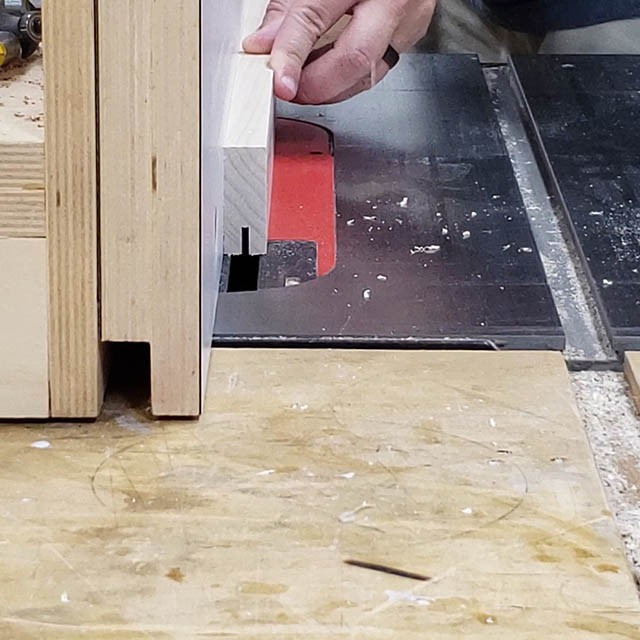
First I set the distance to the fence and cut the shoulders for the tenons based on the measurement I took.
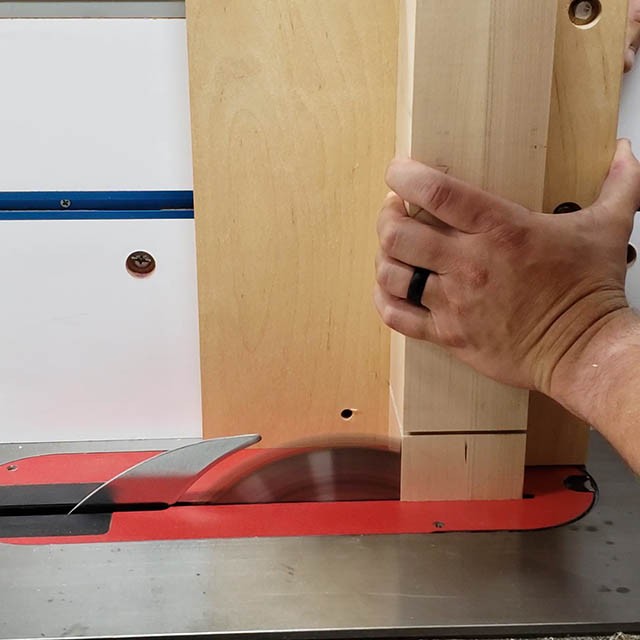
I then cut the cheeks of the tenons using my tenon jig.
I cut each side the same so the tenon was centered on the leg.
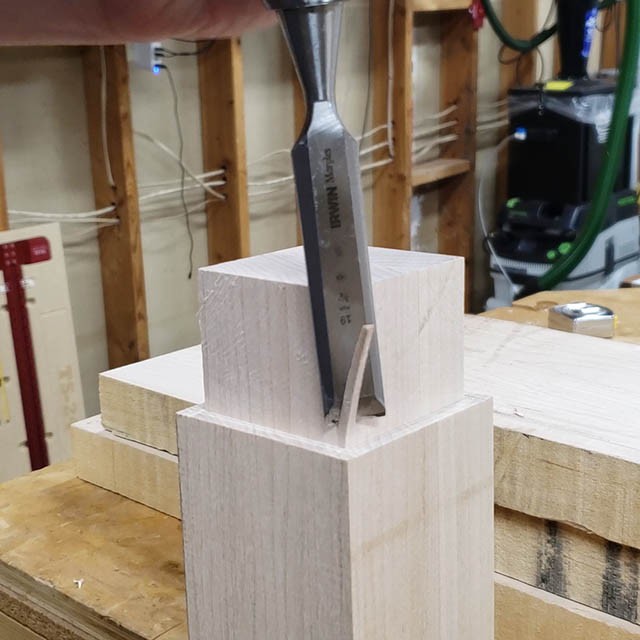
because my mortises were rounded due to the router bit, I needed to shave off the corners of the tenons to fit.No need to make these perfect, no one will ever see them!
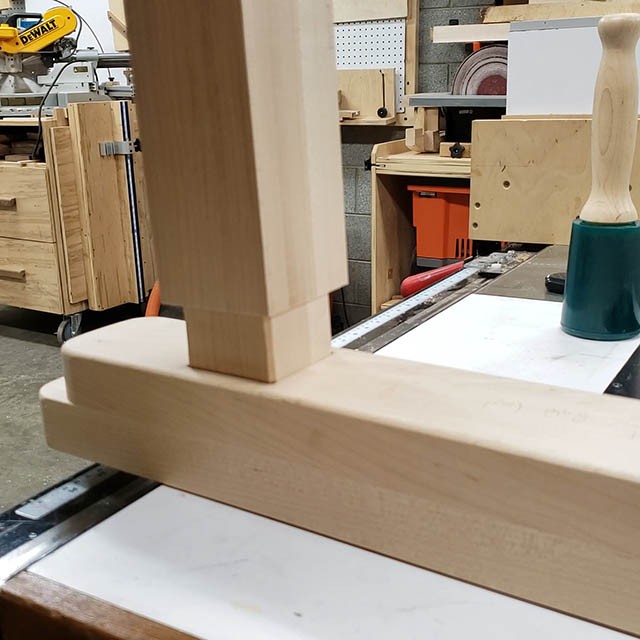
Time for a test fit…….
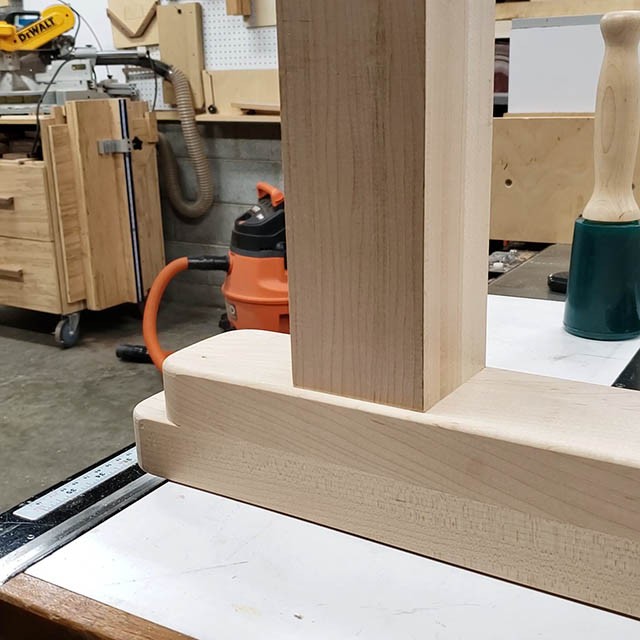
Ahhhh, so nice! Exactly what I was after. Nice clean shoulders and a nice fit.
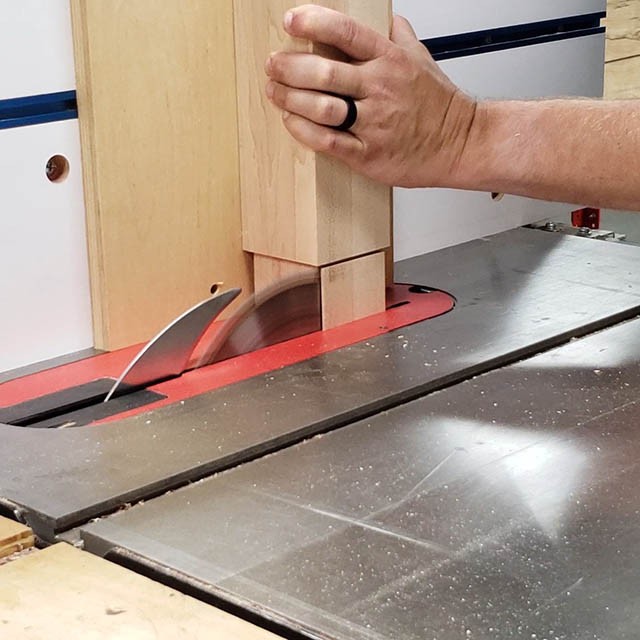
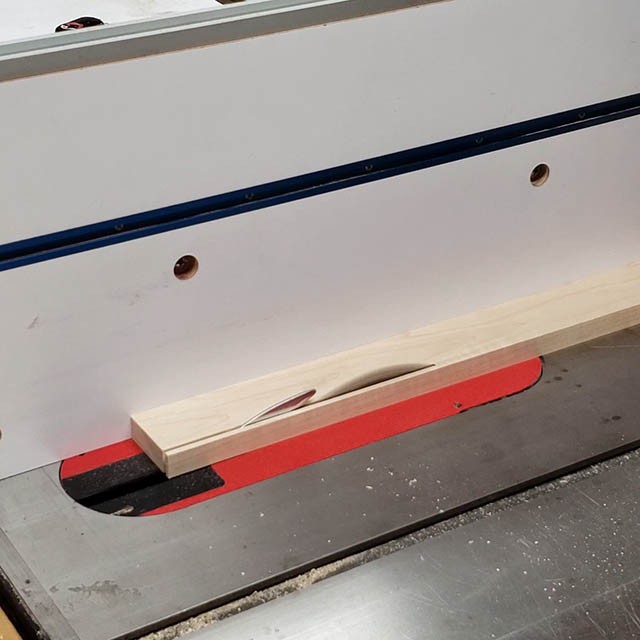
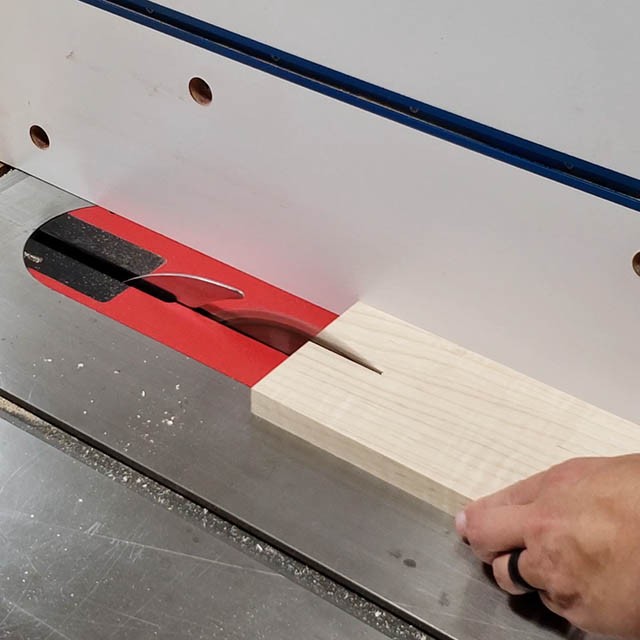
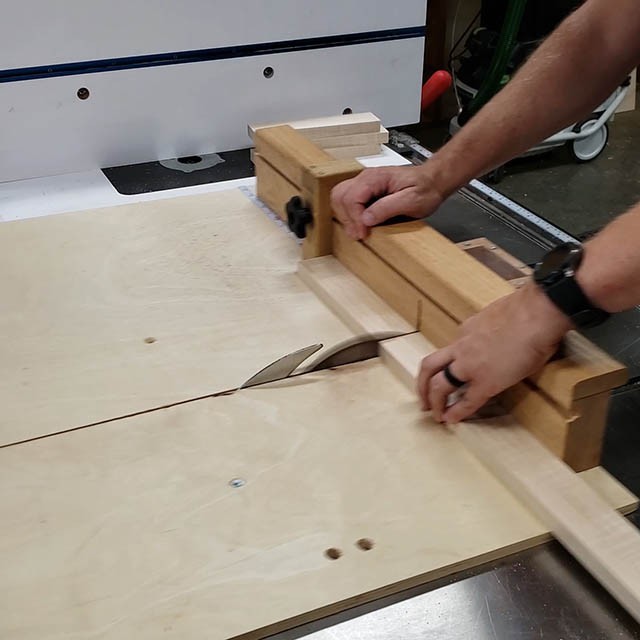
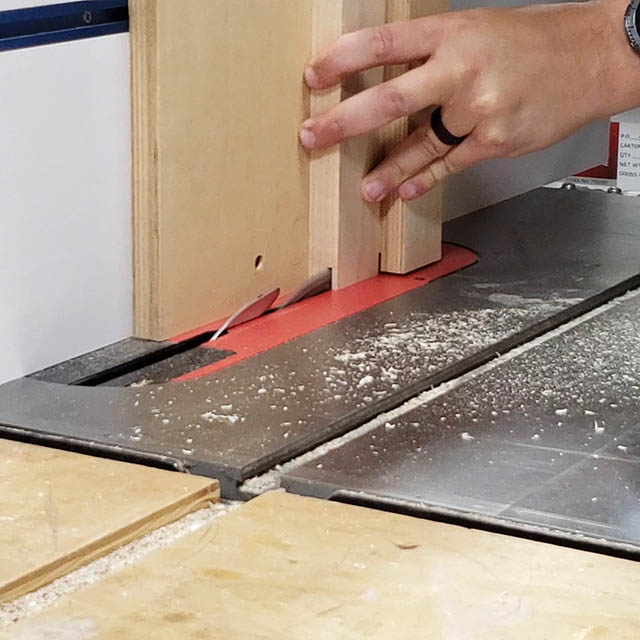
The last cuts on the legs were to put a notch at the top to fit the apron on to. I first cut the shoulder…..
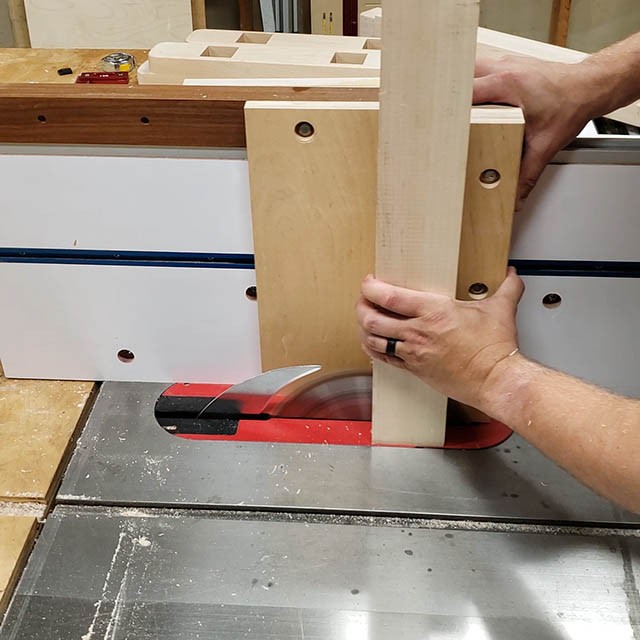
And then cut the cheek creating a notch.
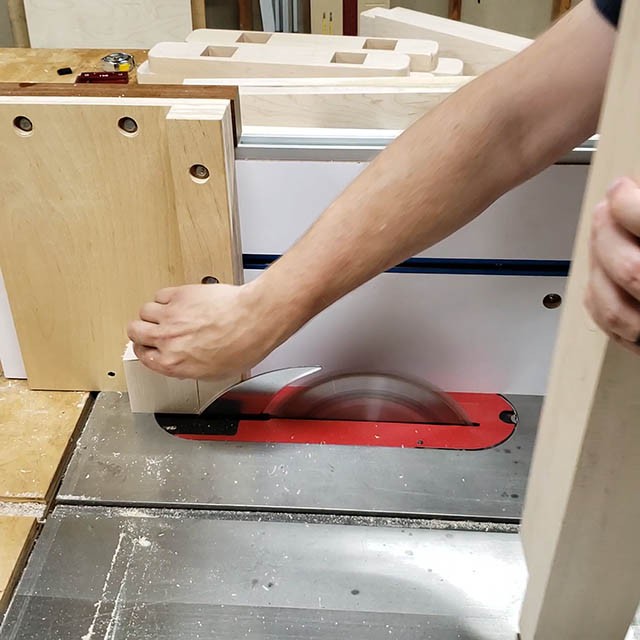
Be careful removing the off-cut. Be sure to stay well away from the blade.
I then pre-drilled holes for assembly later. I will be using screws which will be hidden later by the cabinetry.
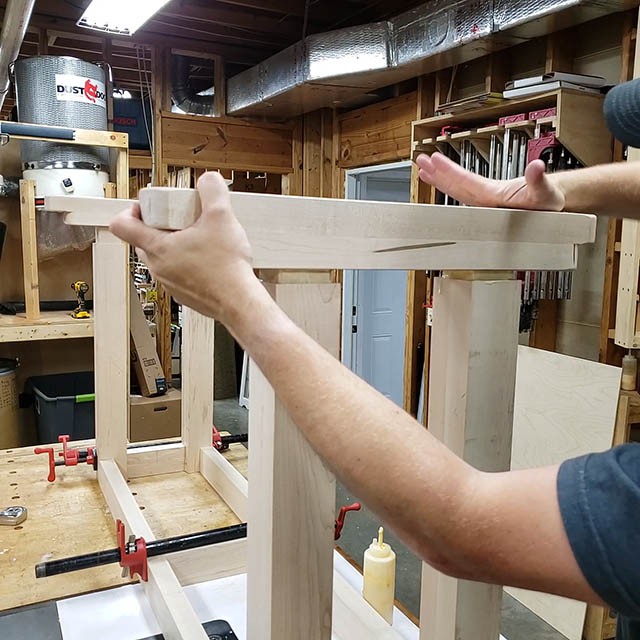
Assembling the Lathe Stand Base
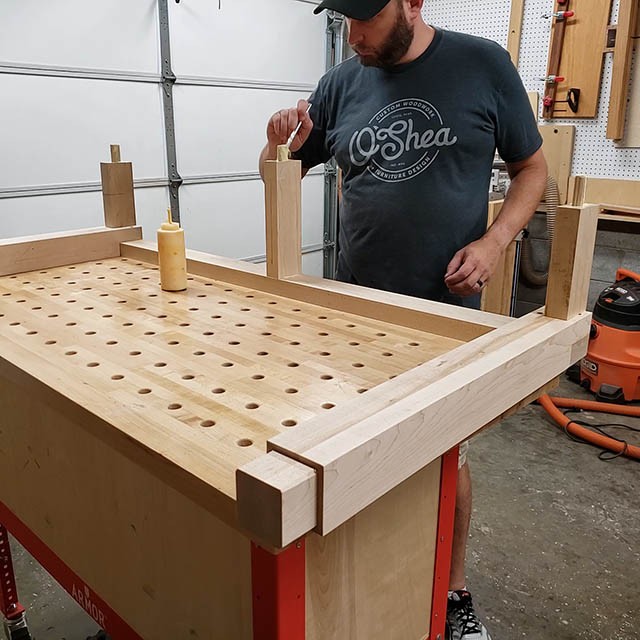
I added some glue for strength to the notch on top of the legs.
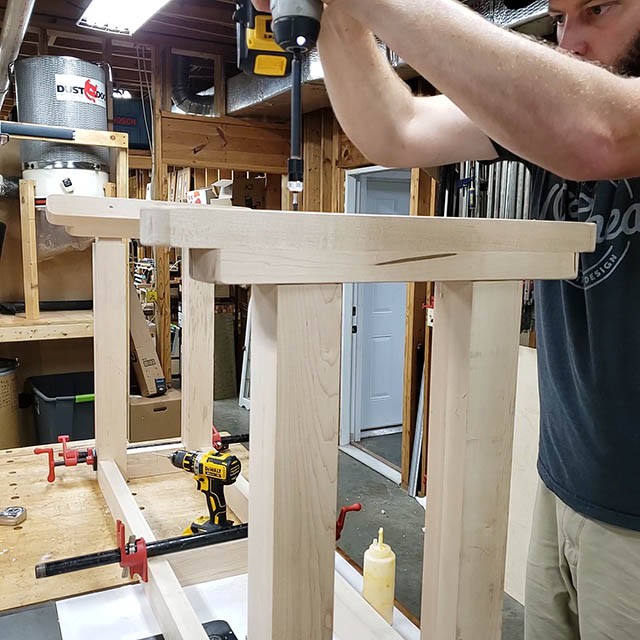
I then squared up my apron parts to the legs.
Finally I drove home the screws. These will be on the INSIDE of the lathe stand and completely hidden by the cabinetry later, so no need to worry about plugs etc.
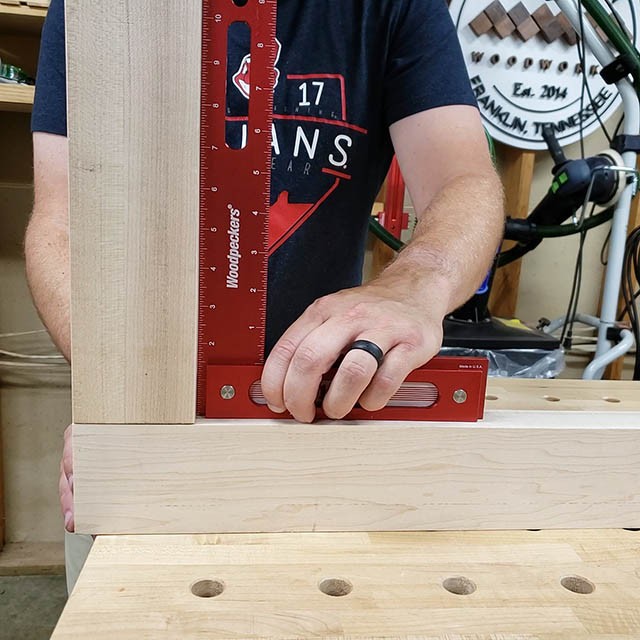
I checked again to make sure everything remained square.
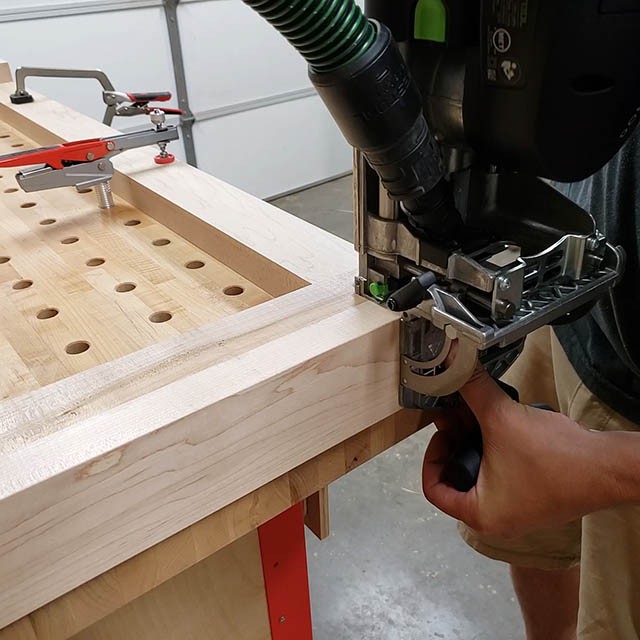
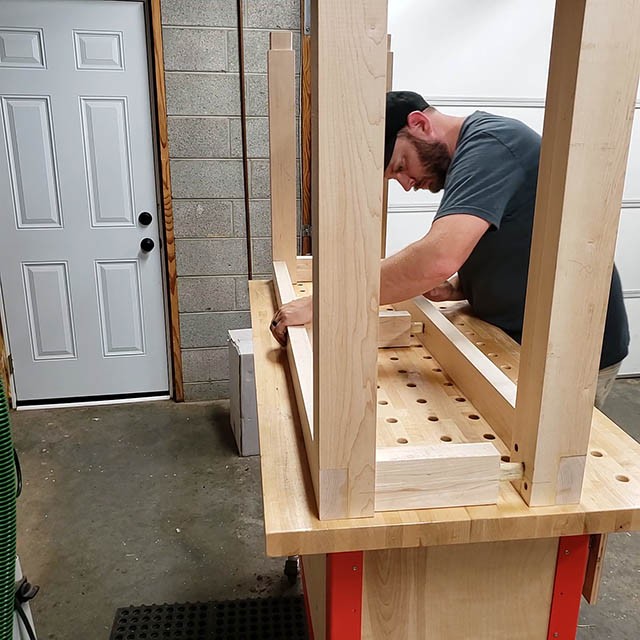
I then clamped the leg/apron combo down and put domino mortises in where the short-side aprons would connect. You could use dowels here if you wanted to.
you can see here I am using one XL domino to make this connection to the short side aprons.
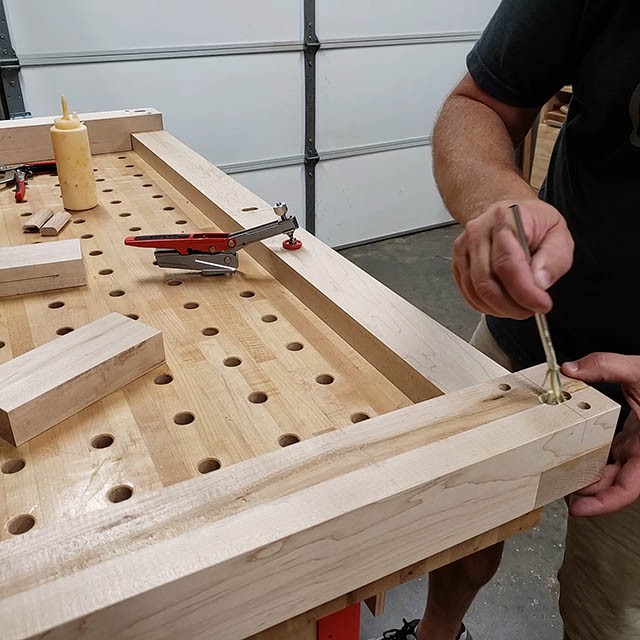
I then add glue to the mortise.
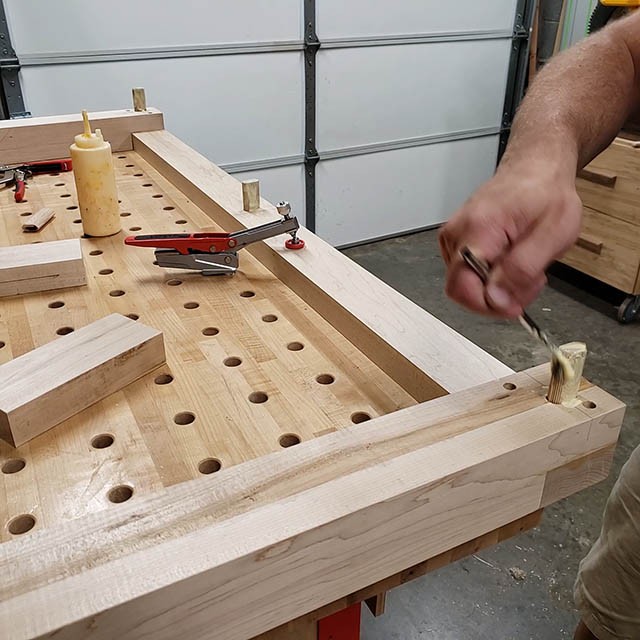
Then slip in the tenon and add glue to that.

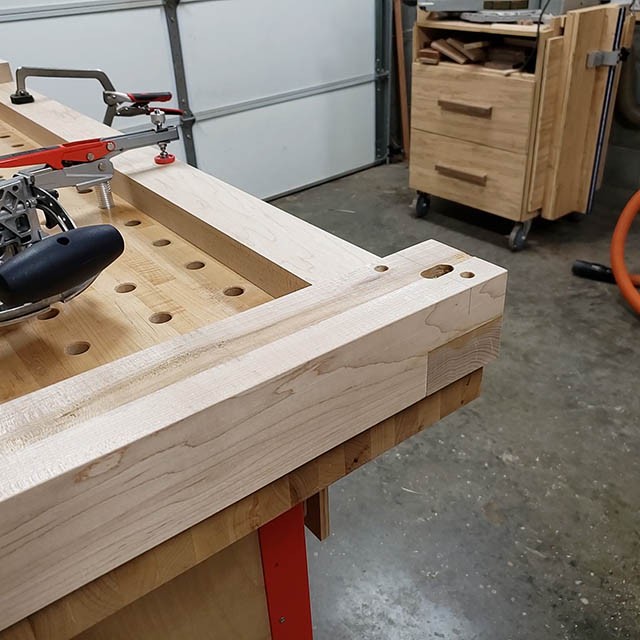
Finally I attach the short apron pieces on, which have matching domino mortises in them.

Let that dry just like this for about 2 hours.
Then I added dominos and glue to the other side.
I then attached the other leg pair. I turned the whole assembly upside down to make this bit easier.
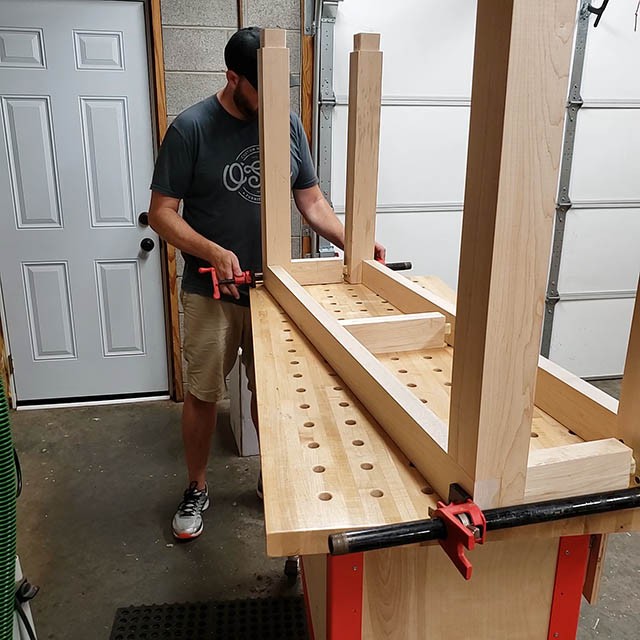
Some clamps at the joints and more waiting for the glue to dry.

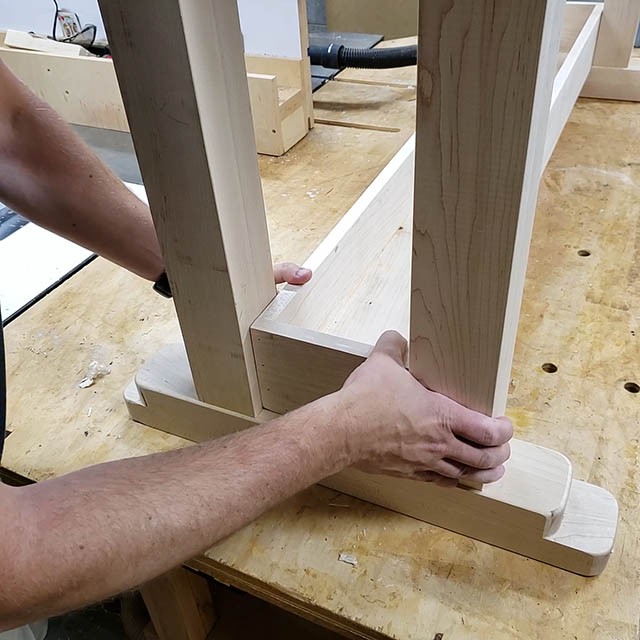
While the glue is drying, attached the feet. First I added glue to the tenons on the legs.
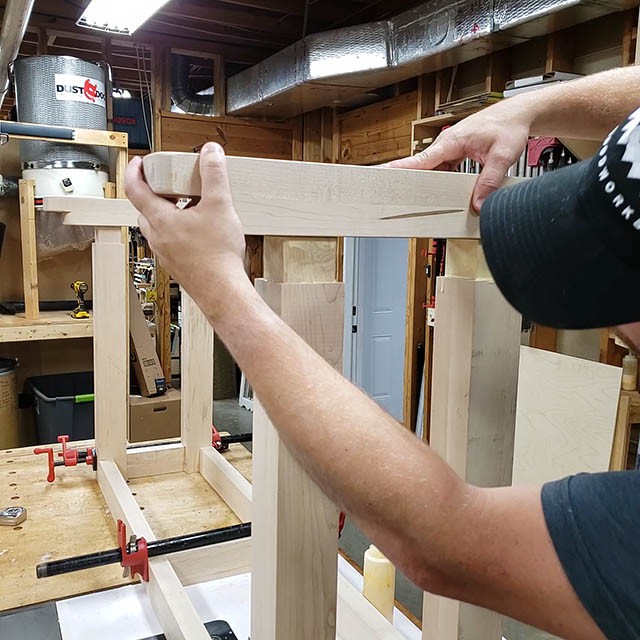
I then lined up the mortises in the feet.
After some working them from side to side I got them seated at the shoulders.
I then drove this connection together with screws which will act as clamps. Since this is the bottom those screws wont be seen.
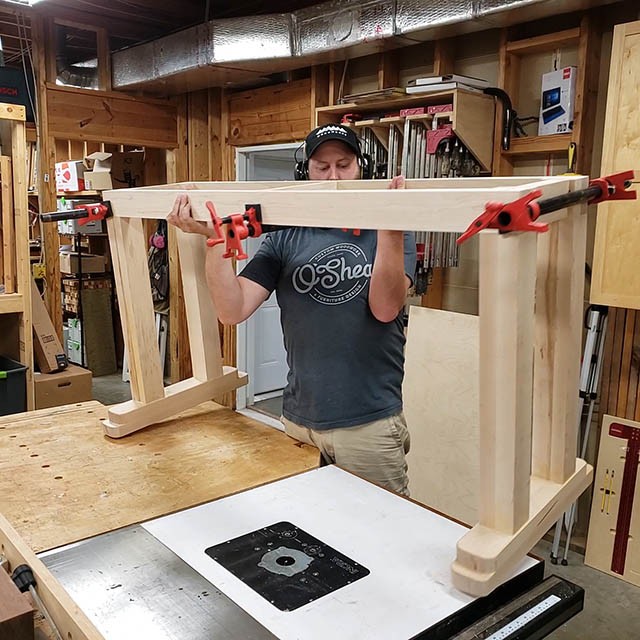
I then flipped the whole assembly upright and you can see the base of the stand is completed. Well, almost. Next I needed to add a stretcher, but not just a stretcher. I wanted to add a sand box! What?…. Keep reading.
Making the Sand Box
The Whole Enchilada Plan Bundle
The Whole Enchilada Plan Bundle! You want it all? You Got it! Get every plan I offer in one bundle at a savings of over 65%!
This product is a DIGITAL DOWNLOAD. You can immediately download your product off the order receipt page after the purchase. You will also immediately receive an email titled “Your MWA Woodworks order is now complete” that contains the download link in the “Downloads” section of the email.
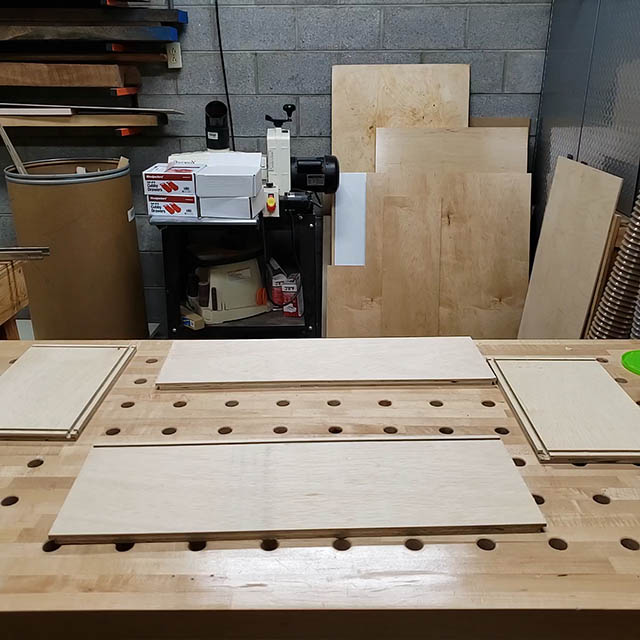
After milling some 4/4 maple to 3/4, I trimmed it to width.
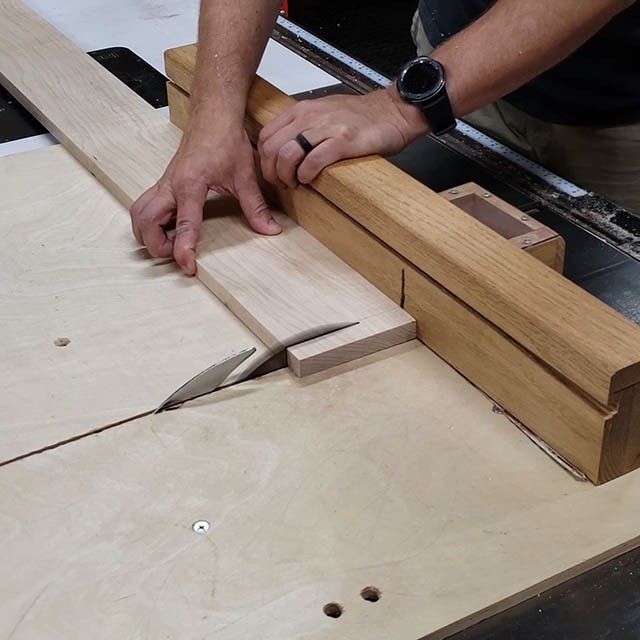
Then I cut everything to length.
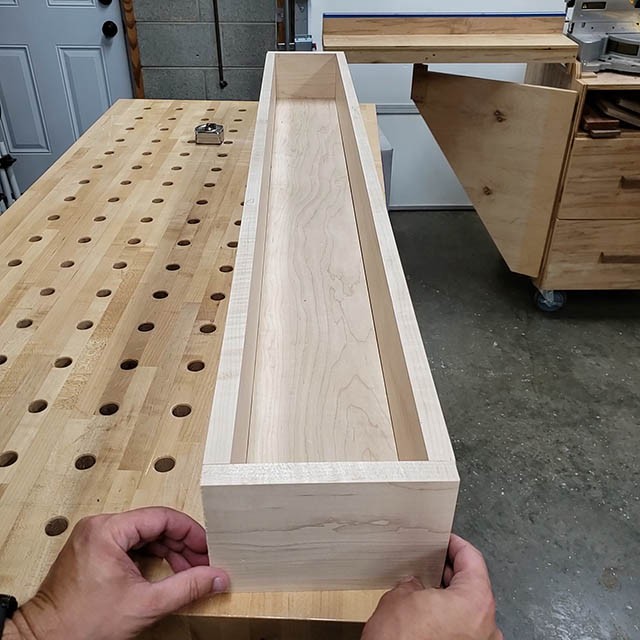
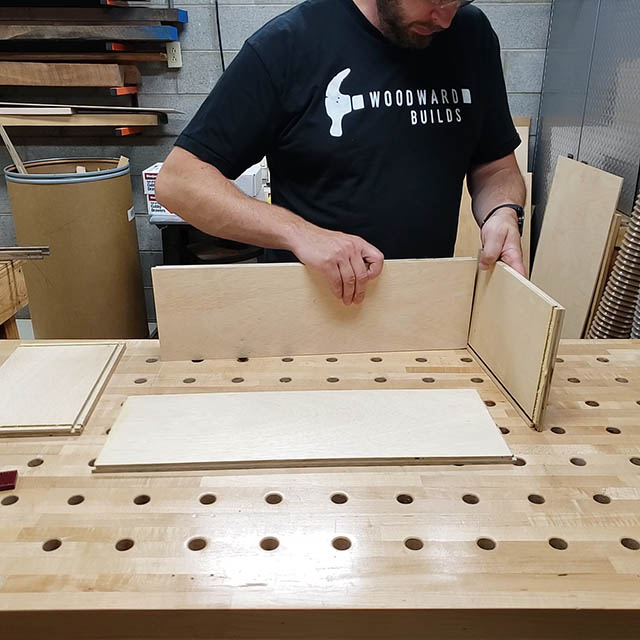
Here you can see how it will go together.
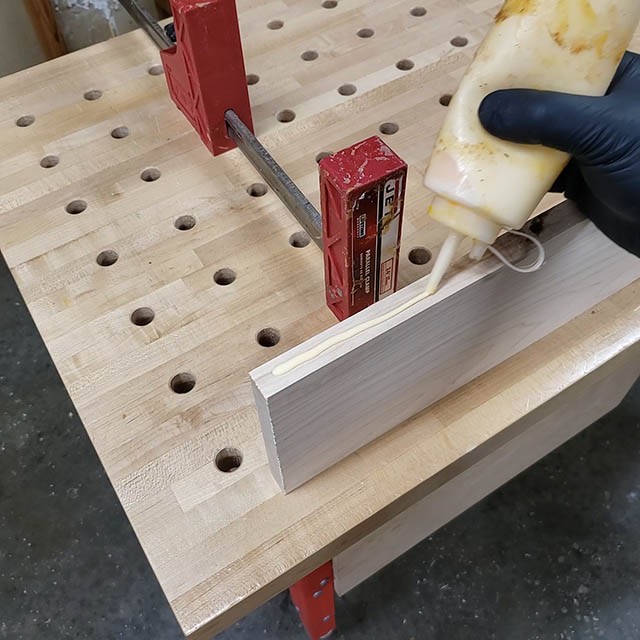
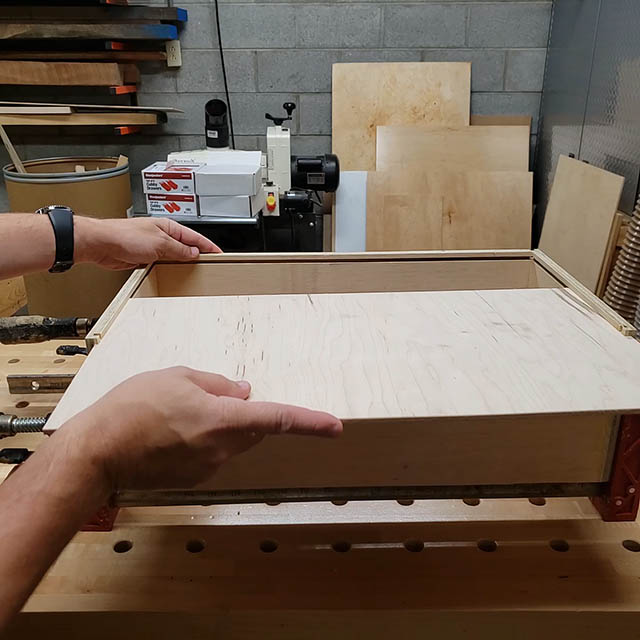
I applied glue to all the parts.
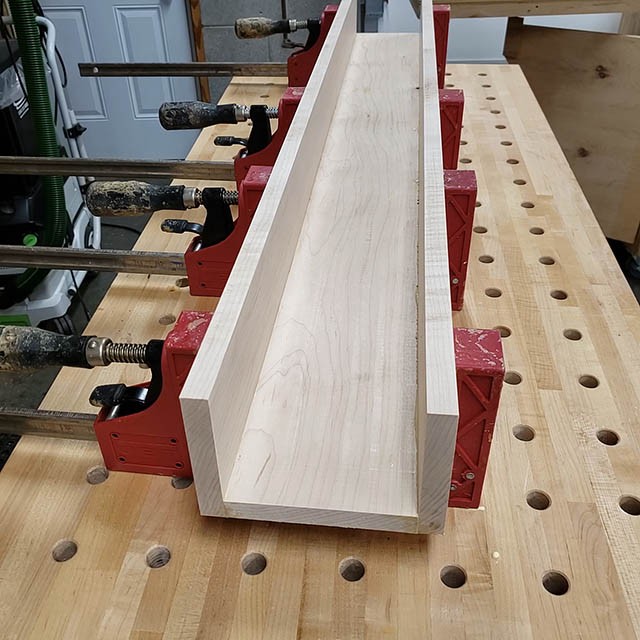
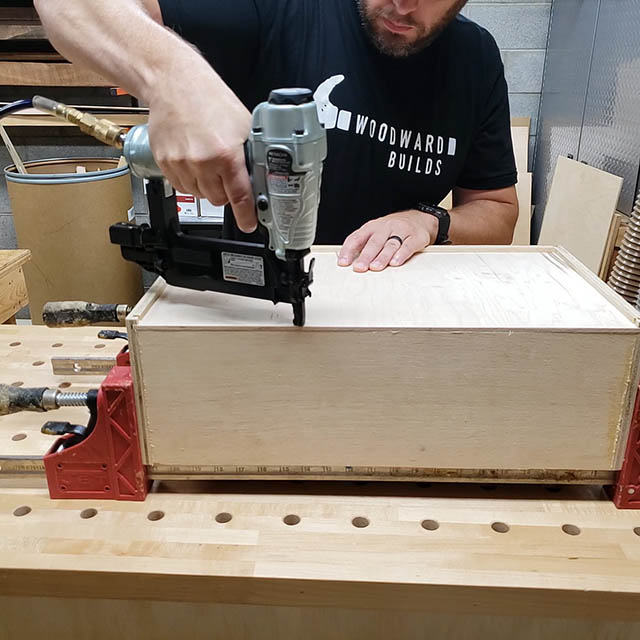
Clamped it together and added the ends (not pictured) and let the box dry.
Then I installed this between the two legs creating a stretcher.
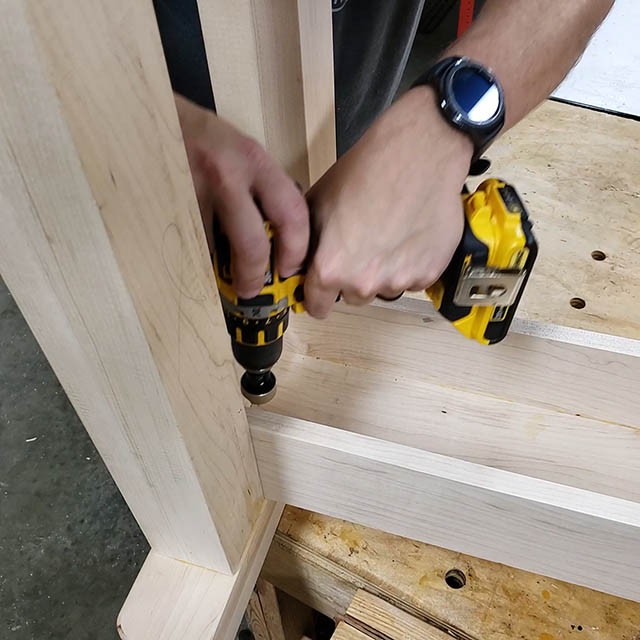
I pre-drilled and screwed it into place.
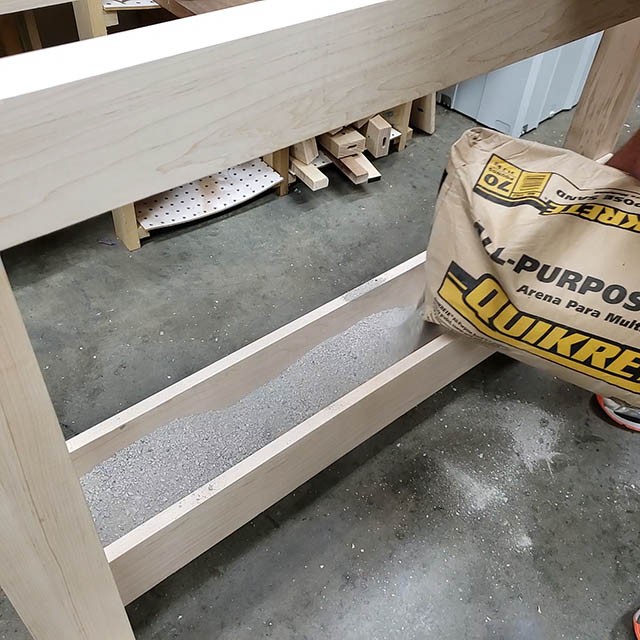
Then I added sand to the box. This does two things…. it adds weight (it was 70 lbs of sand) and it adds vibration dampening. This is good to have for turning since vibration can cause bad cuts at he lathe and be generally annoying to hear and feel in your feet.
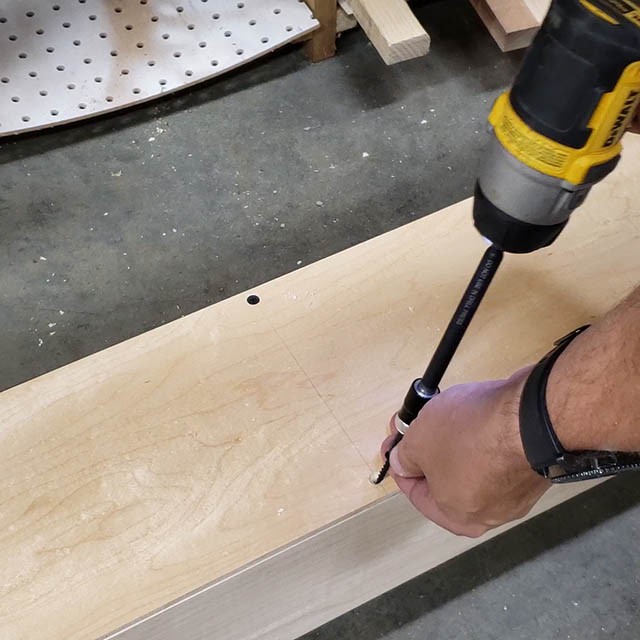
I screwed a piece of 1/4 ply to the top to seal the box and also create a platform for the cabinetry to sit on.
Making the Top for the Lathe Stand
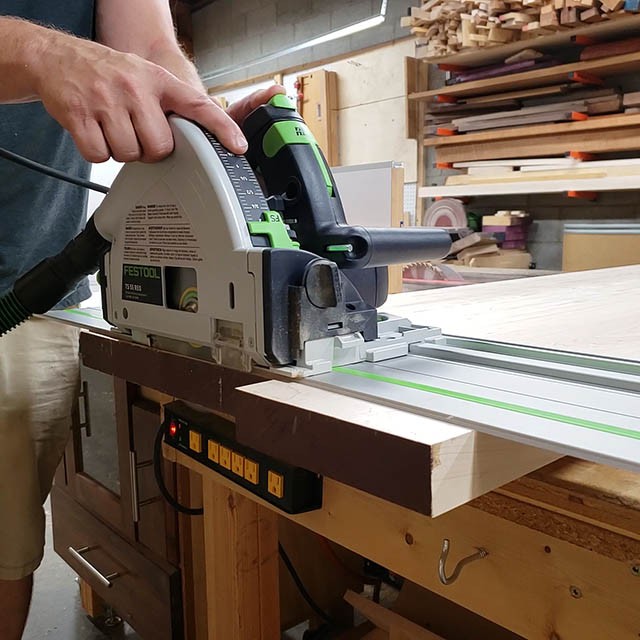
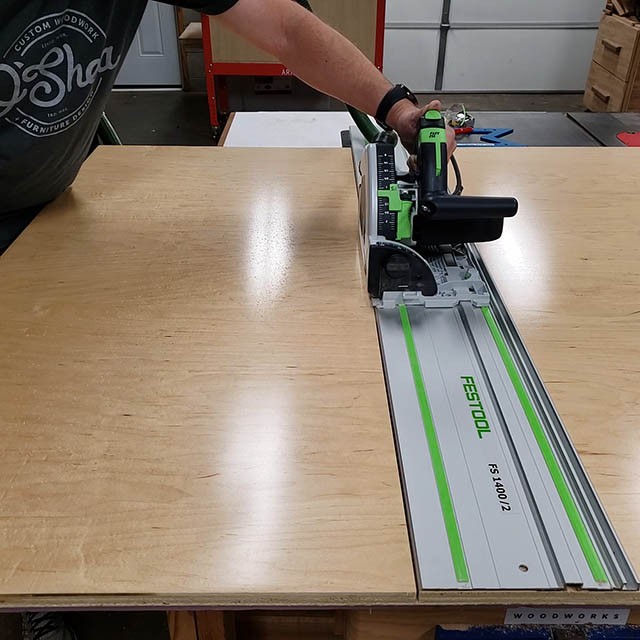
After I glued the top of the table together I trimmed the ends with my track saw. The top was a bit too long and heavy to cut these with a crosscut sled on the table saw.
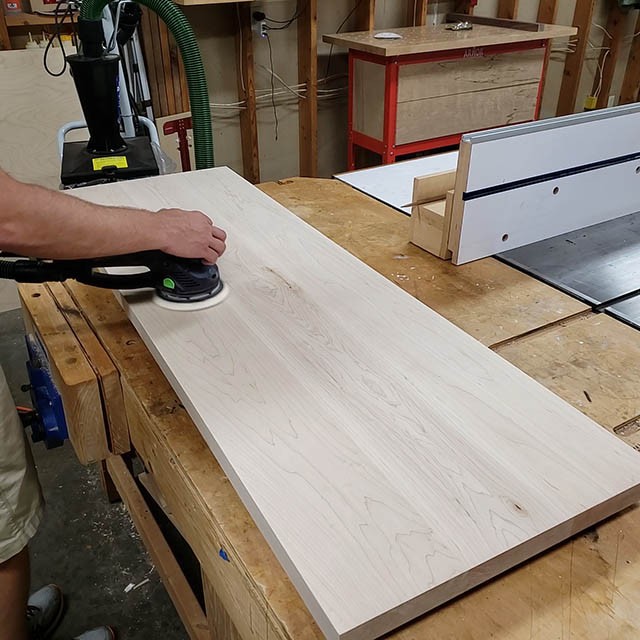
Then a good sanding of the top of 120 and 180 grits (I ignored the bottom since it will never be seen or touched).
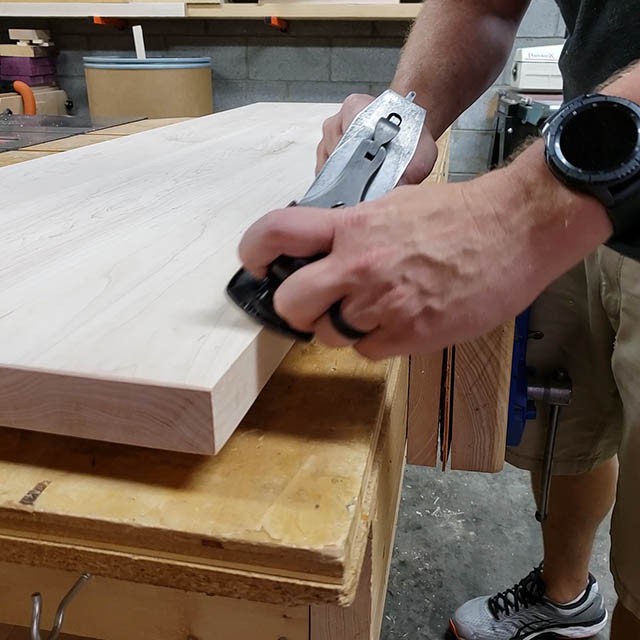
Finally I knocked down the edges with my plane.
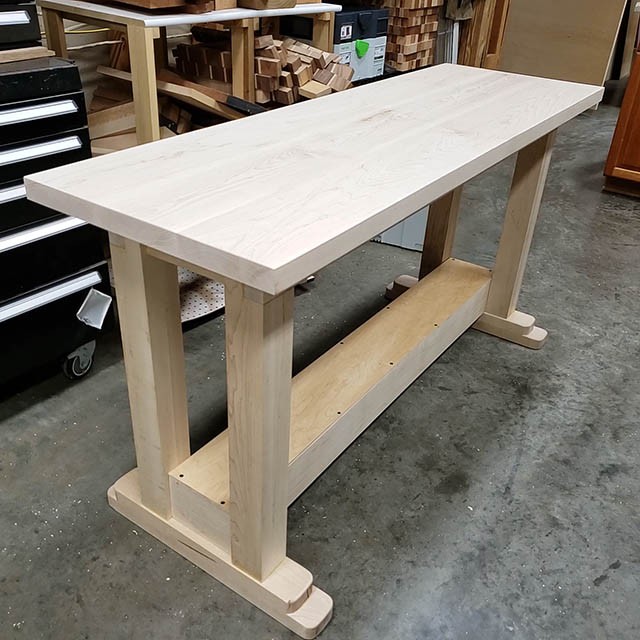
I sat the top on the base and positioned it where I wanted it.
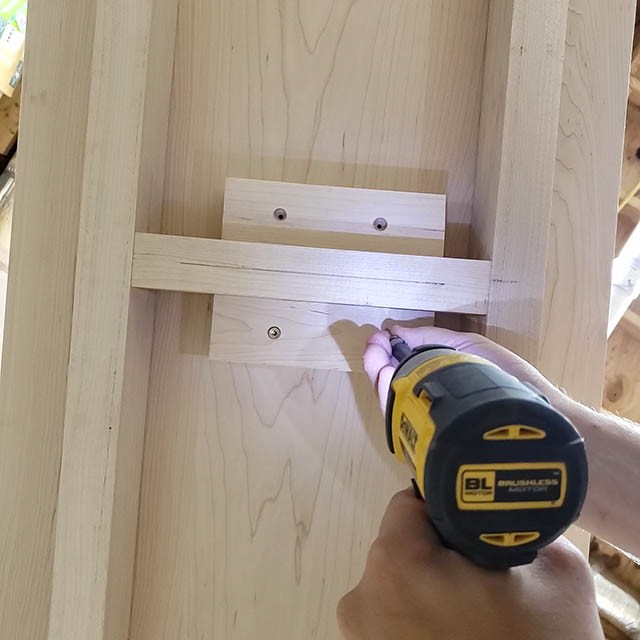
Next, I glued on these cleats onto the middle stretcher and I added similar cleats to the two ends. I screwed these into the top to anchor it from the middle. This gives the top the ability to expand and contract.
The Whole Enchilada Plan Bundle
The Whole Enchilada Plan Bundle! You want it all? You Got it! Get every plan I offer in one bundle at a savings of over 65%!
This product is a DIGITAL DOWNLOAD. You can immediately download your product off the order receipt page after the purchase. You will also immediately receive an email titled “Your MWA Woodworks order is now complete” that contains the download link in the “Downloads” section of the email.
Adding Storage to the Lathe Stand
With the base of the lathe stand essentially done, we can move on to the storage (cabinetry). I made mine out of 3/4″ pre-finished maple plywood.
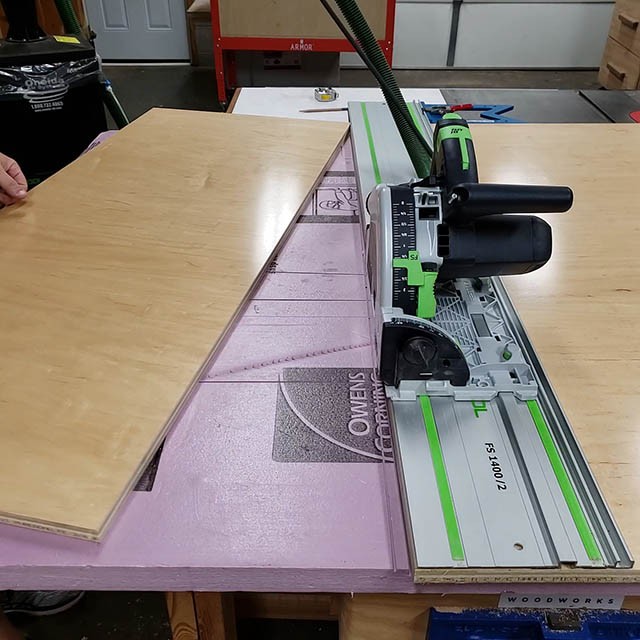
Using my tracksaw, I rip the plywood into strips that would be manageable to handle.
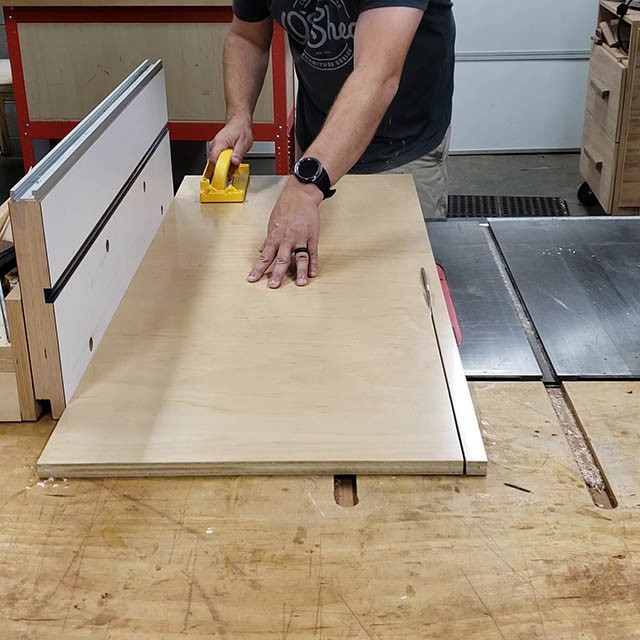
I then took them to the table saw where I cut them into the parts I needed for the cabinets. I ripped off the factory edge of the plywood first.
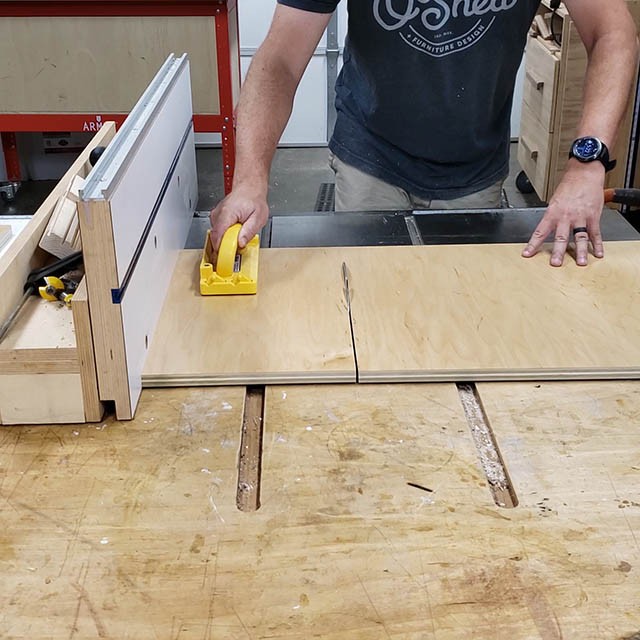
Then I flipped the ply and cut the parts out. All on the table saw.
This is super easy, just 9 parts needed (four for the left hand cabinet and five for the right).
Assembling the Cabinets
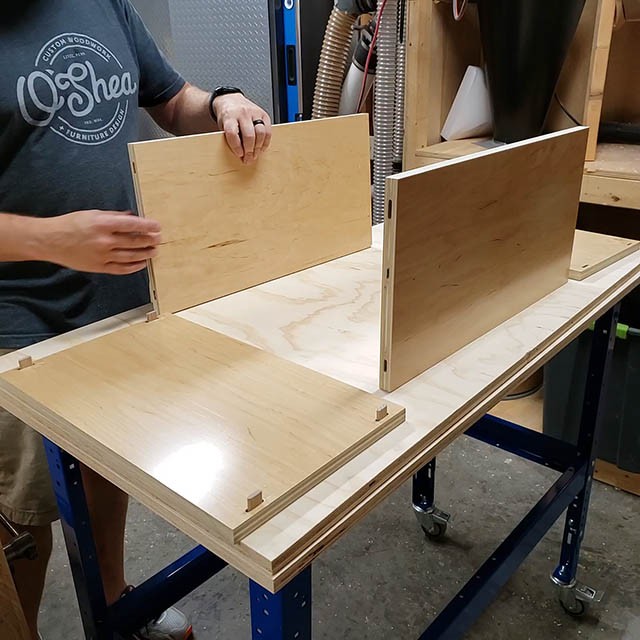
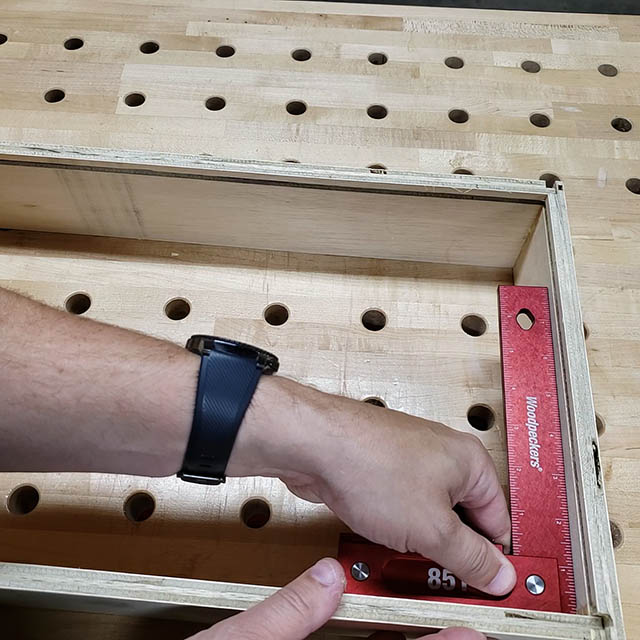
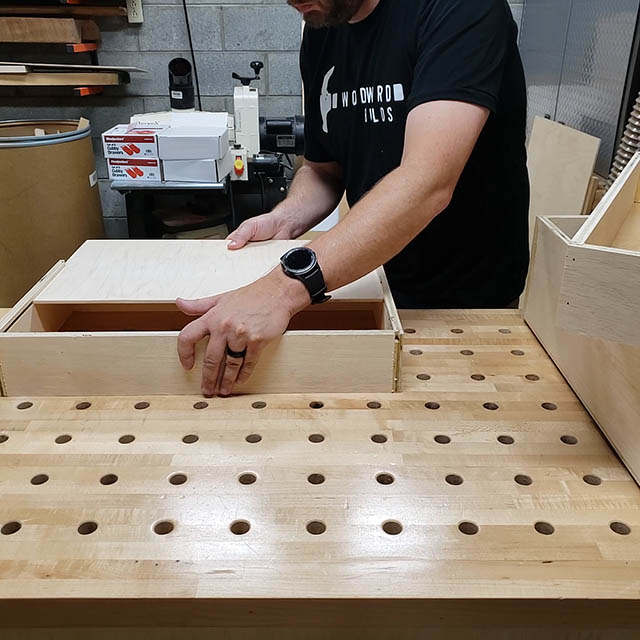
I then lined up all my parts just as a check to make sure the dimensions worked and would fit under the lathe stand.
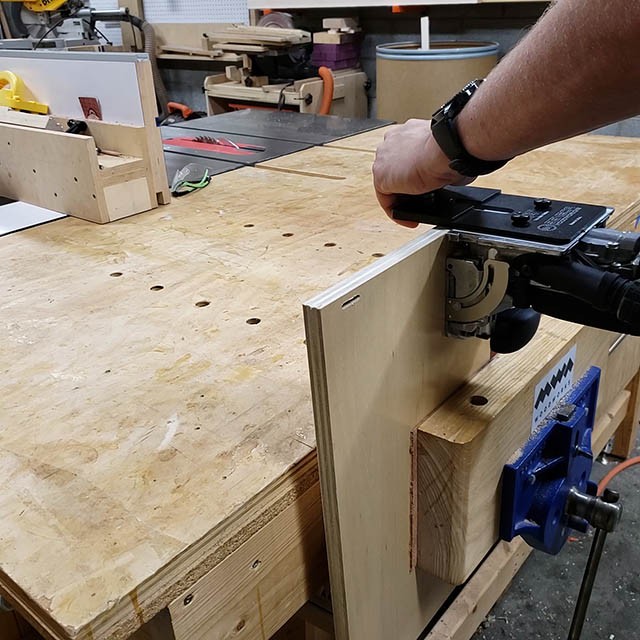
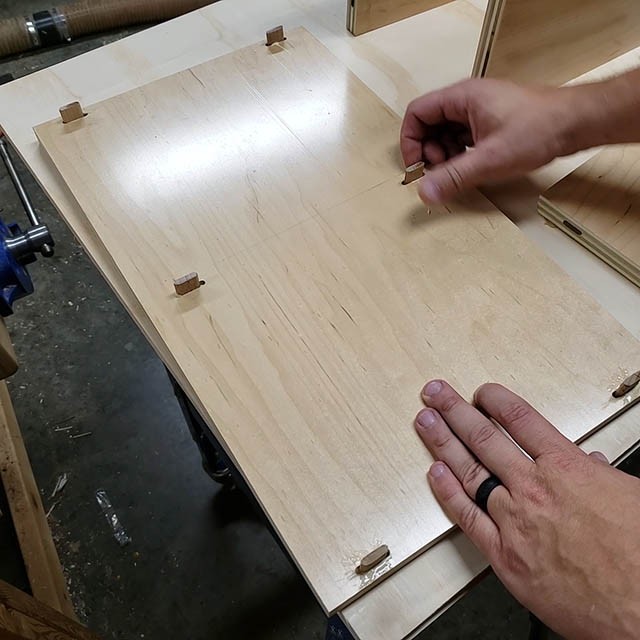
Then I took all the parts back to the workbench to add domino mortises to everything. This construction could easily be done with dowels or with pocket holes without needing to change the dimensions of the parts!
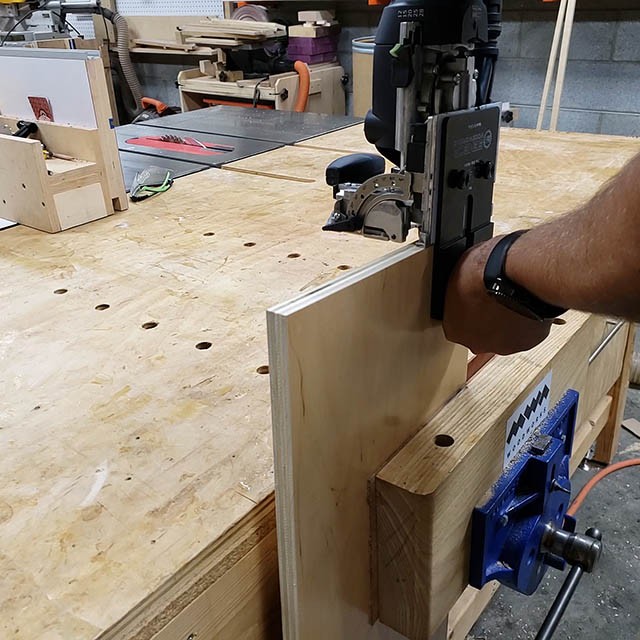
the horizontal parts get mortises in the ends rather than the face.
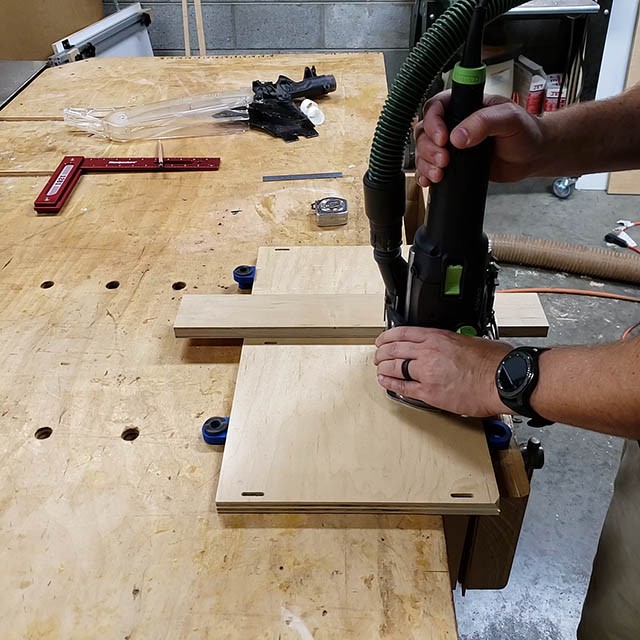
And the right hand side cabinet gets mortises in the middle to hold the shelf.
Once all the mortises were cut I added glue to them and slipped in the dominos before assembling the cabinets.
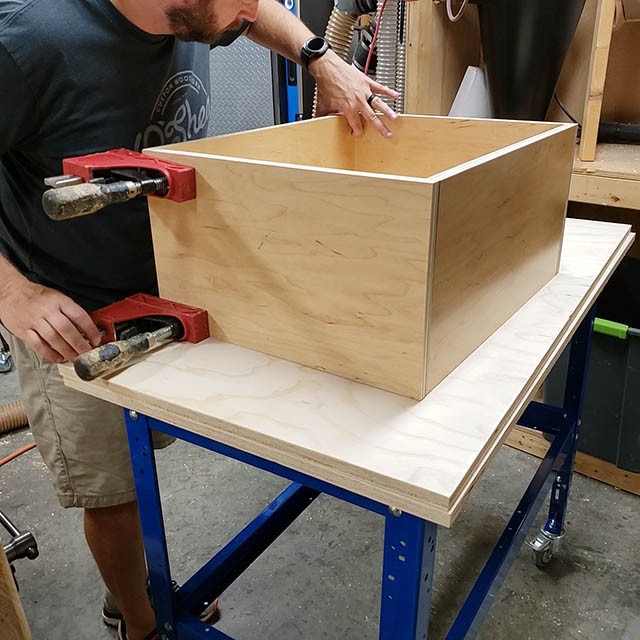
This is where building things with dominos shines. Everything fits together easily and you just clamp it up and wait.

Once the first cabinet is glued up and drying I can focus on the second one.
This one goes together the same way but with a shelf in the middle. You can see my domino mortises are a little loose to give me some play when assembling the cabinets. I cut the mortises in the horizontal parts tight. Only the vertical parts need to be loose.
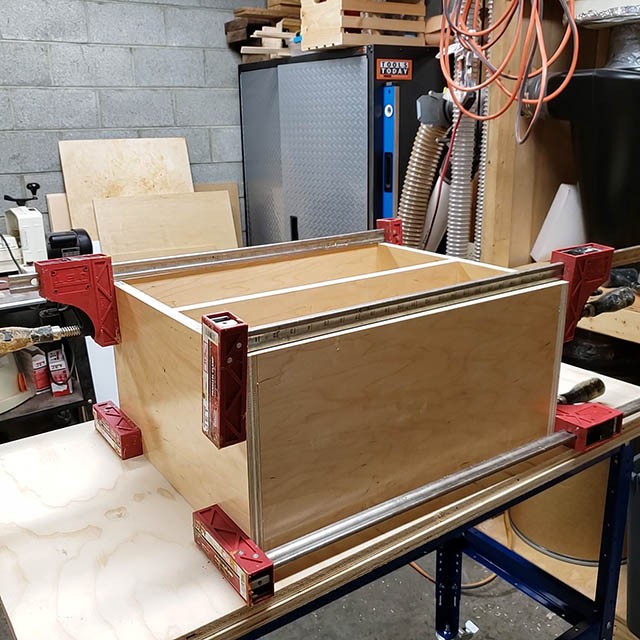
Again, clamp it up and wait for it to dry. About an hour is fine.
Installing the Cabinets
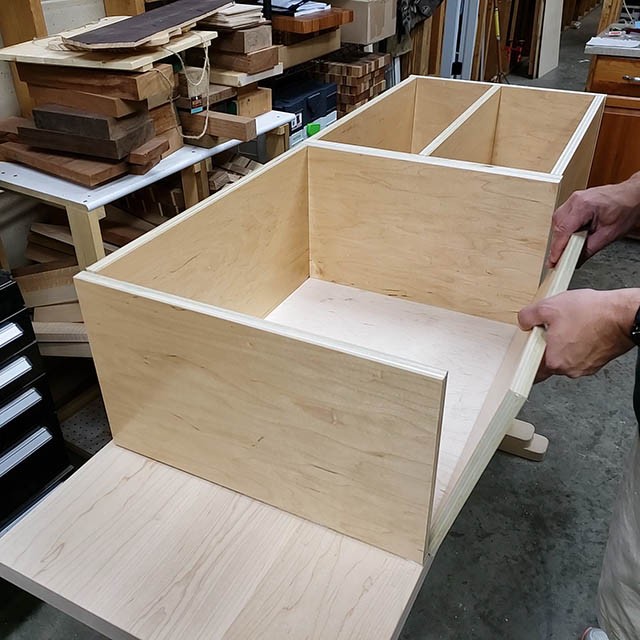
OK, once the cabinets are dry I could add them to the lathe stand. They just slip into place one on the left and one on the right.
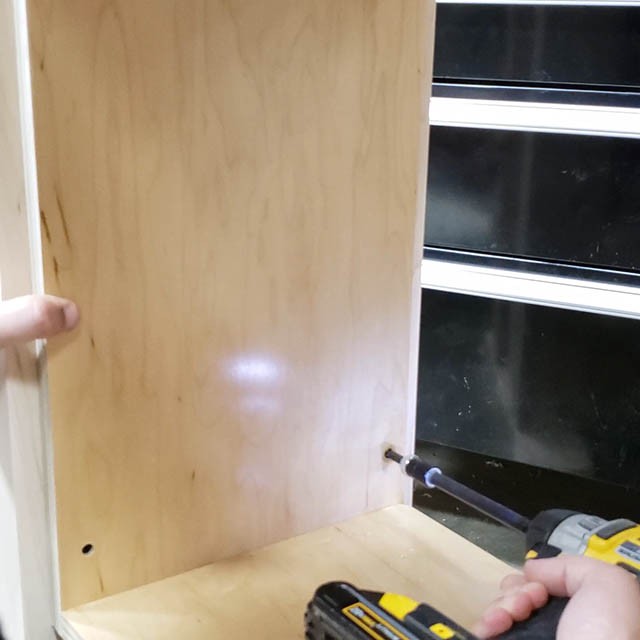
I just secured the cabinet to the legs of the stand with screws that I predrilled into the plywood.
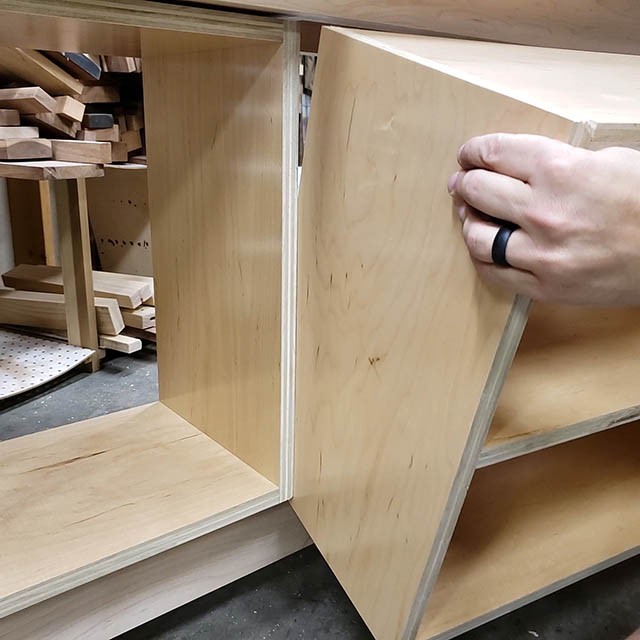
The second cabinet slips in next to it.
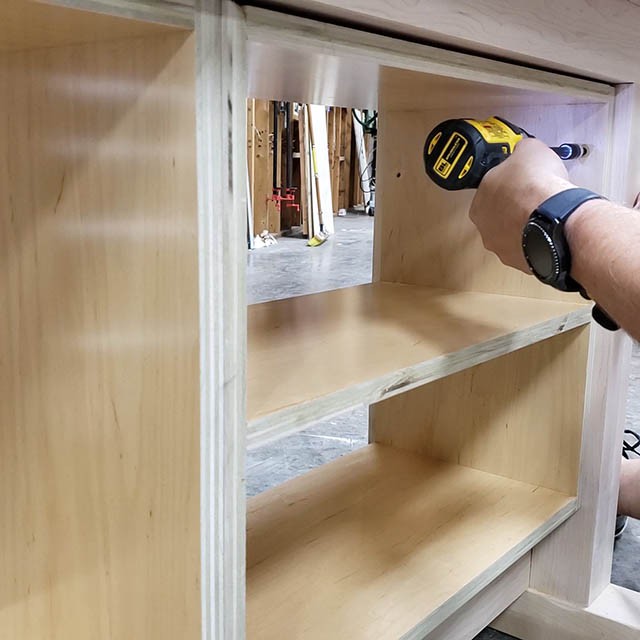
And is fastened the same way. You can decide which side you want your cabinets to be on. I put the cabinet without the shelf on the left. This cabinet will have the drawers in it. The other cabinet will have doors.
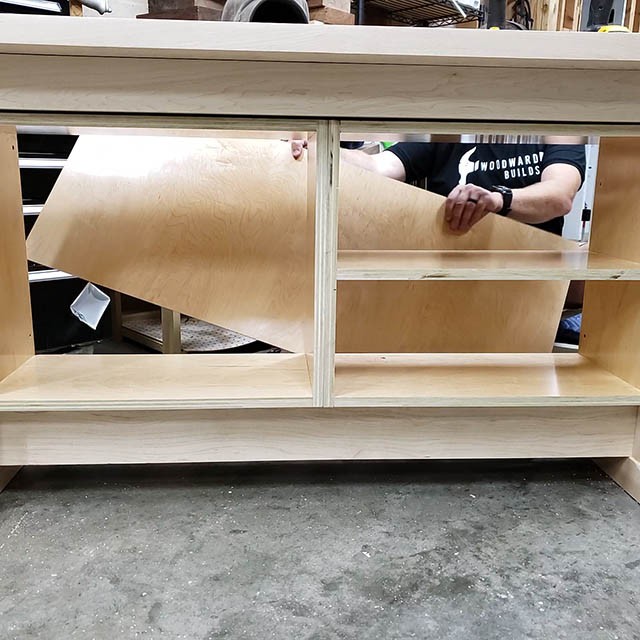
Next I fastened a piece of 1/4″ ply to the back of the cabinets. I used one big strip to cover them both for a seamless look.
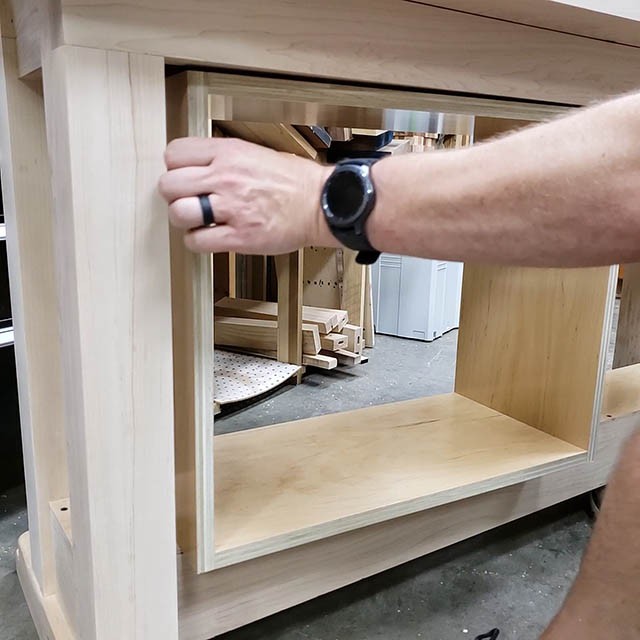
Here is what all that pre-finished plywood looks like when its all together. So nice and so convenient not to have to spray all those parts.
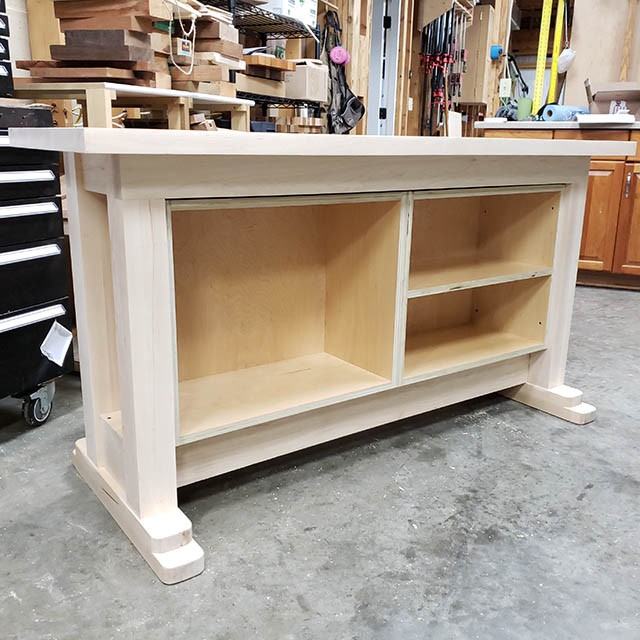
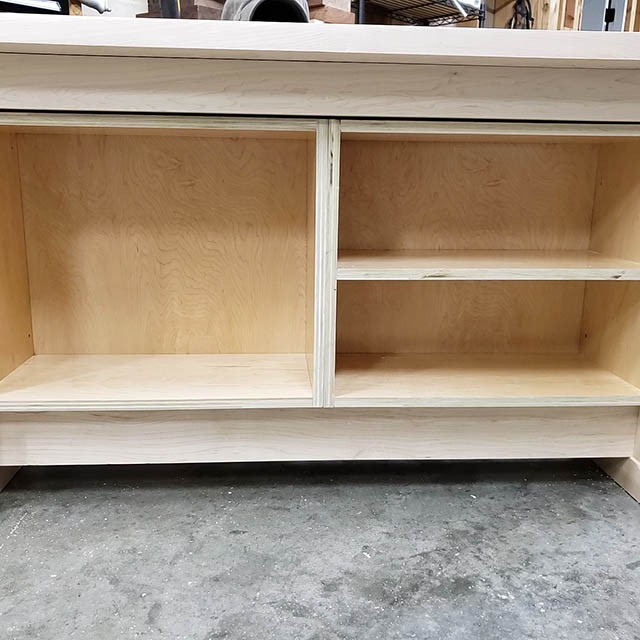
OK! Now its time to step back and check out our work! The stand is more or less done, we just need to add trim to the edges of the ply and then add drawers and doors. You can add however many drawers you wish, but I chose three. You can even make both sides drawers if you want, CRAZINESS! So many choices HA!
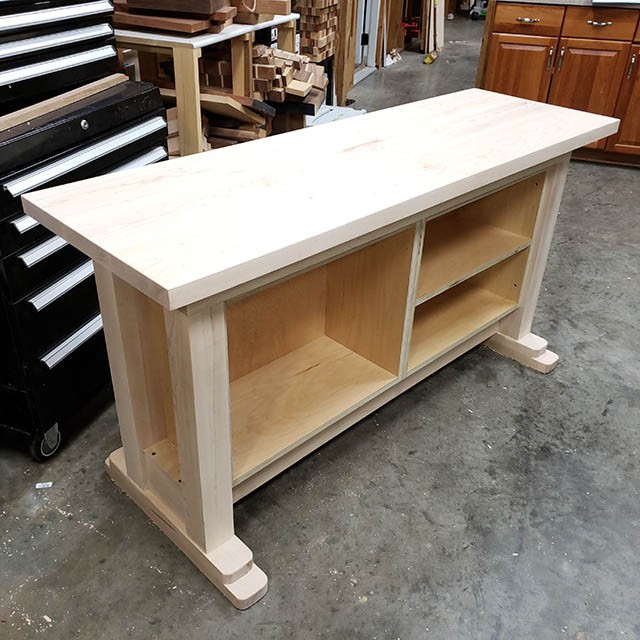
Here’s a view looking from the top.
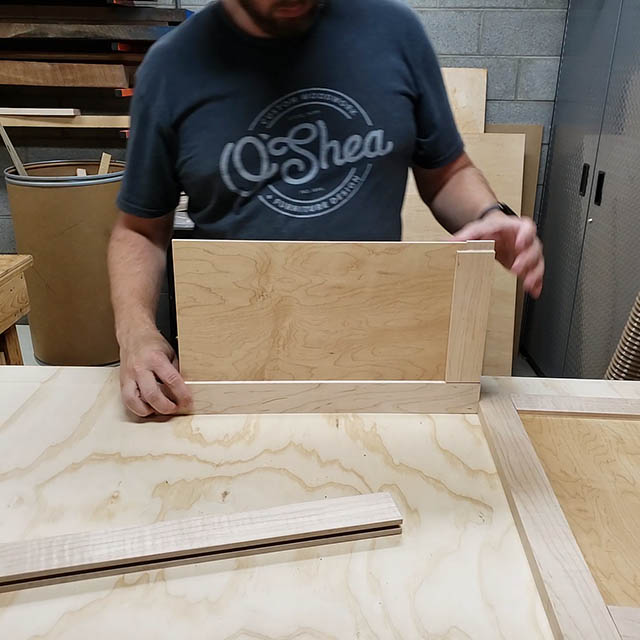
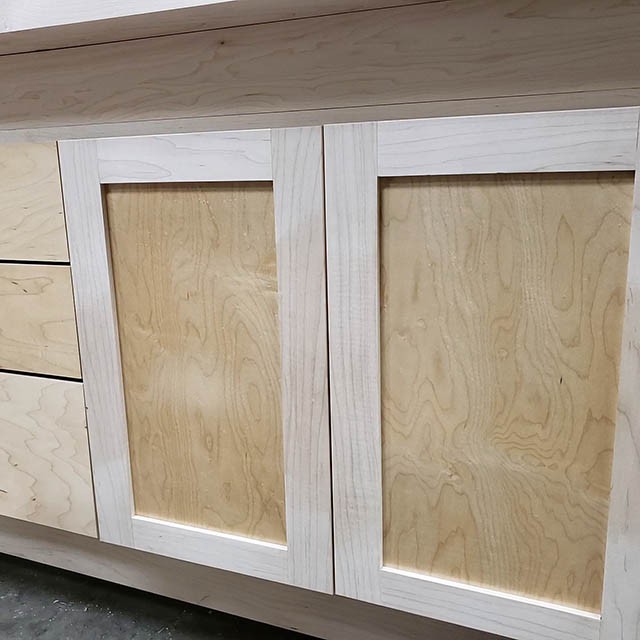
Making the Cabinet Doors
Start by making the parts that will form the frames of the doors. These are frame and panel doors and we are making two of them so we will need a total of eight (8) parts.
This is 3/4″ stock that I ripped to width at the table saw.
Then cut each part to length. You can use a mater saw for this too.
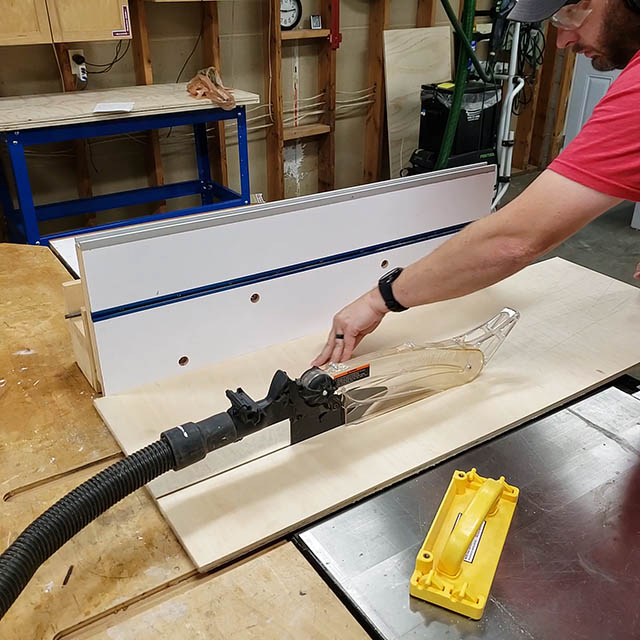
Next I added a 1/4″ groove right down the center of each part. This groove will both hold the panel in the center as well as serve as the mortise to hold the tenons of the end of the horizontal frame parts (more on that in a minute).

The way to center the groove is to run the part across the blade in one direction then flip it so the opposite face is against the fence and run it again.
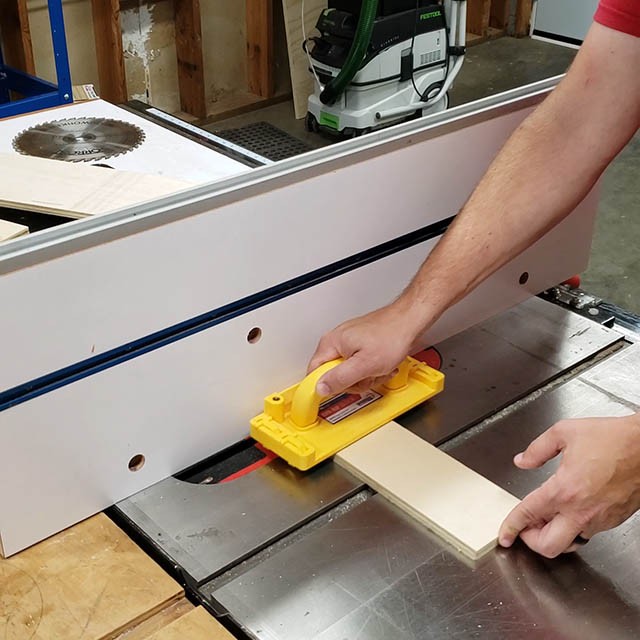
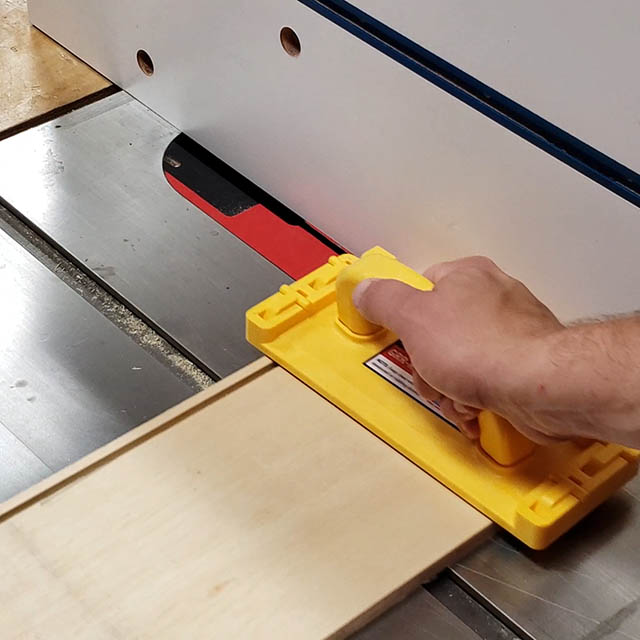
Next, I cut the tenons in the ends of the horizontal frame parts by running them vertically across the blade using my tenon jig. I have a tutorial on making frame and panel doors if you’d like to see more on this procedure.
All 8 frame parts can be cut entirely at the table saw.
Here’s the up-close of the tenons on the ends of the short horizontal pieces.
The doors assemble easily. Glue one short horizontal piece into the groove of the longer vertical piece to make an “L”. Then add your center panel into the grooves of both parts.
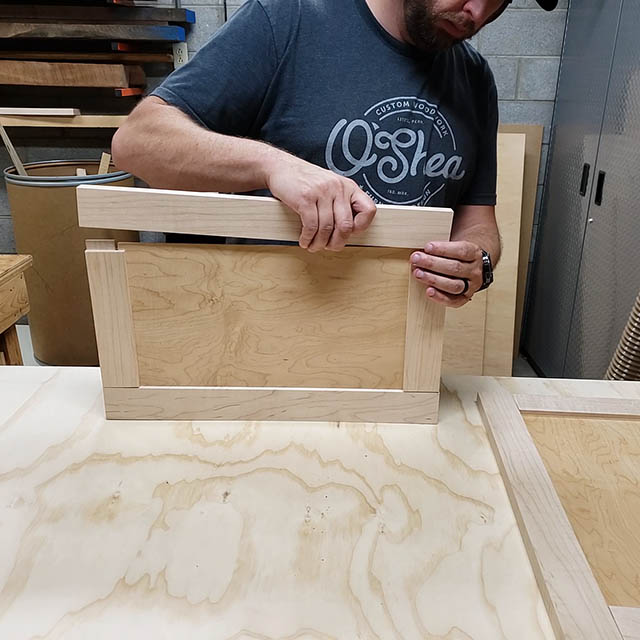
Add the other end by repeating that process and then glue the final side into place. Check for square when you’re done before you clamp them.
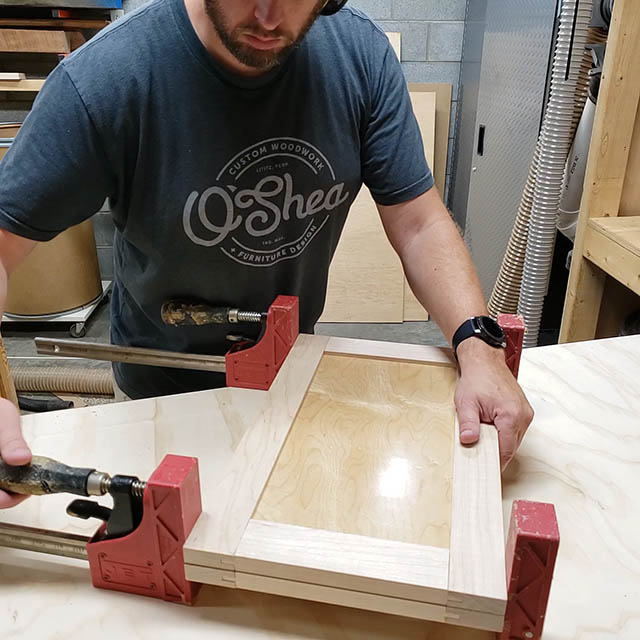
I added both doors to the clamps at once since they were small doors.
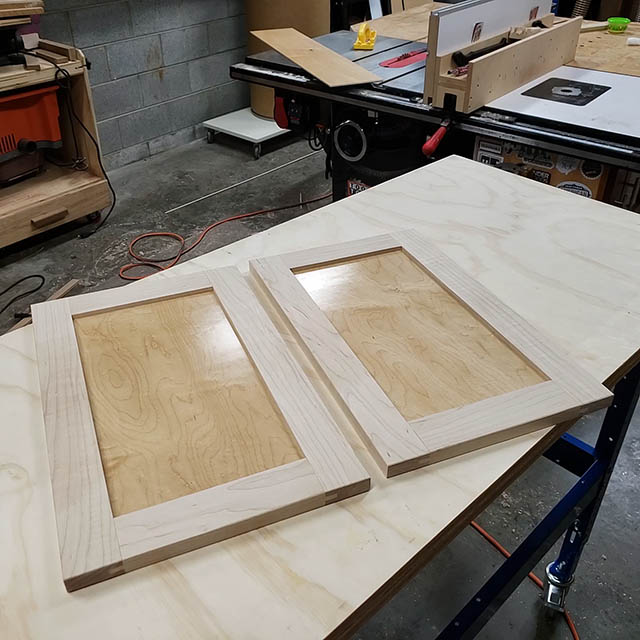
Here’s a shot of the final doors all dried and out of the clamps. Go ahead and sand them now with 120 and 180 grit making sure the joints are flush and everything is smooth to the touch. I was careful not to let the sander hit the center panel since they were already finished and I didn’t want to scratch them.
Making the Cabinet Drawers
Next I made the drawer parts, which I used 1/2″ ply for. I ripped all my drawer sides out and cut them to length to fit in my cabinet.
I then cut grooves along each side and a mating rabbet to create a locking drawer joint.

This groove accepts the tongue of the drawer front to create a joint that is strong.
You can also see the same groove here cut along the length to accept the drawer bottom.
Once you have all four sides cut you can lay them out to do a dry fitting.
Insert the tongue on the front drawer part into the groove on the side.

Repeat that process until you have all four sides glued and in the clamps. I reinforced my joints with brad nails.
Finally you can slip the bottom into place using the grooves that run along the bottom.
I secured the bottom using brad nails.
Checking everything for square along the way is important for the drawers to fit properly into the cabinet.
I repeated this process for all three drawers.

Here you go! Three drawers ready to go.
Adding the Face Frame
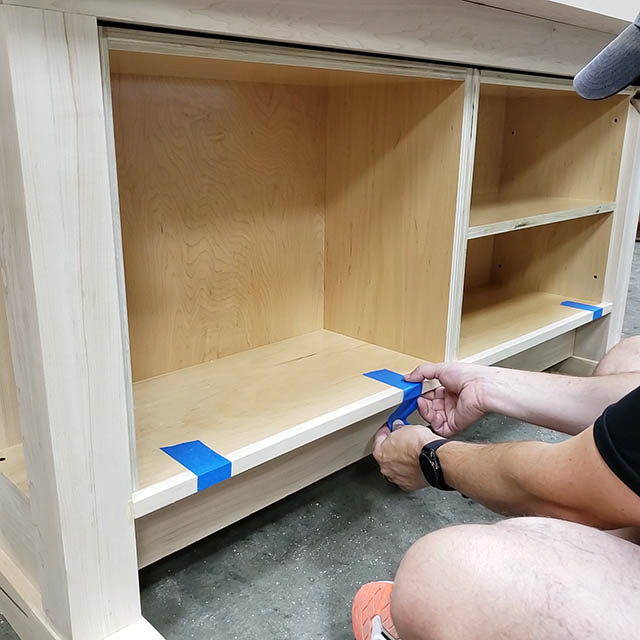
I cut 3/4″ square edge banding to apply to the cabinet fronts. I just cut them to length and fit everything together as I went around the cabinet.
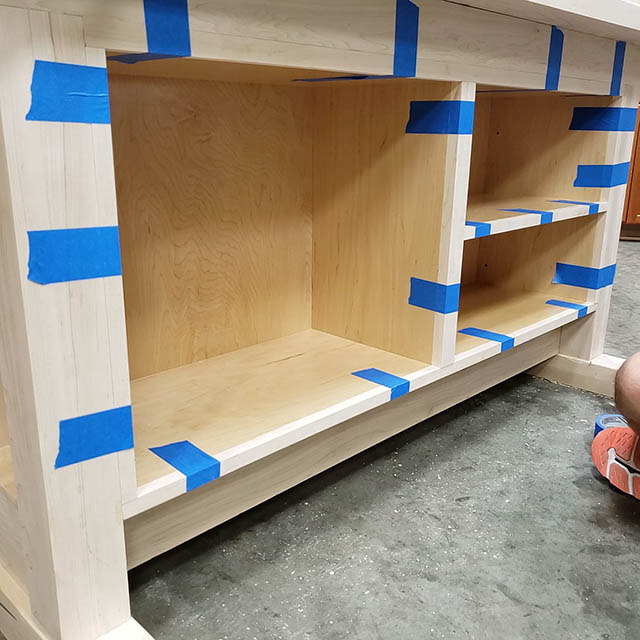
Blue tape is a great clamping mechanism to let the glue dry.
Installing the Drawers and Doors
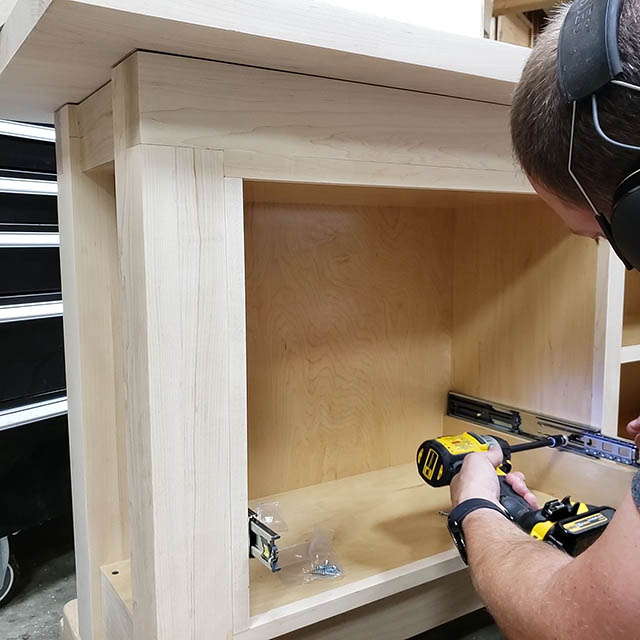
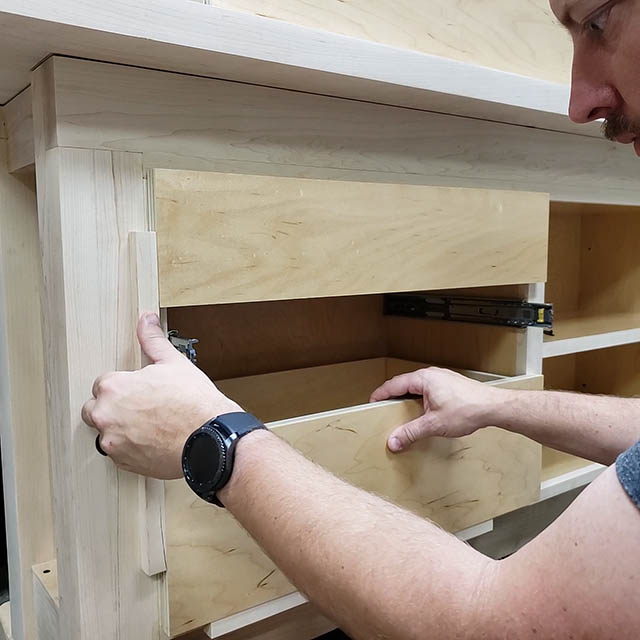
Next it was on to drawer slides. I used a spacer strip to mount them where I wanted.
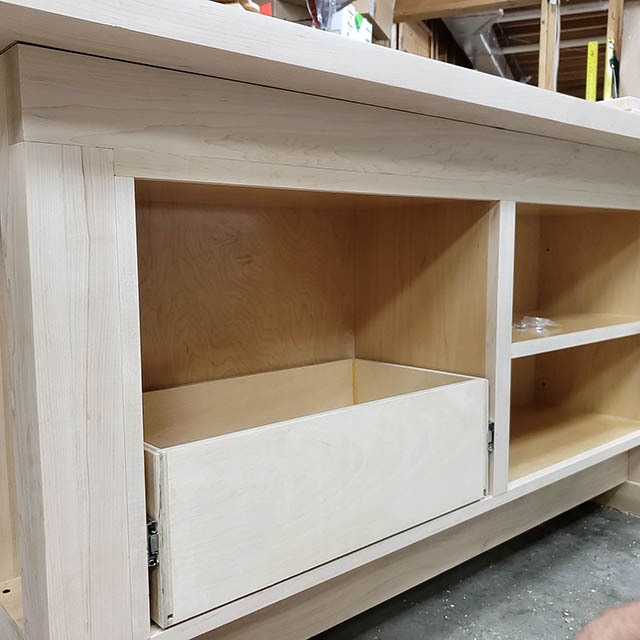
With the first drawer in I can work my way upward.
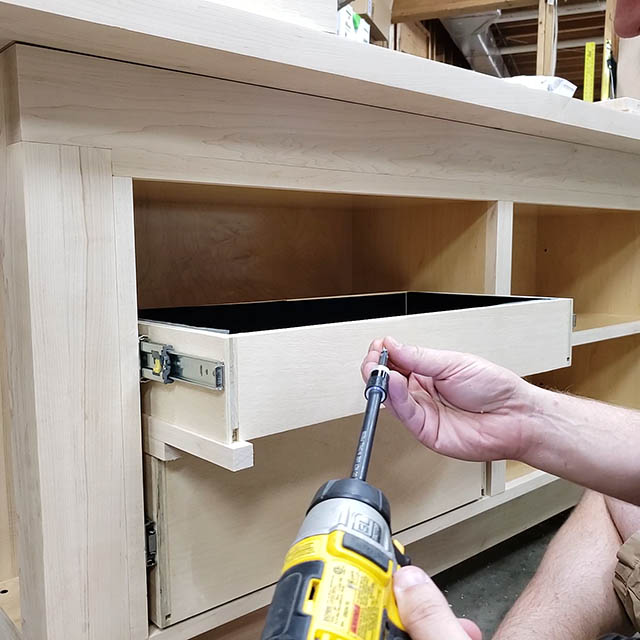
I set my drawer on spacers as well to give the correct spacing between the drawers.
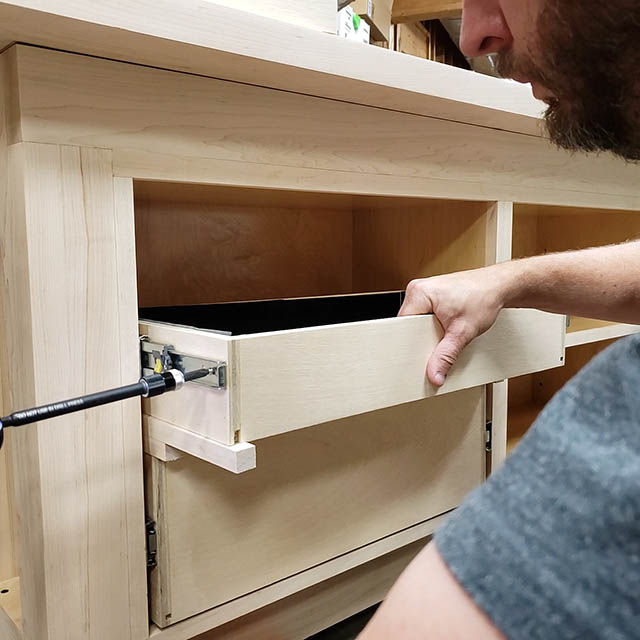
I fastened the slides to the drawer this way to ensure proper placement.

With the last drawer installed I can move on to the drawer fronts.
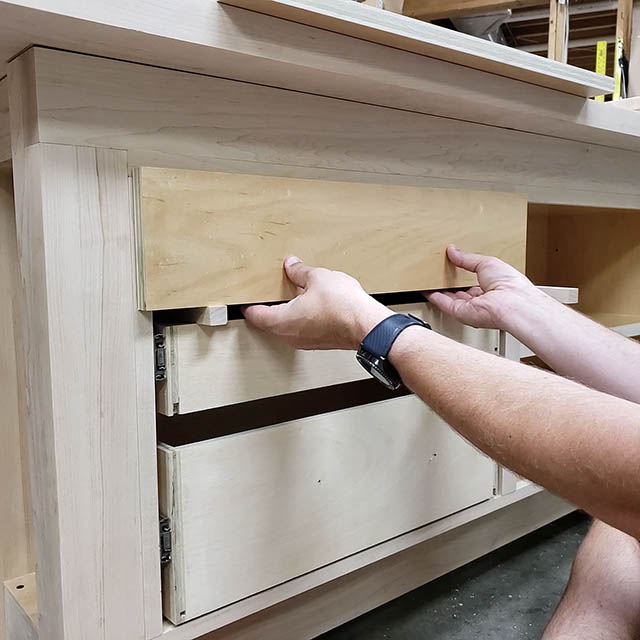
I’m using more of the 3/4″ pre-finished ply for the fronts to match the center panels of the doors I made.
Using my spacers strips I line up the fronts vertically.
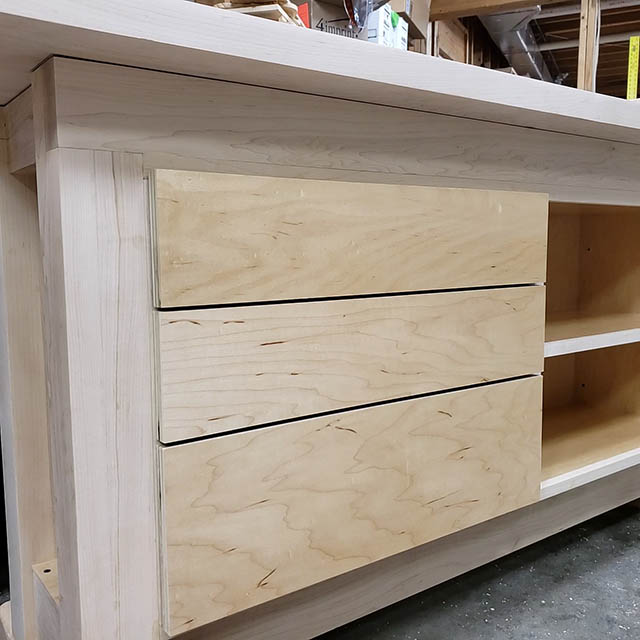
Screwing the drawer fronts in from the back with two screws each completes this task.
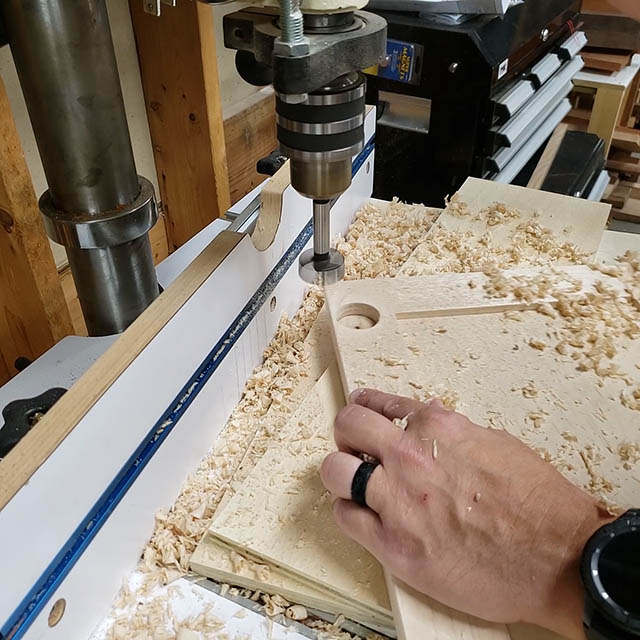
Using a 35mm forstner bit, I bored holes for the cup hinges on the doors.
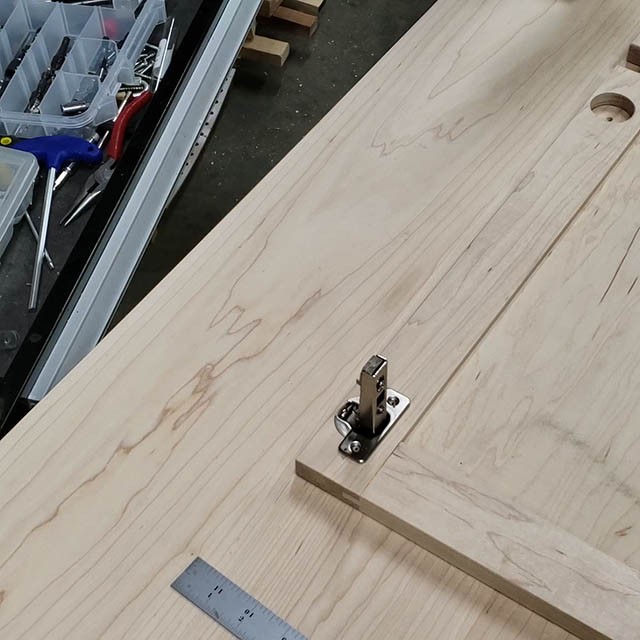
Here is the cut hinge installed on the door.
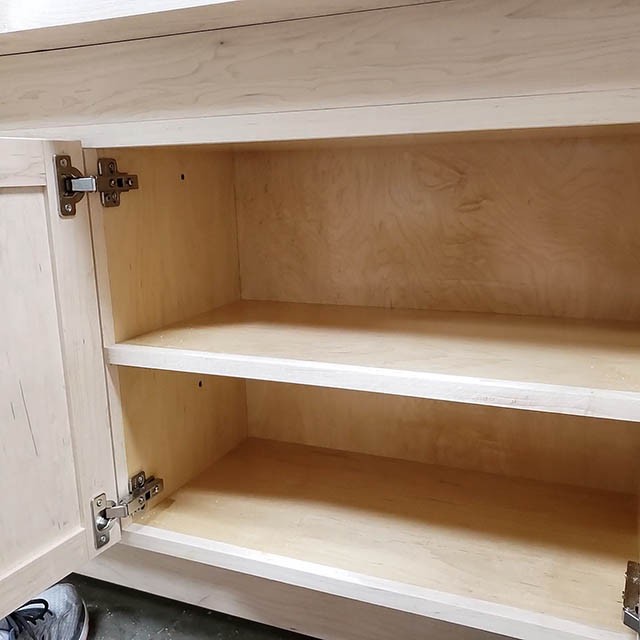
Here’s the installed doors. I lined the door side hinges with the cabinet side of the hinge and fastened them to the cabinet.
After a bit of alignment adjustment everything looks evenly spaced!
Adding the Finishing Touches to the Lathe Stand

This lathe stand is almost done. Just a few other small things to address.
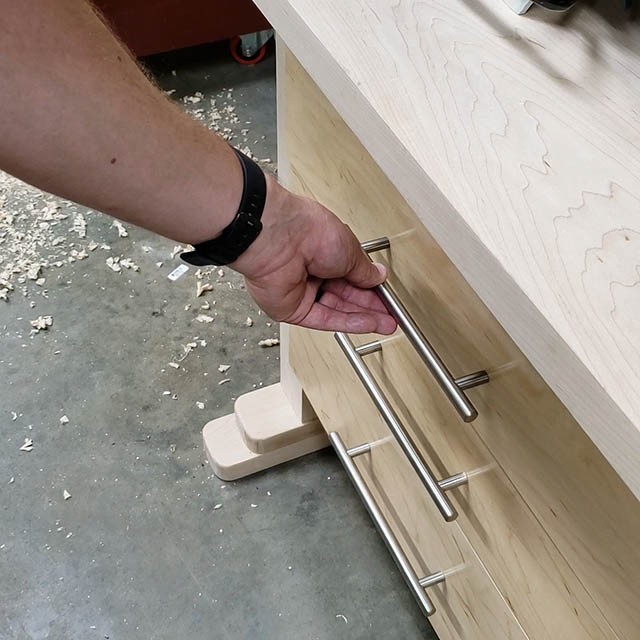
I added stainless drawer pulls because I think they look soooooo good next to the maple.
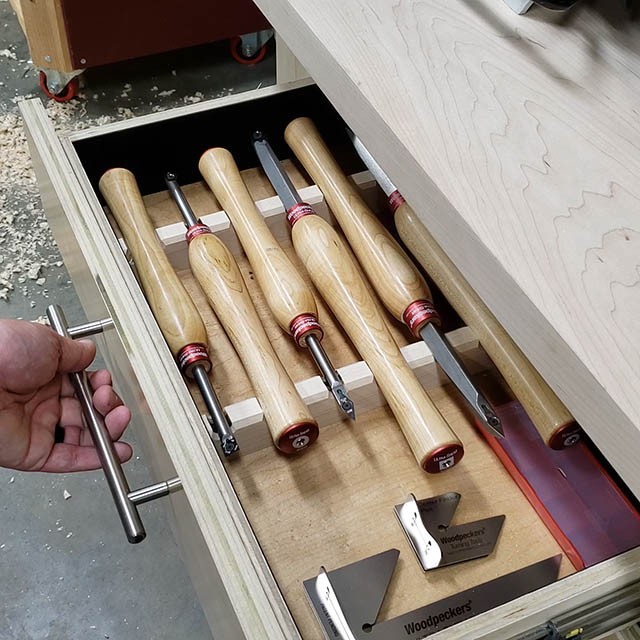
I also added these custom turning tool holders to the top drawer. This way there is no rattling around.
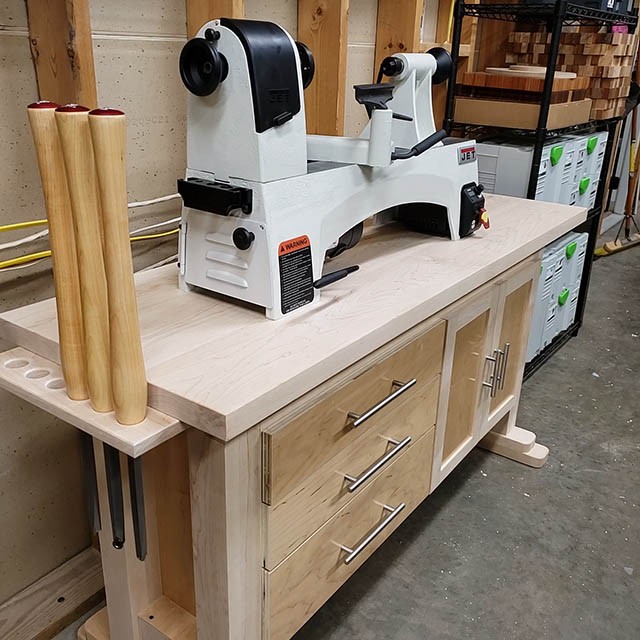
I added one more simple tool holder to the side for my longer turning tools.
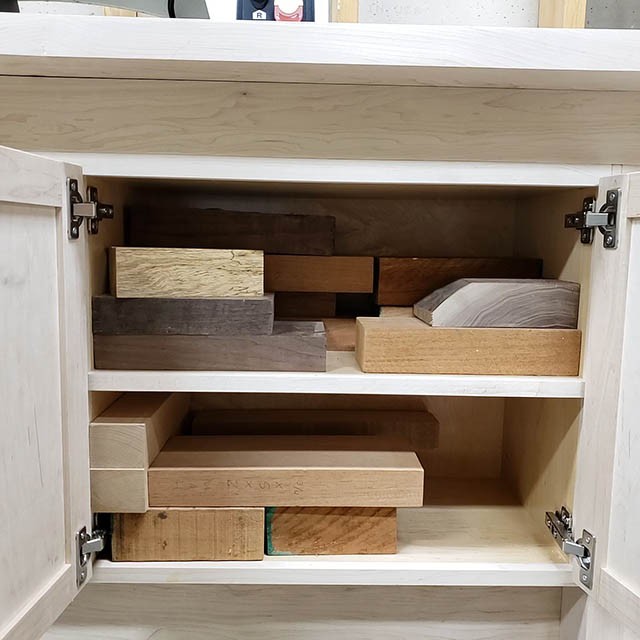
And added some turning blanks to the cabinet!
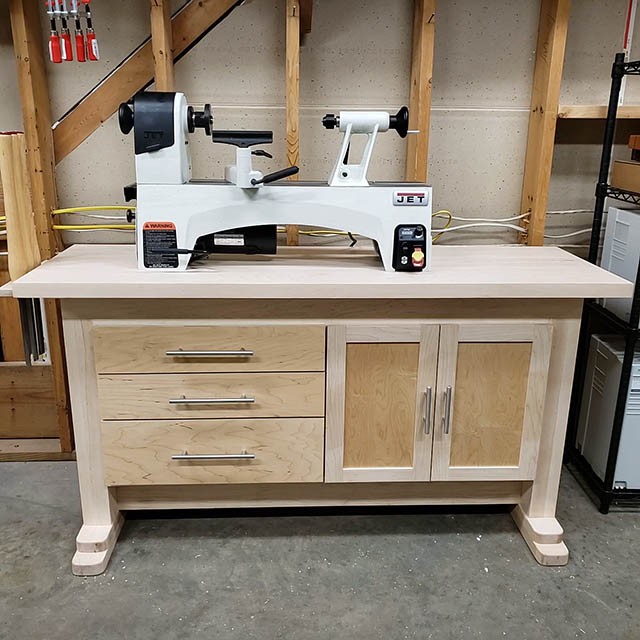
I have my midi lathe on the stand now with plenty of room to add the bed extension. I can also fit a full sized lathe on this stand when the time comes to upgrade.


