
In this project I show you the steps to producing a large walnut end grain butcher block from rough lumber all the way to finished product. I’ve made hundreds of these boards and I’m sharing all the tips and tricks I know to help you be successful in making one yourself!

DID YOU KNOW: You can follow me on these social media platforms!
Instagram · YouTube · Facebook · Pinterest
| Materials & Supplies* | Tools* |
| (?) 8/4 Walnut (quantity will vary) | Forstner bit |
| Water resistant glue | Festool Rotex |
| Mineral oil and beeswax mix | Festool ROS |
| 1″ Anti-Skid Pads | Drum Sander |
| 1″ Round Nose Router Bit | |
| Block Plane | |
| Spray Bottle (water) | |
| Disc Sander | |
| Table Saw | |
| Miter Saw (or jig saw) | |
| Jointer & Planer | |
| Crosscut Sled | |
| Parallel Clamps |
*I use affiliate links, please see details on my disclaimer.
The Whole Enchilada Plan Bundle
The Whole Enchilada Plan Bundle! You want it all? You Got it! Get every plan I offer in one bundle at a savings of over 65%!
This product is a DIGITAL DOWNLOAD. You can immediately download your product off the order receipt page after the purchase. You will also immediately receive an email titled “Your MWA Woodworks order is now complete” that contains the download link in the “Downloads” section of the email.
How to Make an End Grain Butcher Block
This project build will illustrate the build process for an end grain butcher block beginning with the milling of rough cut lumber. If the material you are working with is already pre-milled (surfaced straight and square) you can skip the first section of this tutorial.
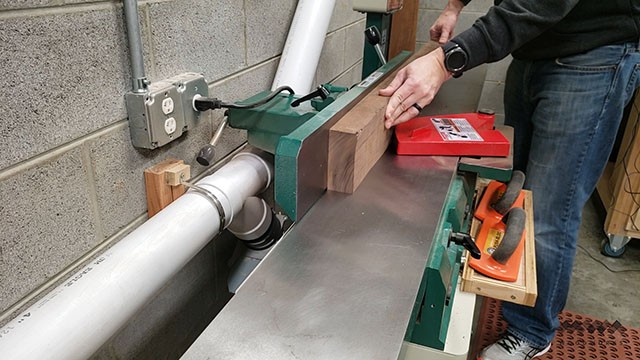
Prepping Your Material
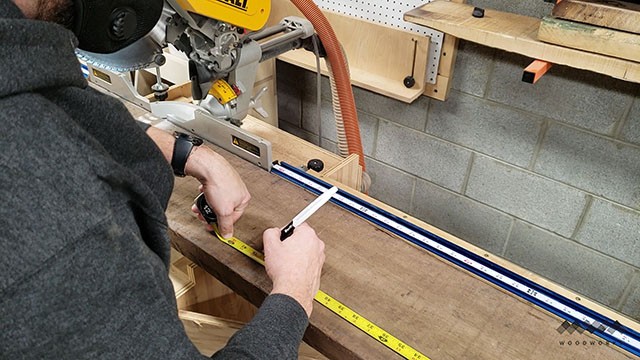
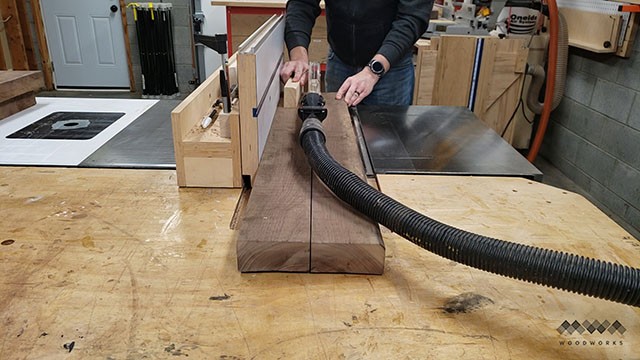
I begin by cutting this 12 foot rough-sawn walnut lumber into rough lengths at the miter saw. *TIP: Use a white marker (or chalk) to mark your lines on dark woods such as walnut to better see your cut lines.
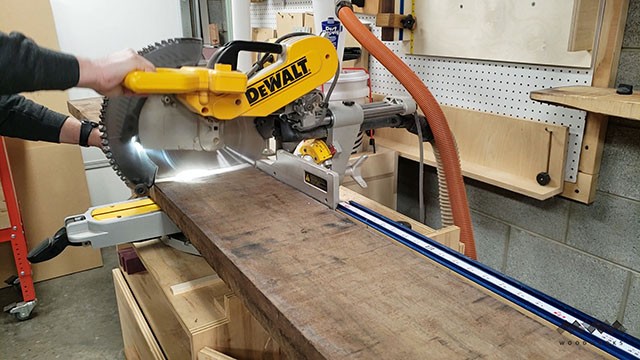
Many times rough cut lumber isn’t perfectly straight and you can get a gap between the lumber and the fence of the miter saw. If you cut the material the same way you would cut something that has been milled (moldings, plywood, dressed lumber) you could experience an unpleasant kickback. To avoid this, cut a kerf line in the material then cut through the material furthest from the fence first and then the material nearest the fence. This will greatly reduce the risk of the material pinching the blade as you push through the cut, causing the kickback. This method only works for SLIDING miter saws. If you have a standard miter saw, avoid cutting this material on the miter saw and opt instead for a jig saw.
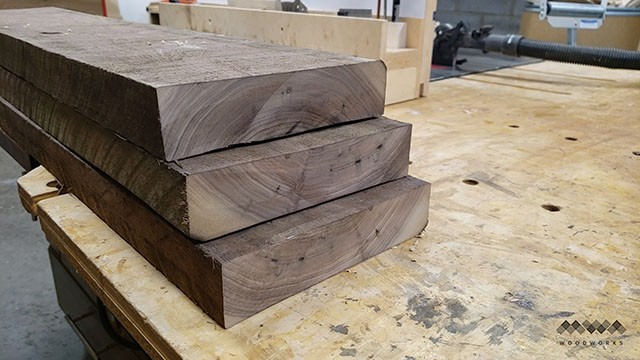
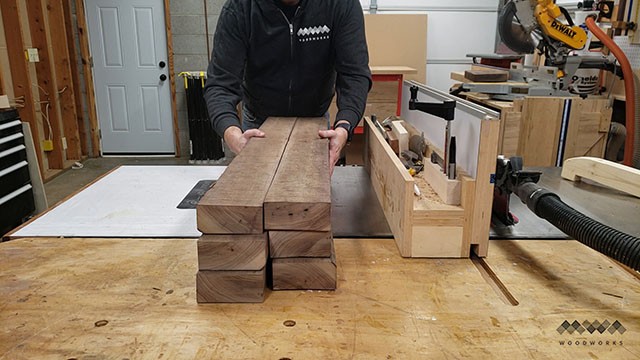
Rough cut lumber is, well, rough and needs to be flattened and squared during the milling process. You can see the cupping in the boards above.
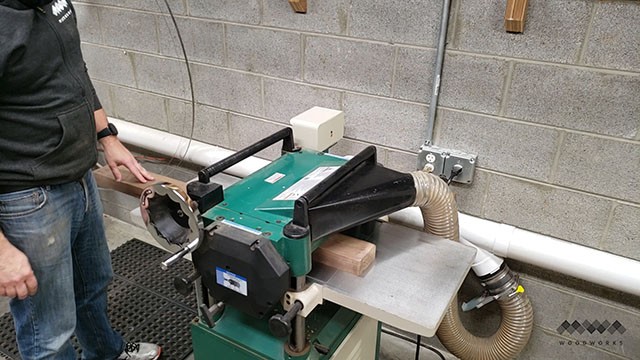
The Milling Process
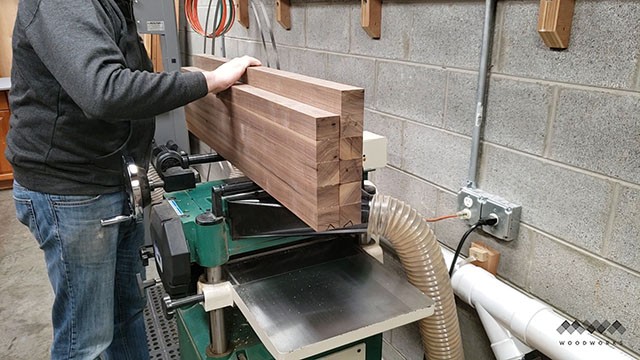
Since these boards are too wide for my 8″ jointer, I need to cut them in half at the table saw. A side benefit to this is that it reduces the amount of cupping (you are cutting the cup in half) which means you don’t have to mill off as much material to make them flat.
Once all my boards are cut in half, I can take them to the jointer and planer. Can you believe all that walnut is going to go into ONE butcher block?!
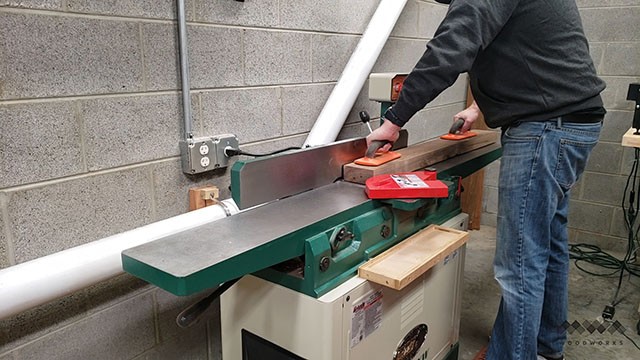
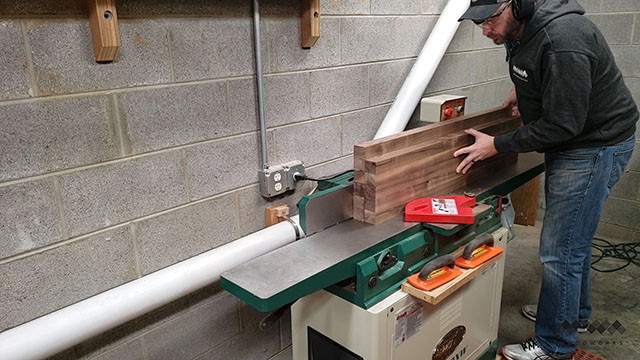
I begin by milling one face of my lumber flat. If your material has a bow in it, place the bow face down (so the front and back are touching the table and the “belly” in the middle is sticking up.
Once I have that face flat, I stick it against the fence and square up one edge to the flat face.
We repeat this process with all our boards (flatten one face, square one edge)
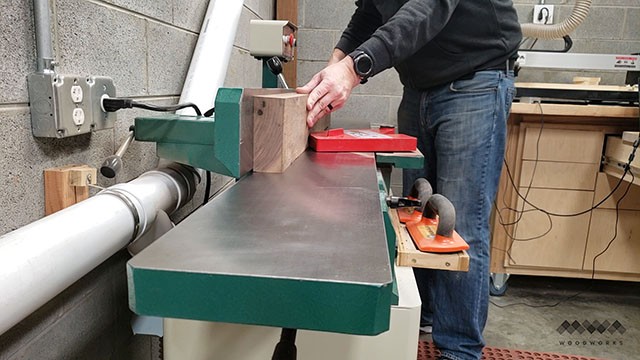
Now, I take the flat face and put it face down at the planer. This will allow me to make the opposite face flat and coplanar to the first side.
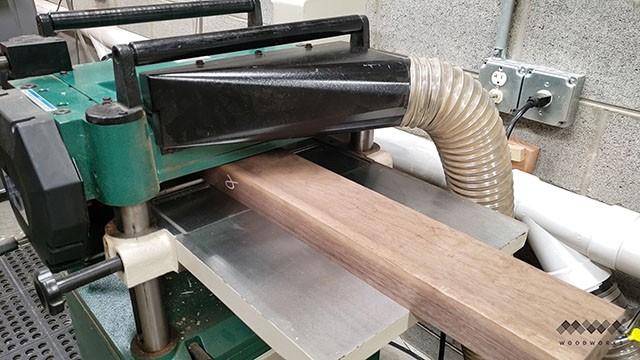
Once completed, this means I have two sides perfectly parallel to one another with an edge between them that is 90 degrees. I repeat this will all my boards.
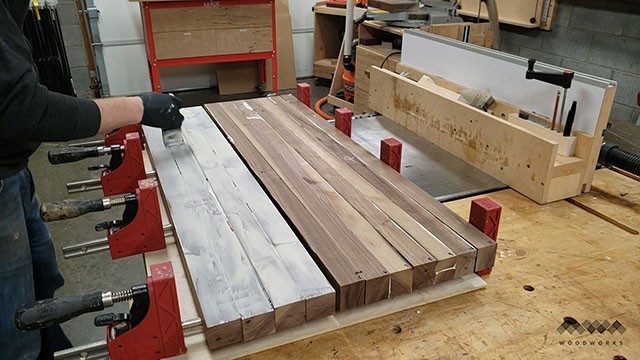
Now, with my table saw set to 90 degrees, I cut my boards into strips, this creating the fourth squared edge.
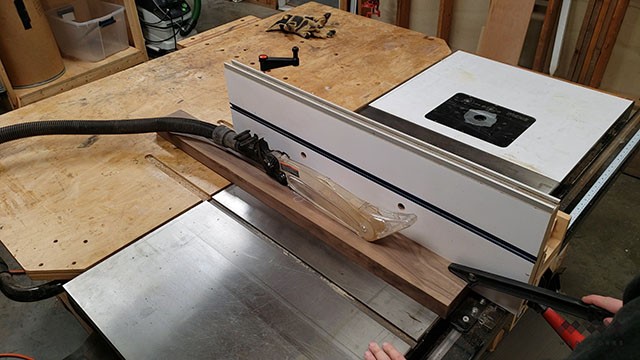
It’s essential that your table saw be able to accurately hold 90 degrees here otherwise your panel glueup won’t go smoothly and you could have gaps or a non-flat panel.
*TIP: If you want your end grain segments to be perfectly square, then cut these strips slightly narrower than they are thick. This way you have some material to plane down once the panel glueup is dry and you run your panels through the planer.
The Whole Enchilada Plan Bundle
The Whole Enchilada Plan Bundle! You want it all? You Got it! Get every plan I offer in one bundle at a savings of over 65%!
This product is a DIGITAL DOWNLOAD. You can immediately download your product off the order receipt page after the purchase. You will also immediately receive an email titled “Your MWA Woodworks order is now complete” that contains the download link in the “Downloads” section of the email.
The First Glue-up
Once all my strips are cut for the butcher block, I apply glue and cover all the boards totally.

Make sure to brush the entire surface to ensure good even glue coverage.
rotate the strips to form the first panel.
leave one glue seam bare (no glue) and then repeat with the second panel. This will allow for the two panels to fit into the planer to flatten them.
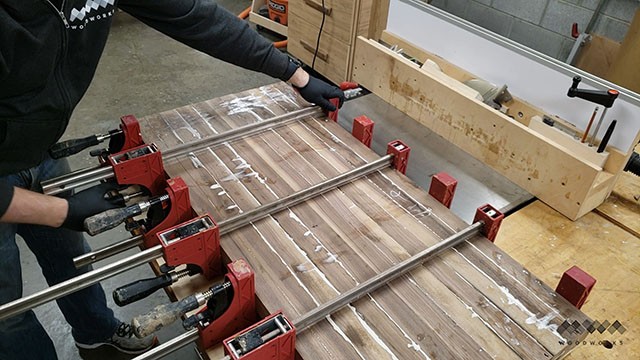
Alternate clamps to promote even clamping pressure and to avoid tensions that might cause a warped panel.
Milling, Part Deux
Once the glue has dried (minimum one hour, typically I wait overnight).
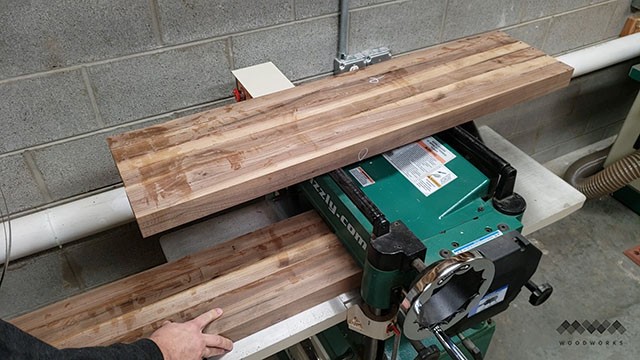
Run the panels through the planer until both sides are flattened and also the exact same thickness.
Once both panels are coplanar, line the glue joint up the way you’d like it based on the grain patterns and draw a diamond across the glue joint on the side of the two panels. This will allow you to know how the board goes together later.
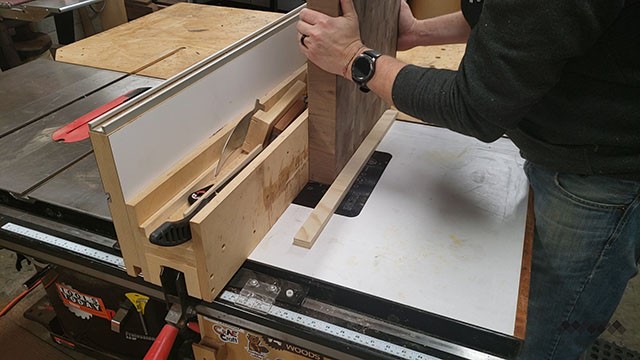
In order to get a tight fitting glue joint, fold your two panels together like a book and take them to the jointer.
Running both panels across the jointer at once in this manner allows for any potential inconsistency in your jointer’s fence being slightly off 90 degrees. It will create supplementary angles (two angles that when combined add up to 90 degrees).
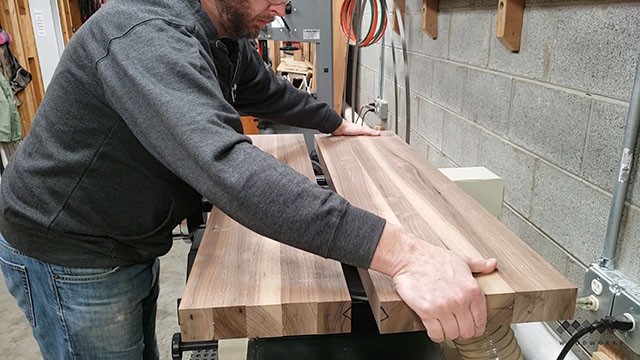
Now, unfold your panels back to their original position and check the joint you just made.
Everything should be tight and near invisible. If not, repeat the process again.
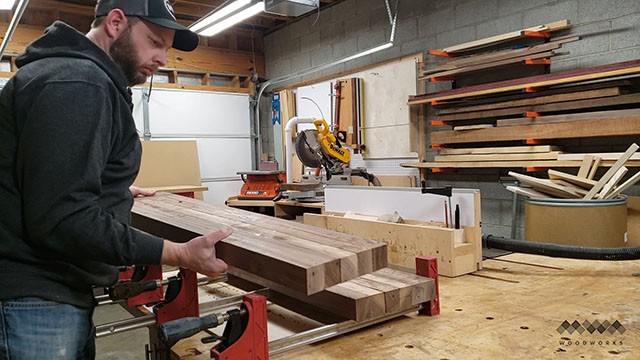
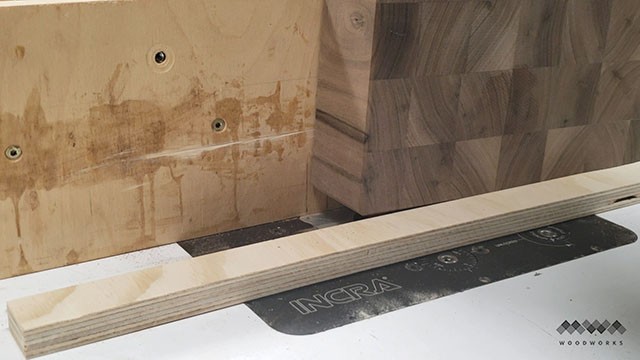
Next, trim up one edge of each panel so that when you combine the boards you have one square reference edge.
The Whole Enchilada Plan Bundle
The Whole Enchilada Plan Bundle! You want it all? You Got it! Get every plan I offer in one bundle at a savings of over 65%!
This product is a DIGITAL DOWNLOAD. You can immediately download your product off the order receipt page after the purchase. You will also immediately receive an email titled “Your MWA Woodworks order is now complete” that contains the download link in the “Downloads” section of the email.
The Second Glue-up

Add a bead of glue to the glue joint. You don’t need a ton of glue this time as you want to keep this glue joint fairly clean. You want to be able to check the joint to confirm its alignment easily.
Now clamp it up. Because you’re only dealing with one tight joint, you don’t need many clamps. I find three to be plenty to get squeeze-out across the panel. You should aim to have a very neat glue joint here. Make sure your two panels are perfectly aligned which will cause you to do less clean up of the joint. I recommend spritzing water on the joint to clean all the glue off. Don’t worry about glue staining because this panel is going to be cut into strips and glued together so that this will all be hidden.
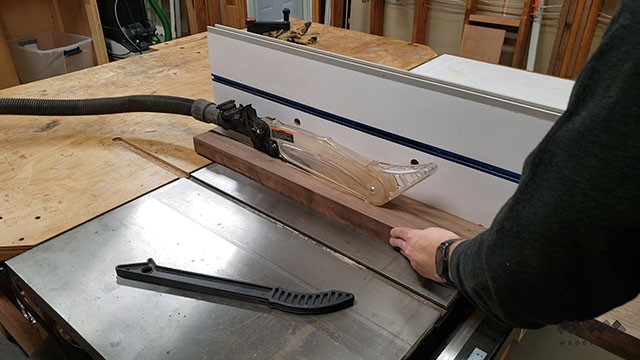
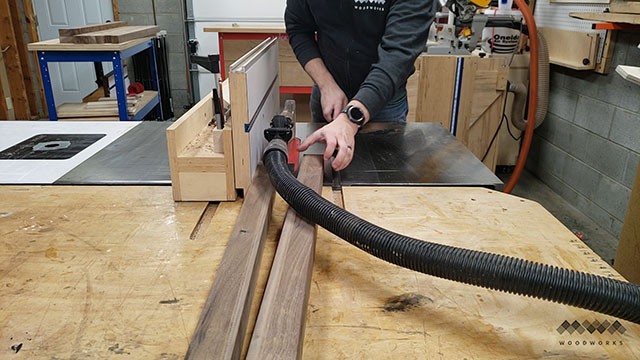
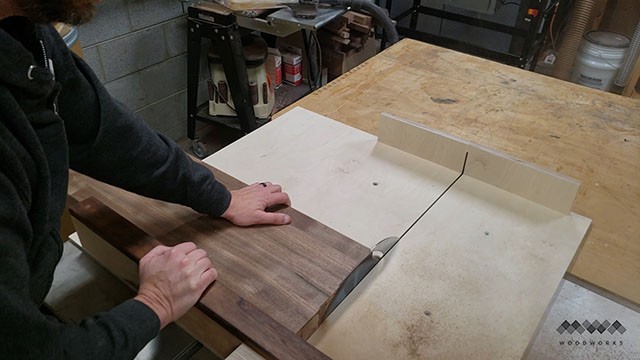
Slicing & Composing End Grain Strips
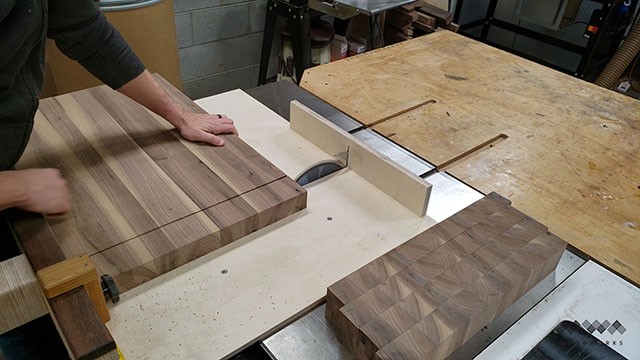
Once your panel is glued up and the joint has been cleaned up, use a crosscut sled to cut the panels into strips. My strips are 3″ thick for this board.
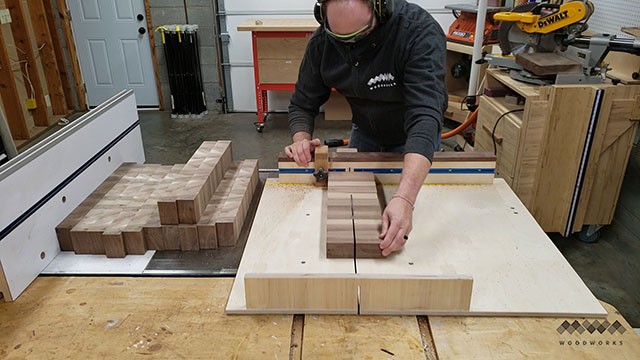
Be careful cutting your last couple strips. Make sure you use your riving knife for this process to avoid kickbacks. Securely hold your panel against the fence of the sled as you make these cuts.
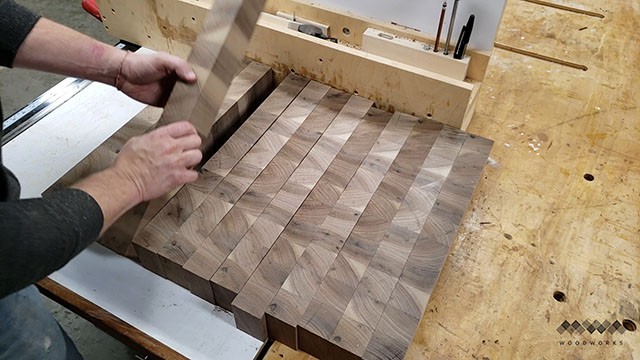
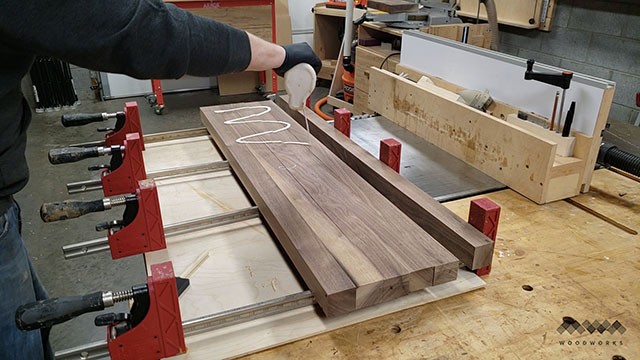
Now arrange all your strips together in a way that looks most pleasing to you. I prefer randomness, but you may find an interesting pattern that emerges as you flip the strips and arrange them in new orders.
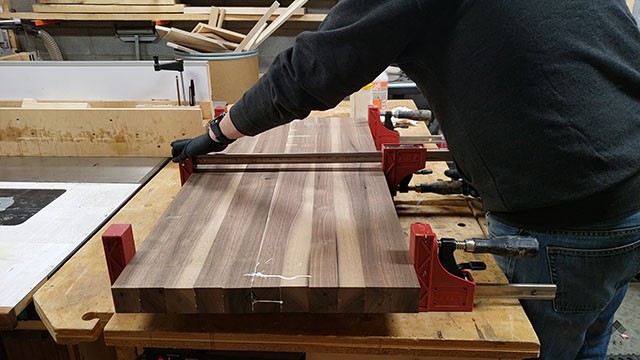
The Third & Final Glue-up of the Butcher Block

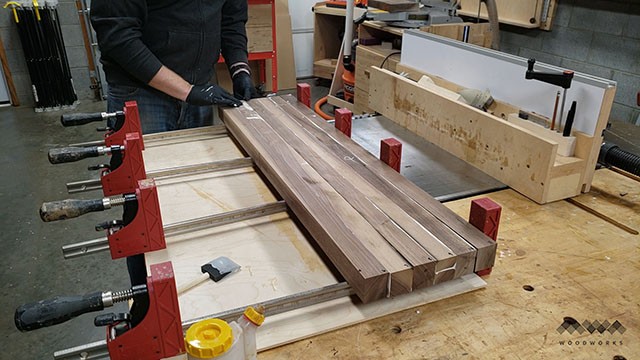
Once you have all your strips in the order you want, turn them all on their side and apply a liberal amount of glue. You have a lot of strips to get glued up so I suggest using a wood glue with a longer open time.
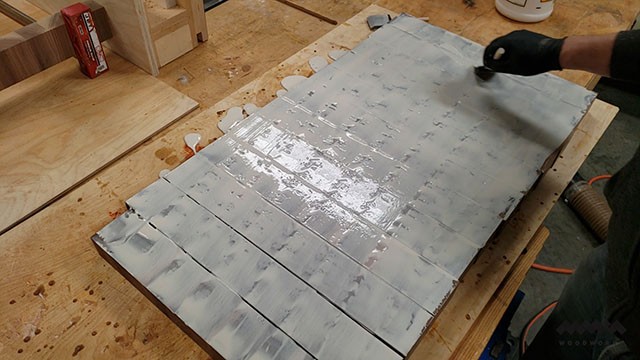
Brush or roll the glue out to ensure even coverage across all the strips.
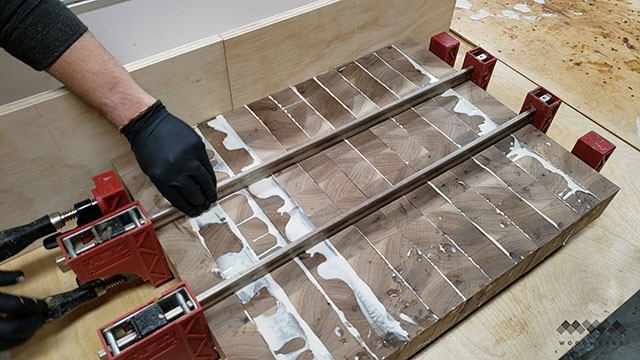
Now stack each strip into the clamps, ensuring the strips are as flat ass possible. This will reduce the amount of sanding needed to make the board flat later.
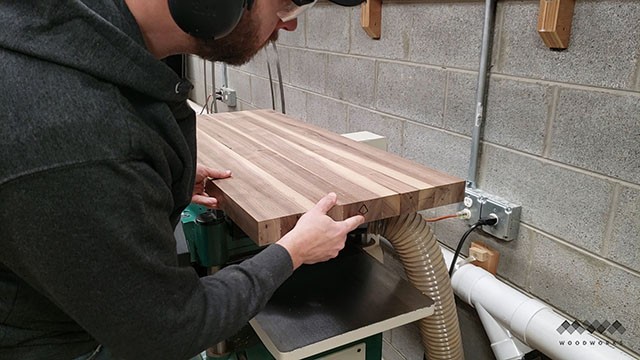
Flattening, Sanding & Edge Treatment
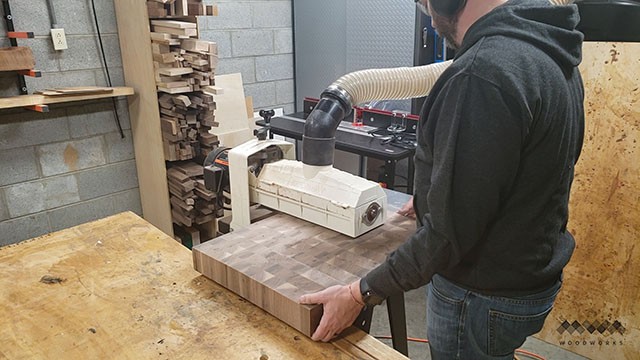
Since this board is endgrain and since it is 20 inches wide, the best option for me was to use my drum sander to flatten it. I made one pass through the sander, rotated the board and send the other side through. I then flipped the board end for end and repeated. this helps ensure a flat board.

This is a fairly time consuming process requiring many small passes. You can easily overwhelm one of these drum sanders and so very light passes are recommended.
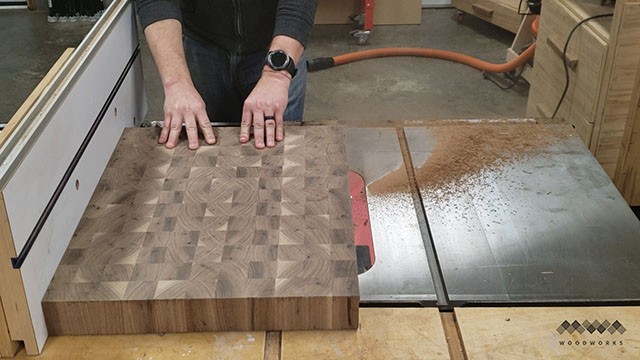
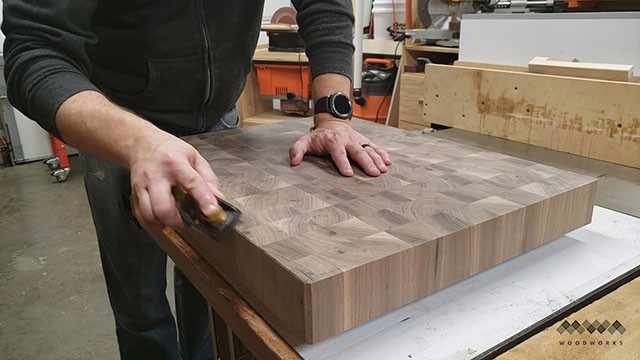
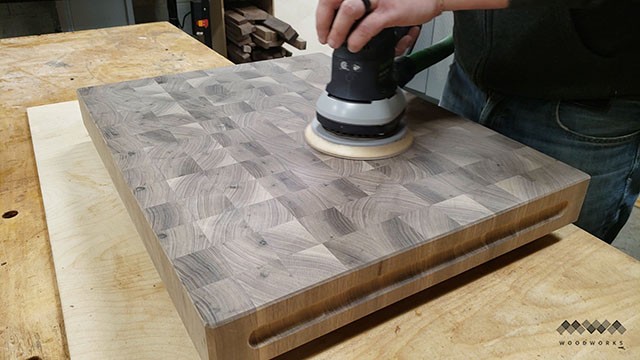
After I clean up the edges of my board to flush things up, its time to move from the drum sander to handheld sanders.
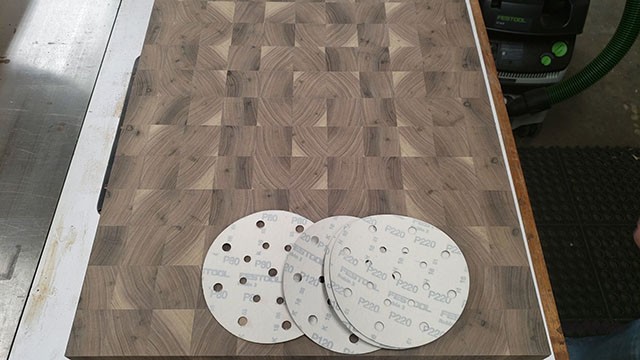
My sanding progression for end grain boards is this: 60,80, 120, 180 and 220 grits.
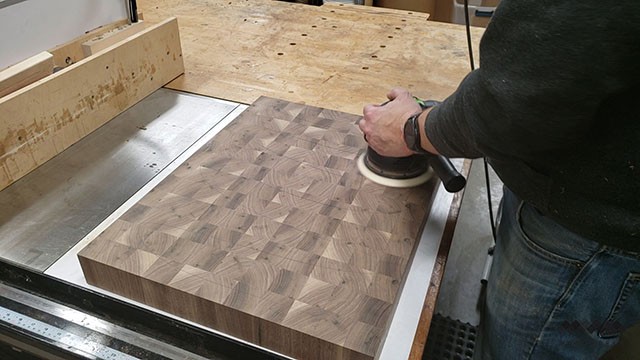
I do 60 & 80 grit first using the Festool Rotex. This is the most efficient way I’ve found to remove the deep vertical scratch marks left by a drum sander. I then change over to a 6 inch random orbit sander and proceed to 120, 180 and 220 grits.
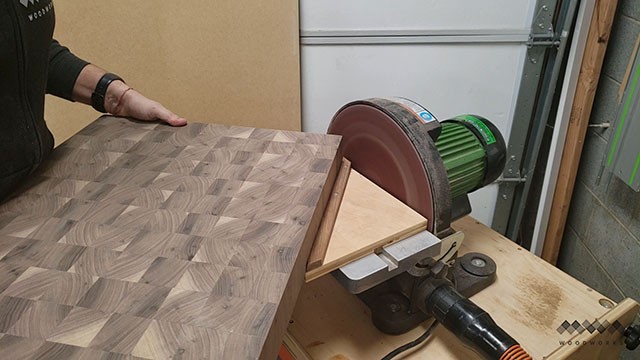
I add chamfers to the corners of my boards using a 45 degree jig on my disc sander. This keeps the corners of the board neat and clean and prevents them from getting dinged up with use.
I follow this up by hitting all my edges with a block plane. this creates a nice chamfer that goes well with the corners of the board.
The Whole Enchilada Plan Bundle
The Whole Enchilada Plan Bundle! You want it all? You Got it! Get every plan I offer in one bundle at a savings of over 65%!
This product is a DIGITAL DOWNLOAD. You can immediately download your product off the order receipt page after the purchase. You will also immediately receive an email titled “Your MWA Woodworks order is now complete” that contains the download link in the “Downloads” section of the email.
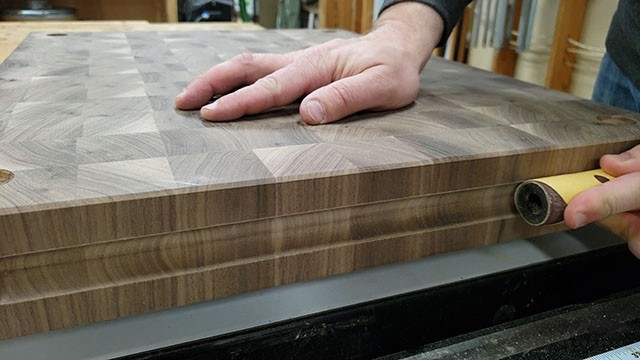
Creating Finger Grooves in the Butcher Block
The next thing I do is create finger grooves in the ends of the board. To do this I set up a 1″ round nose bit in my router table. The diameter of the bit can vary depending on how thick the board is, but I max out at 1″. I cut my grooves 3/8″ deep.
As you see, I mark with a pencil where to begin and end my cut. This allows me to begin and end 2 inches from the ends of the board. I use a feather board made of a strip of plywood fastened with 2 sided tape to help keep my board against the fence as I make this cut. I then drop the board onto the bit at my start line and move it quickly across the bit until the back side of my board hits the finish line. It’s important that you move as quickly across the bit to prevent burning. along with having a dull router bit, hesitation while making this cut is a major contributor to burn marks in the grooves which are a huge pain to try and remove with sanding.
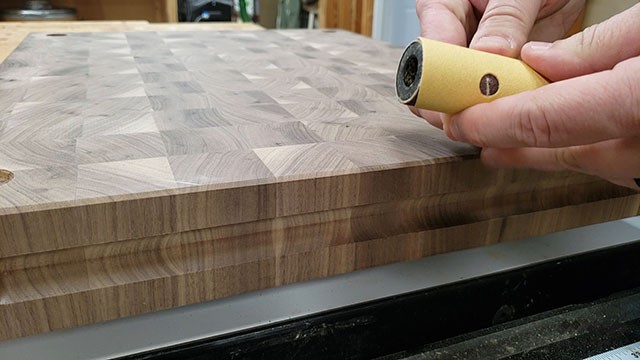
Next I wrap a piece of sand paper on my 1″ spindle sander thing-a-ma-bob.
This fits perfectly into my finger grooves allowing me to sand them smooth.
Finishing the Butcher Block
After I have sanded all parts of the board to 220 grit, I spritz the board with water to “raise the grain”. Raising the grain refers to making the broken fibers of the wood stand up, similar to the hair on your arm when you are cold. This will cause the board to feel “fuzzy”. This does’t require a lot of water. Just enough to make it damp on the surface.
After the grain has raised and the board is dry, sand the grain down using your last grit(220) and the board will return to smoothness. Repeat this process 1-3 times or until the grain no longer feels fuzzy when spritzed with water. doing this process now will prevent it from happening to the owner of the board once they clean it with water.
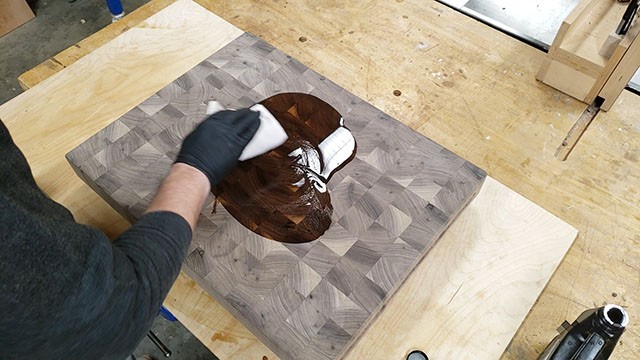
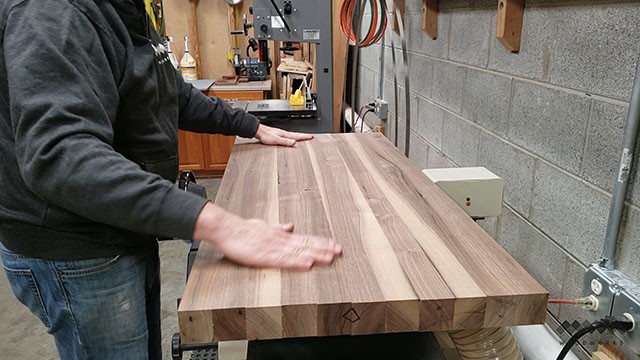
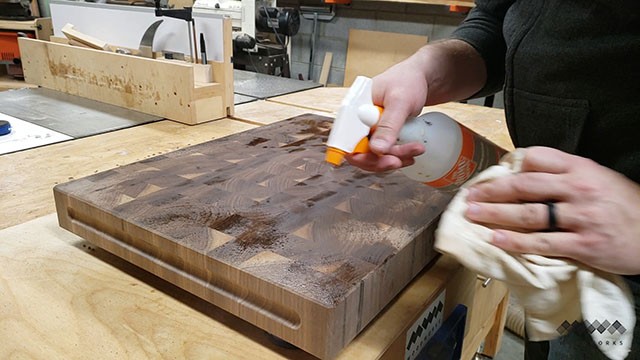
Now for the fun part…. I pour a liberal amount of mineral oil on the surface of the board and watch the grain come alive!

I continue to apply oil on areas of the board that look “dry” as this huge board soaks up the oil. when the surface no longer looks like it will take any more oil, I wipe off the excess and apply a coat of beeswax paste. This will give the board a second layer of protection from water and make it feel silky smooth to the touch.
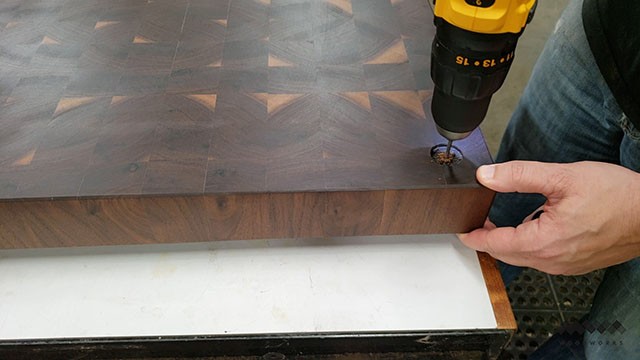
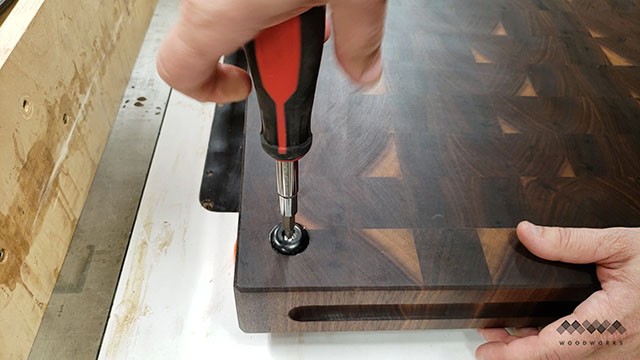
The last step is to pre-drill some screw holes into the recesses I cut for the feet.


That looks really good buddy! What kind of beeswax paste did you use for the finish?
Beautiful work. Very educational, even a Swede like myself can understand!
Do you have a plans for an end gtain butcher block kitchen island?