
If you’re getting into cabinet making, you’ll most likely have to make cabinet doors eventually. While there are many options for door making, the standard is “frame and panel” doors. These are doors with a “frame” made most of the time from hardwood and a “panel” made of anything from solid wood to plywood to MDF. The simplest form of the frame and panel door is the Shaker style door known for its no-frills look, clean and simple. Keep reading and I’m going to walk you step-by-step through how I built a shaker style door.

DID YOU KNOW: You can follow me on these social media platforms!
Instagram · YouTube · Facebook · Pinterest
| Materials & Supplies* | Tools* |
| (1) 3/4″ maple (use solid wood of choice) | Table Saw |
| 1/4″ pre-finished maple plywood | Table saw ripping blade |
| wood glue | Parallel clamps |
| euro style cup hinges | Center punch |
| Oil/Wax finish (sub poly/lacquer for a more durable finish) | 35mm forstner bit |
| Lacquer Finish (more durable) | Cordless Drill |
| Tape measure | |
| Double Square | |
| Square |
*I use affiliate links, please see details on my disclaimer.
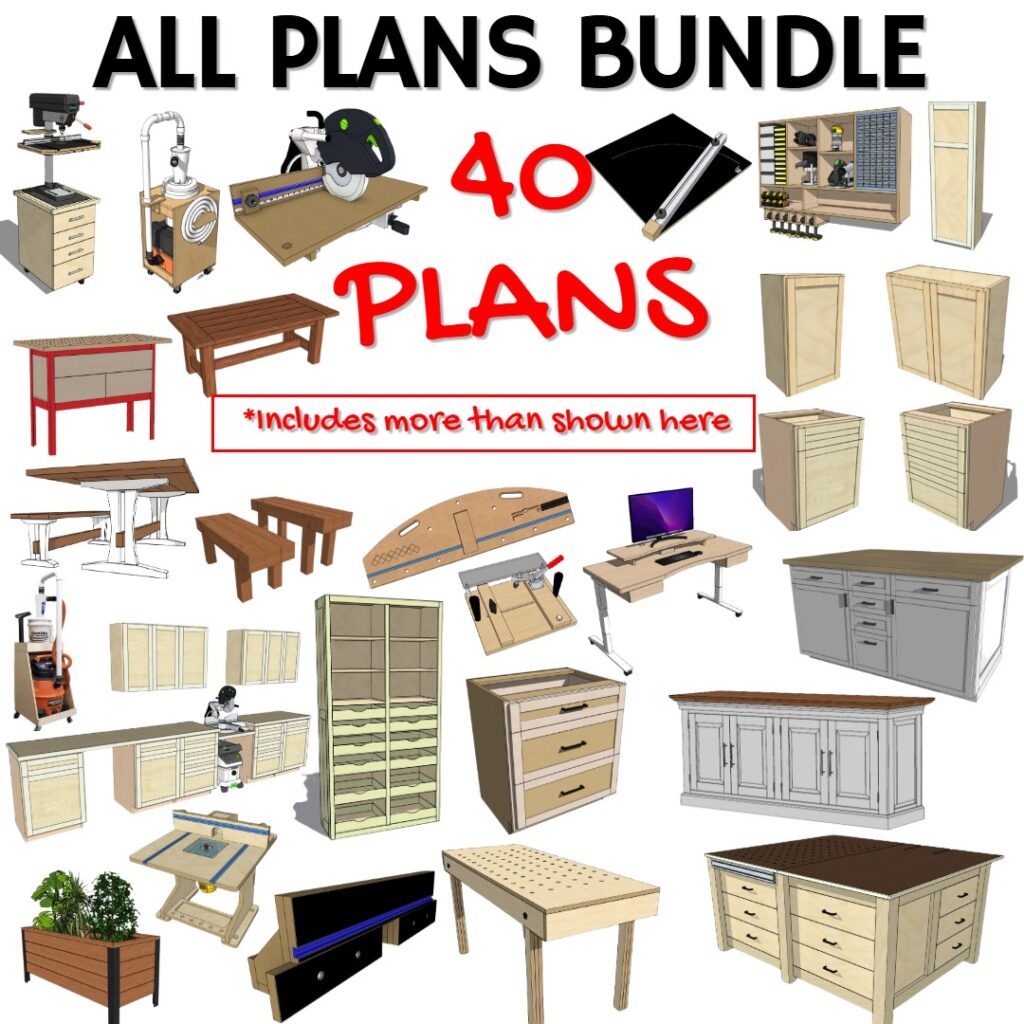
The Whole Enchilada Plan Bundle
The Whole Enchilada Plan Bundle! You want it all? You Got it! Get every plan I offer in one bundle at a savings of over 65%!
This product is a DIGITAL DOWNLOAD. You can immediately download your product off the order receipt page after the purchase. You will also immediately receive an email titled “Your MWA Woodworks order is now complete” that contains the download link in the “Downloads” section of the email.
Making a Shaker Style Door
If you’re starting with lumber that has already been surfaced and squared, for example from a big-box store, you can skip straight to X, but if you’re like me and beginning with rough lumber, then proceed below.
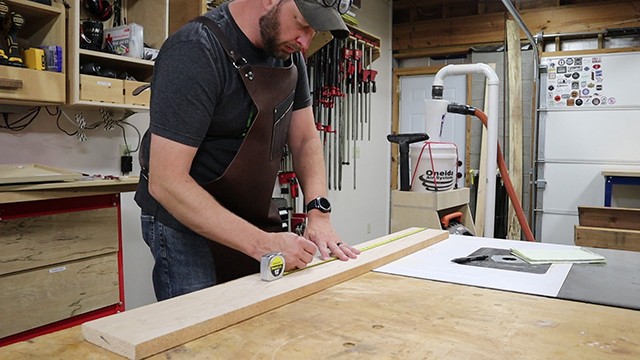
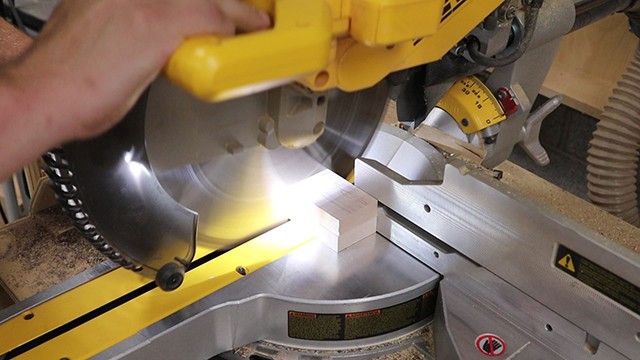
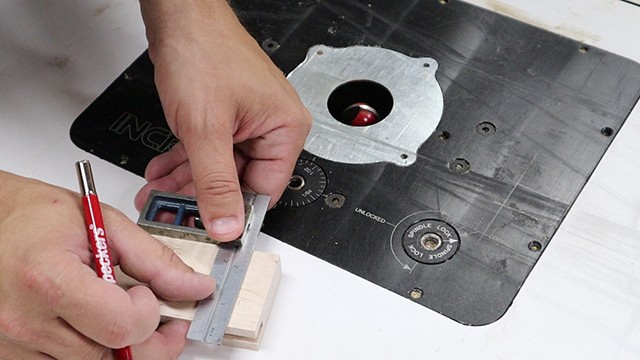
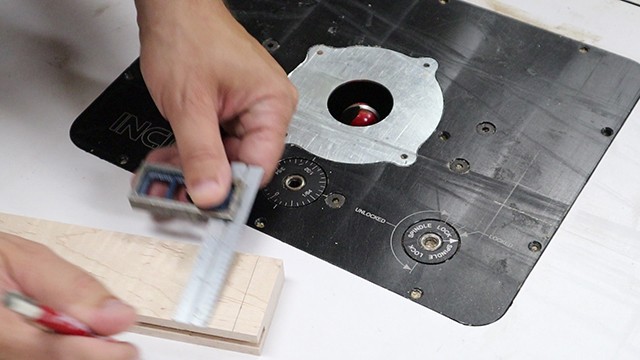
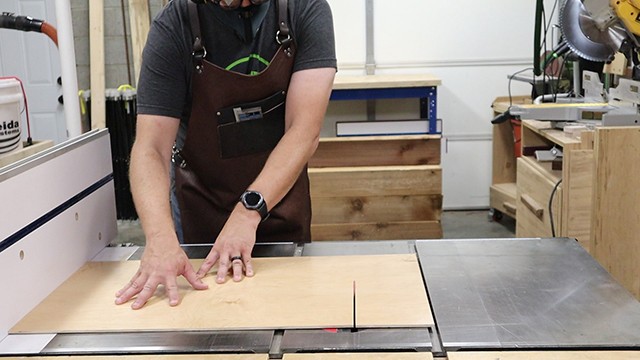
Begin by marking your lumber for rough cutting to length.
Milling your stock
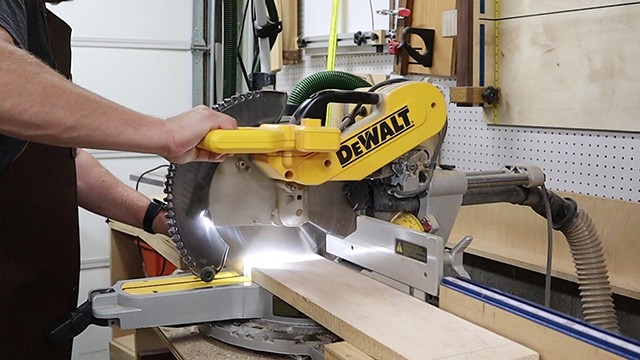
At the miter saw cut to length. You want to make sure you have enough to get all 4 frame parts with a little length to spare.
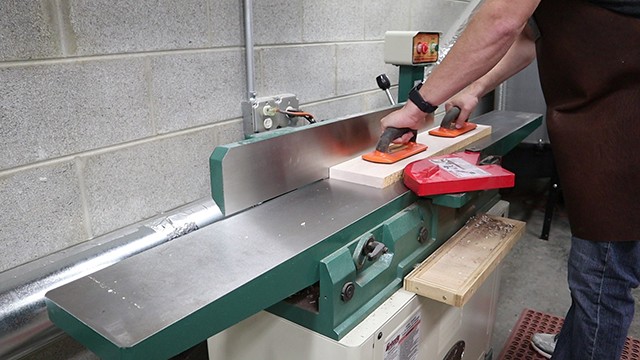
Next, flatten your stock at the jointer to get a flat face.
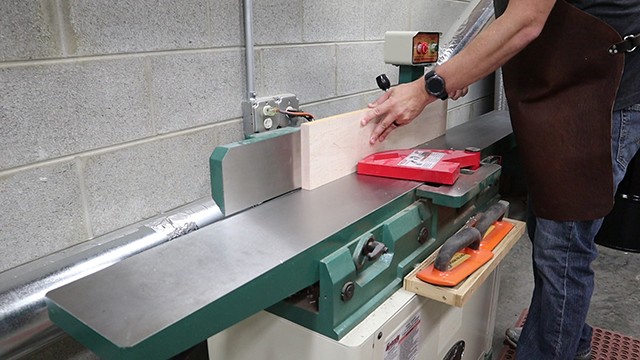
Then, joint one edge by putting the flat face up against the fence.
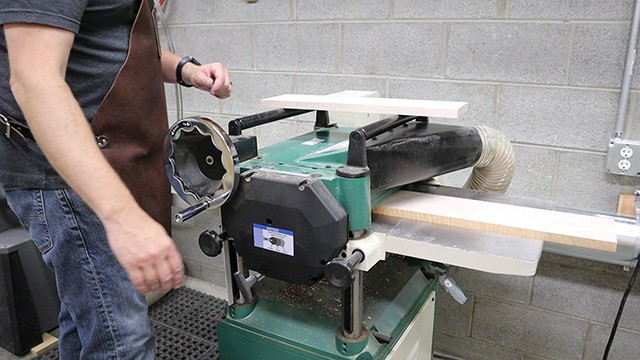
Next, with the flat face down, run your stock through the planer to make the opposite side flat and coplanar.
PRO TIP:
Continue to run your stock through the planer until you reach a final thickness of 3/4″ which is the standard thickness of cabinet and door parts.
Cutting Parts for the Shaker Style Door
Next run your milled stock through the table saw, ripping your stock to 2″ wide.
Then repeat that with the stock for the shorter sides. Again, 2″ wide.
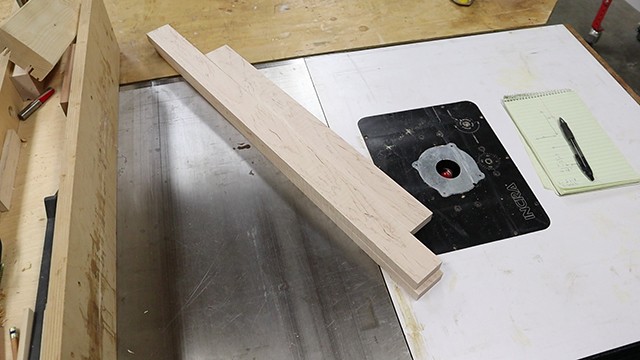
You should now have four frame parts, two long and two short.
PRO TIP:
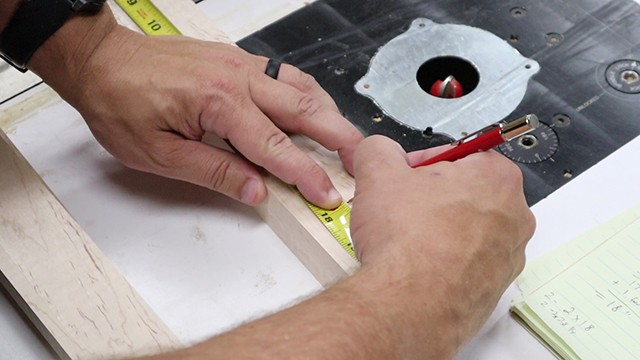
Continue to run your stock through the planer until you reach There are a couple things to consider to make sure that you end up cutting your parts to the correct lengths so when the door is assembled, it comes out to the correct dimensions. The typical way to assemble this style of door is to have the top and bottom frame parts join into the side parts. This prevents you from seeing the joinery on the sides of the doors.
There are a couple things to consider to make sure that you end up cutting your parts to the correct lengths so when the door is assembled, it comes out to the correct dimensions. The typical way to assemble this style of door is to have the top and bottom frame parts join into the side parts. This prevents you from seeing the joinery on the sides of the doors.
With that in mind:
Side Parts: Whatever the final height of your door will be is how long to cut your side parts. Easy. Done.
Top and Bottom Parts: Here is where the math will need to be done to make sure your door comes out to the correct final width.
The equation (in inches):
Top and bottom length = (Final width of the door) – (The width of your side frame parts x 2) + 1(1/2″ per tongue)
So….
If the final width of the door needs to be 20″ and your side frame parts are 2″ wide then…. 20″ – (2″ x 2) +1″ = 17″
Your top and bottom pieces would be cut to 17″
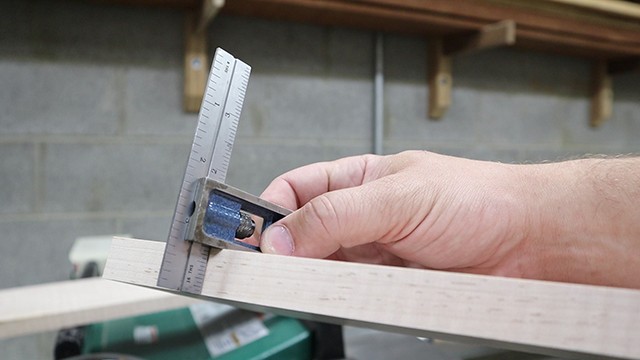
So now that you know how long your parts need to be, take them to the miter saw and cut them to final length.
Now trim all four parts to length at the miter saw.
The Whole Enchilada Plan Bundle
The Whole Enchilada Plan Bundle! You want it all? You Got it! Get every plan I offer in one bundle at a savings of over 65%!
This product is a DIGITAL DOWNLOAD. You can immediately download your product off the order receipt page after the purchase. You will also immediately receive an email titled “Your MWA Woodworks order is now complete” that contains the download link in the “Downloads” section of the email.
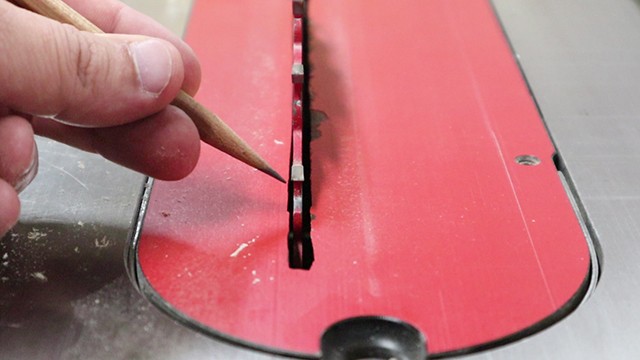
Cutting the Panel Grooves
Next you will cut the grooves in each frame part to house the panel. This groove should be as wide as the panel you plan to put in the door. For example, if your panel will be a 1/4″ thick piece of plywood, then the groove should be just wide enough to accommodate it. The grooves should all be 1/2″ deep.
A trick to getting your groove perfectly centered on your frame part is to make one pass across the blade, and then flip the piece around so the other face is against the fence and run it through again.
This should leave you with a perfectly centered groove that is 1/2″ deep.
PRO TIP:
I recommend using a saw blade with a flat grind on the teeth. Most blades made for ripping stock will have this kind of tooth. Avoid using cross cut blades or all-purpose blades which typically have an ATB (alternating tooth bevel) as these blades will leave “bat ears” in the bottom of the groove and your joinery will not look crisp and clean. I personally use the Freud Heavy Duty Rip Blade which is pretty affordable and holds up well.
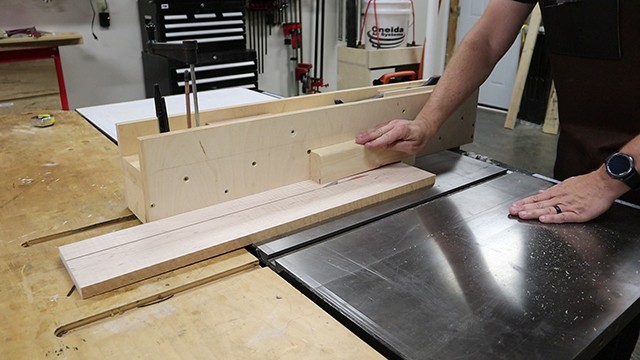
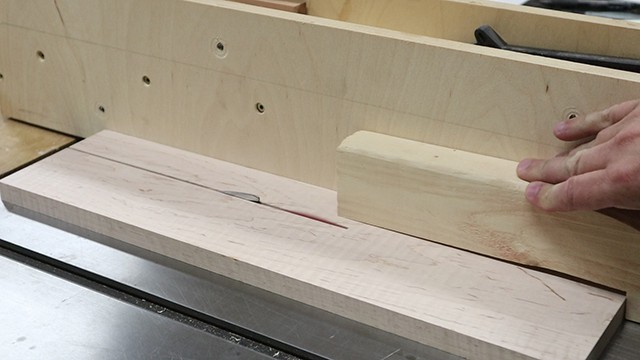
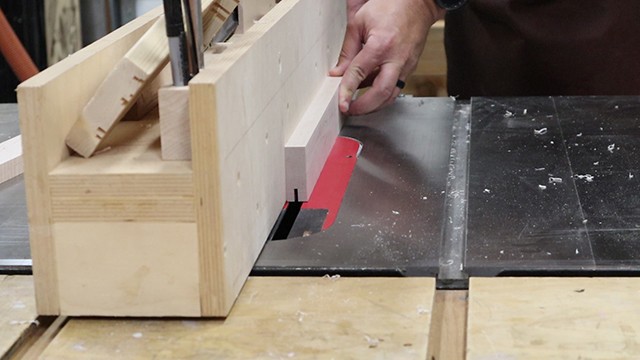
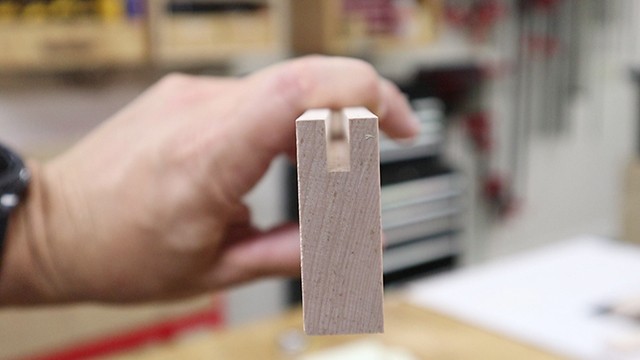
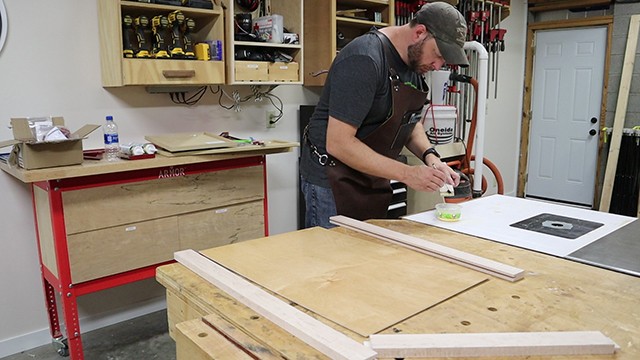
Cutting Joinery
Once the grooves are cut, we can cut the tongues on the ends of the top and bottom frame parts.
You want to set your saw blade to 1/2″ in height (make a mark on your frame parts and raise the saw blade to that line as reference).
You will then set your table saw fence to the proper distance so that the outside of the saw blade tooth is just touching the edge of the groove you cut in your frame parts.
just line the outside of the tooth on the blade with the inside edge of the groove you cut in the rail part.

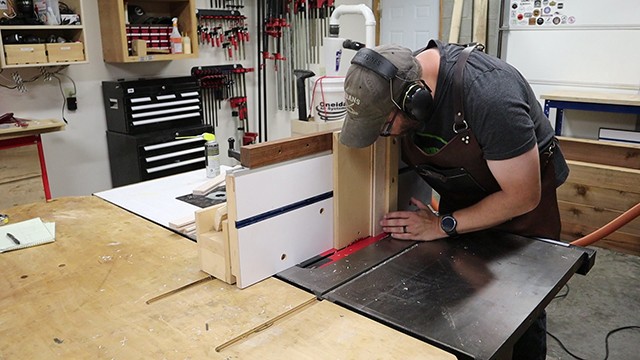
Making this cut safely:
This is a tricky cut if you’ve never tried it before because you need to run your parts across the blade VERTICALLY which is not safe to do without a way to properly support the work piece.
PRO TIP:
I highly recommend the use of a tenoning jig for this cut. You can see from the pictures a tenoning jig rides on your table saw fence and has a backer board that supports the work piece as you run it across the blade. Making a tenoning jig is another topic for a later time, so for now….
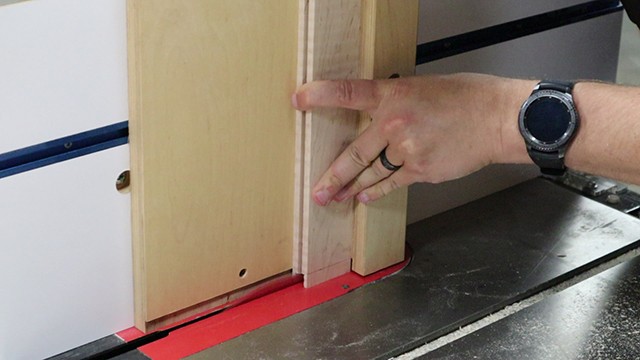
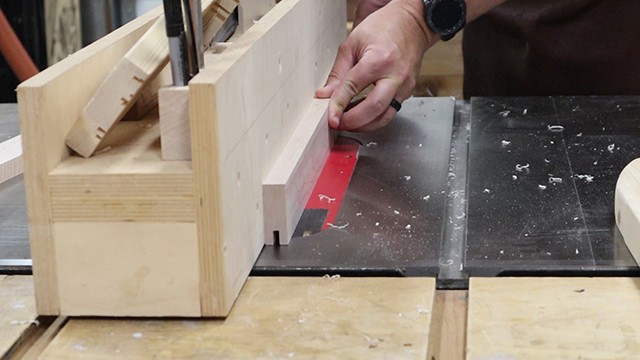
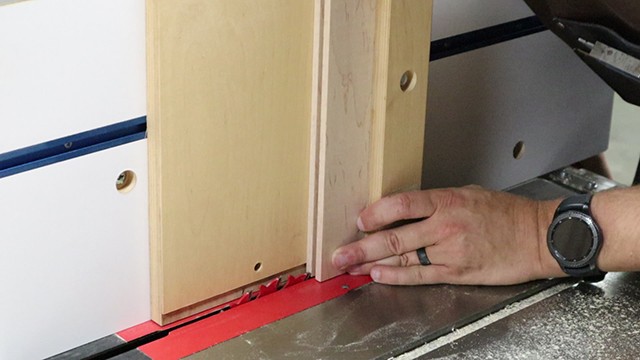
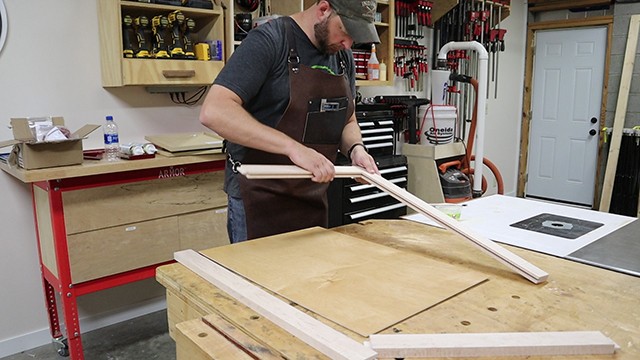
Once you make your first cut, turn the work piece around and make the same cut on the other side. This will establish the width of the tongue. Then just adjust the table saw fence to remove the remainder of the wast on the outside of the cuts you just made.
The result should be a tongue that fits perfectly into the grooves on the side frame parts.

Now adjust the fence distance closer to the blade to remove the remaining waste on the outside face of each side (you will be left with just the tongue in the middle once done)
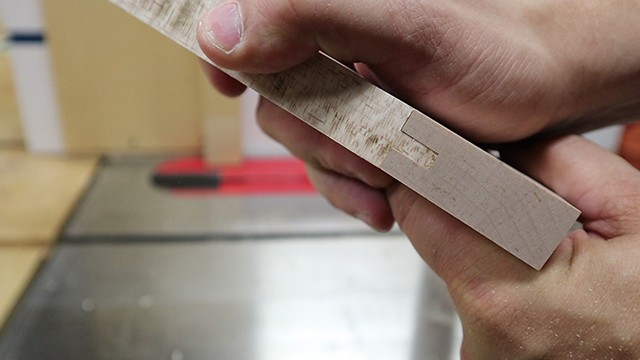
You should end up with a tongue that seats perfectly into the groove of the adjoining long frame piece.
Next, dry fit all your frame parts together to ensure the tongues all fit nicely.

make sure to double check your door’s overall width now to ensure no bad surprises later when you hang the door on your cabinet.
The Whole Enchilada Plan Bundle
The Whole Enchilada Plan Bundle! You want it all? You Got it! Get every plan I offer in one bundle at a savings of over 65%!
This product is a DIGITAL DOWNLOAD. You can immediately download your product off the order receipt page after the purchase. You will also immediately receive an email titled “Your MWA Woodworks order is now complete” that contains the download link in the “Downloads” section of the email.
Cutting the Door Panel
The final cuts to make will be to make your door panel. To size your door panel properly we need more math (I know, I know)
To get the dimensions of your panel use these equations (inches):
Vertical dimension: Total Door Height – (width of frame parts x 2) + 7/8″
Horizontal dimension: Total Door Width – (width of frame parts x 2) + 7/8″
This will properly size your panel with 1/16″ gap all the way around the panel inside the grooves (to allow for expansion and to make assemble easier.
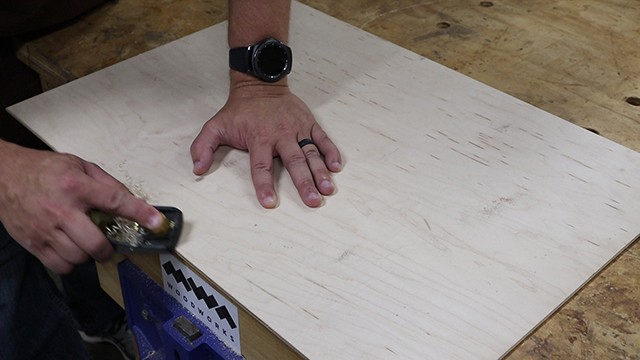
PRO TIP:
Ease the edges of your panel using a block plane. This makes assembly go much smoother. Don’t worry about being perfect because these edges will be hidden inside the grooves and nobody will ever see them!
Assembling The Shaker Style Door
Next, add wood glue to one of the tongues and set it in the groove of the adjoining frame at the very bottom edge.
You should have an “L” shape

Next, add your panel by seating it into the grooves on both frame parts.
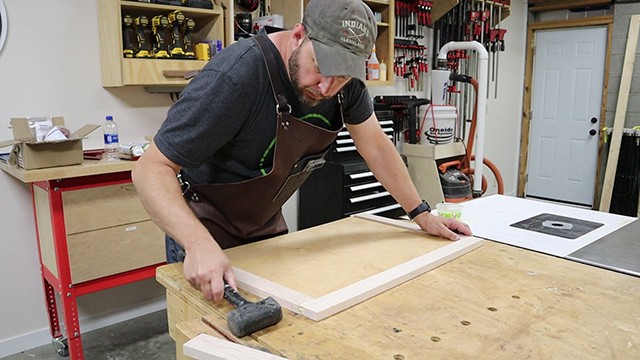
Now add glue to the tongue of the opposing frame part and repeat the assembly. Use a mallet to tap the parts into place if needed.
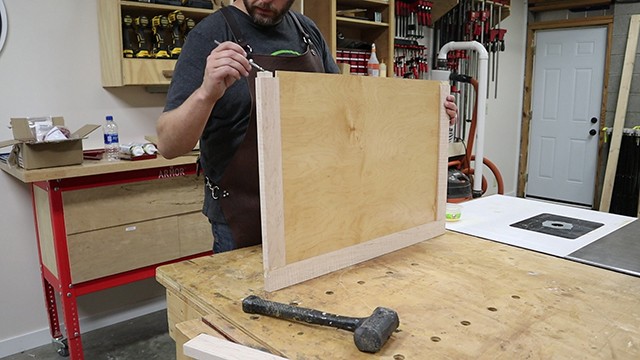
Then add glue to the remaining two tongues
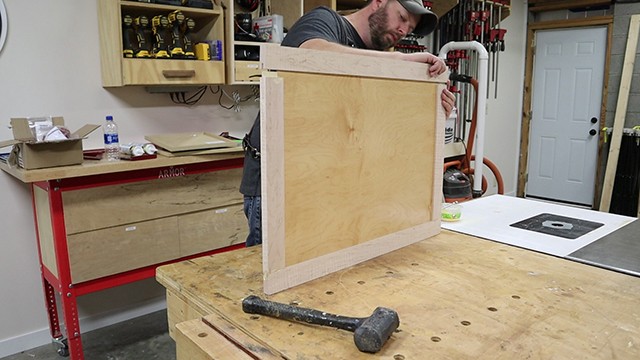
And slip the final frame part in place
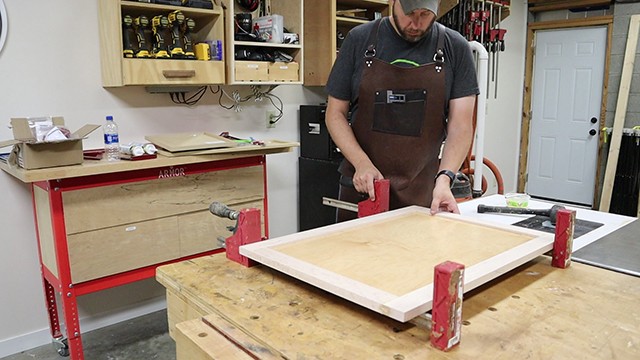
Next you need to add clamps to the top and bottom of the door to make sure you have tight glue joints. The shoulders of the tongues should tightly rest against the side parts for a clean look.
PRO TIP:
Don’t over-tighten the clamps! You only need to apply enough pressure to close up the glue joints (look for a line of glue squeeze-out). Over tightening can lead to a door that is warped or distorted and we don’t need any of that!
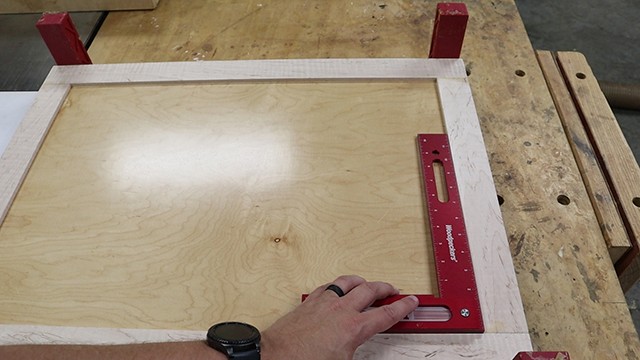
Now is a nice time to check for square. Make sure all four corners read square before you clamp the door up.
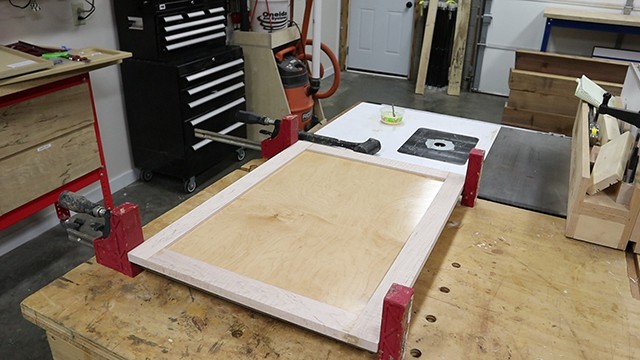
Now set your door aside to dry at least 1 -2 hours.
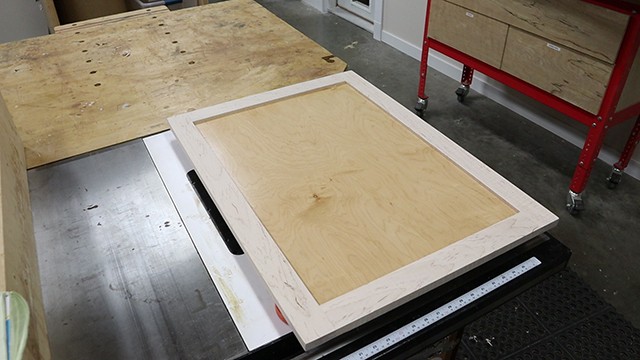
Once your door is out of the clamps, its time to finish it.
The Whole Enchilada Plan Bundle
The Whole Enchilada Plan Bundle! You want it all? You Got it! Get every plan I offer in one bundle at a savings of over 65%!
This product is a DIGITAL DOWNLOAD. You can immediately download your product off the order receipt page after the purchase. You will also immediately receive an email titled “Your MWA Woodworks order is now complete” that contains the download link in the “Downloads” section of the email.
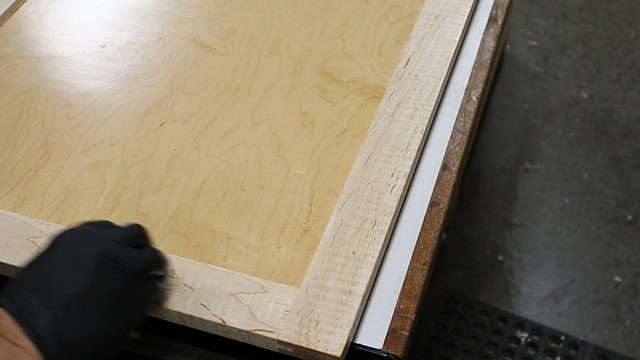
Sanding & Finishing the Shaker Style Door

You should begin with a thorough sanding at 120 grit with a random orbit sander. This should remove mill marks and even out each glue joint. Then move to 180 grit to make the door frame smooth to the touch. Repeat this process for the center panel unless you are using a pre-finished panel.
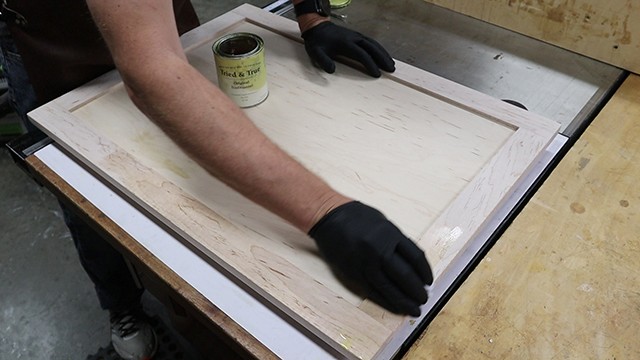
Next, apply your finish.
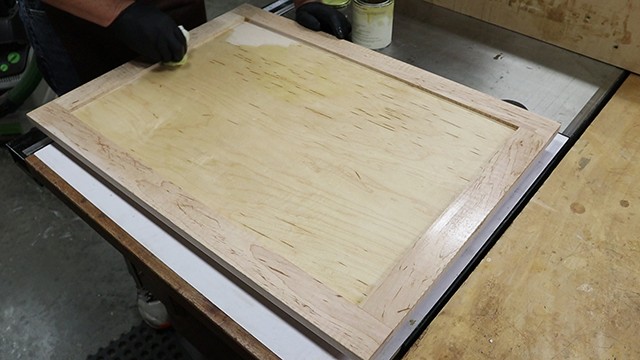
I am using an oil wax blend on mine, but if your cabinets are in a high traffic area such as the kitchen, you will want to use something more durable such as lacquer or polyurethane to finish your door with.
I buff my wax to a buttery smooth finish and luster
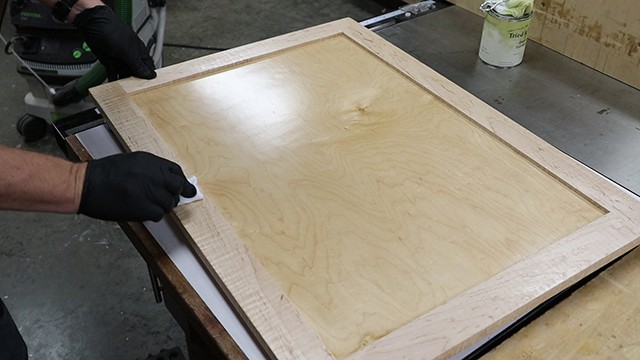
This is done with a clean towel or rag.
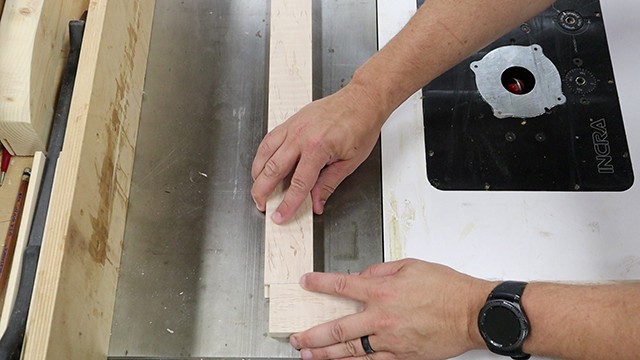
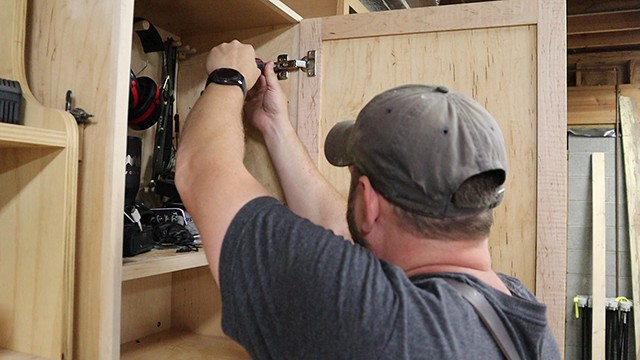
Installing the Hinges
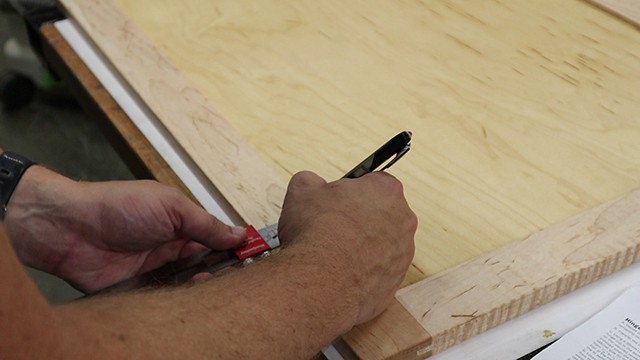
Next, if you’re going to use euro-style cup hinges, please proceed by marking the location of the pockets that need to be cut in the back of the door frame to hold the cup hinges. Follow the manufacturer instructions of the hinges you purchased.
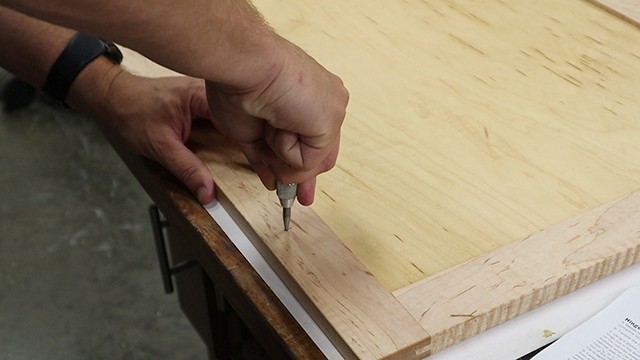
Locate the center of each pocket with a center punch which you can get HERE
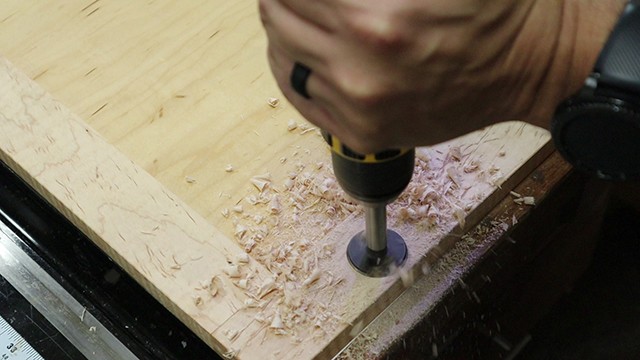
Drill out each pocket to the depth specified in the instruction that came with your hinges (typically 1/2″ deep). Also, a 35mm forstner bit is the standard sized bit for boring these pockets.
PRO TIP:
Every cup hinge I’ve ever installed requires a 35mm forstner bit for the proper fit. Click the link to pick one up!
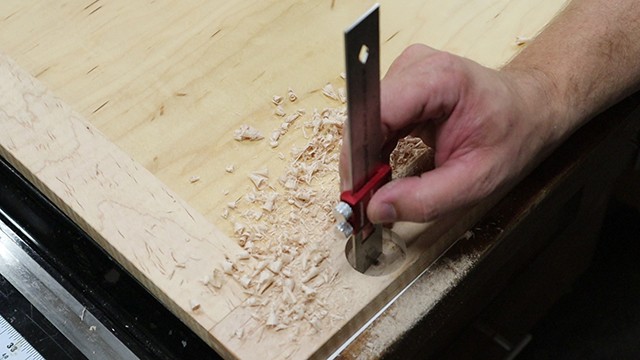
Double check your depth with a rule and sneak up on the right depth.
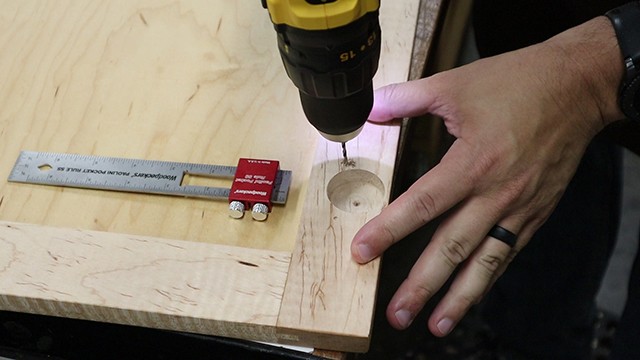
Now drill pilot holes for the hinges. You can use the hinges as a guide to place the holes.
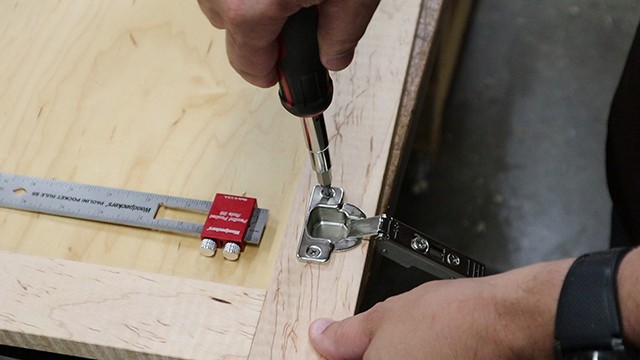
Next, set the hinges into the pockets and screw into place.
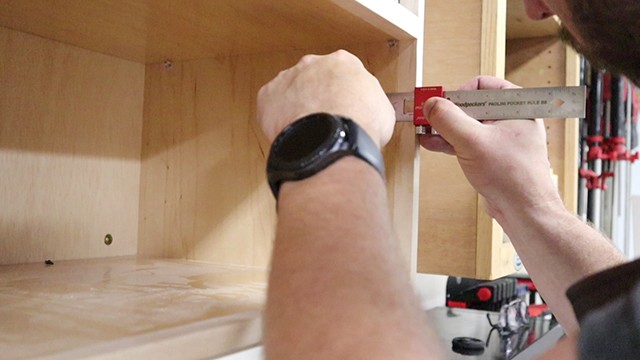
Then, mark the corresponding location on the cabinet side per the instructions that came with your hinges
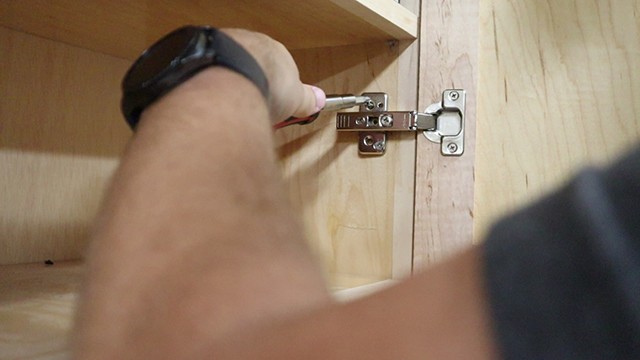
Next, screw the hinges into place.
Once you have the bottom secured you can mark the exact location of the top and screw into place
Your cup hinges should come with a couple adjustment to raise/lower and adjust the distance from the frame of the cabinet. Make these adjustments per the instructions that came with your hinges.
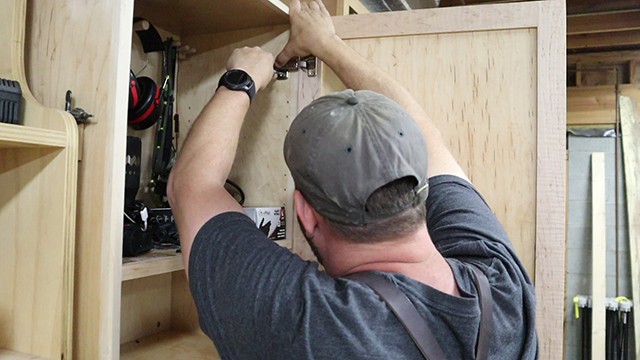
Making Adjustments
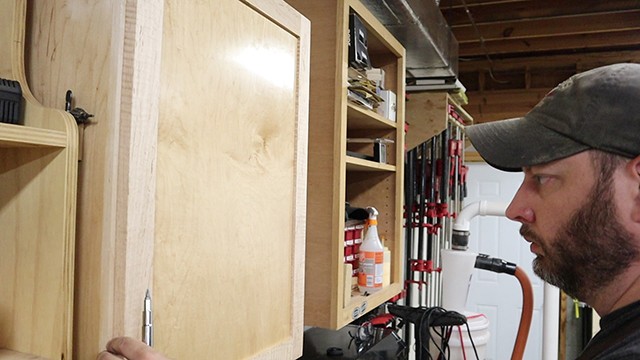
Ideally your door should be centered on the frame (if the cabinet has a face frame)in all directions and when closed should not leave a gap on the side that opens.
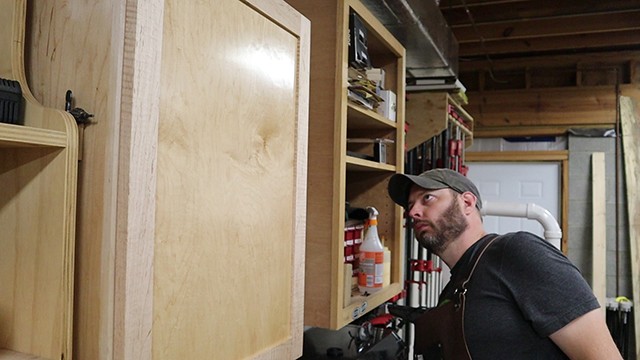
A quick visual inspection insures success! You just knocked out your first shaker style frame and panel door!
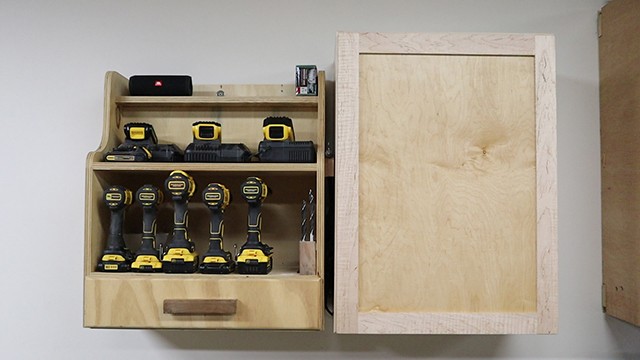
In conclusion, Shaker style doors are simple, clean and yet so much nicer and more interesting to look at on a cabinet. In my opinion this is an essential cabinet making skill and one you should be proud of having learned.


Hi, I watched your video on YouTube and I didn’t want to leave this comment there. I make shaker doors the same way! Good job!
I noticed your push block in the video and I have a few comments. I ALWAYS try to educate woodworkers on dangers as I have 50 years experience in woodworking. I have a friend that had an accident with the plastic push sticks and broke her wrist when the saw had a kick back! Your push stick in my opinion is equally dangerous as your thumb pushes the block through the saw and if there was a kick back it would break your thumb or worse pull your hand into the saw blade. As we all know that many inexperienced woodworkers look to youtubers for information and training and one might see your block and follow your design. All my push blocks place my hand well above the blade and if there is a kick back my hand is no where near the sharp blade. Just trying to keep you safe! Cheers!
Hey – I built a similar upright cabinet without doors and found it was not serving the purpose. I laid down on it’s side outdoors under a canopy where I make sawdust. Now, it holds power tools at my 4×8 work table.
Do not have to constantly do away with sawdust. When it piles up, I shovel it down the hill and rain carries it away. Weather will rot it and nourish the soil.
RE: the push stick, I made a 12″Lx 6″H x 3.4″ thick, shaped like a shoe sole. It lasts forever, never slips and after a few years it wears out and I make make another with a pass thru the table saw. Takes less than 2 minutes. I have always felt that push sticks are an accident looking for place to happen.
Your pencil box- I make them for the ladies in my family and call it a jewelry box. Making some heart shaped boxes for their Christmas presents. With band saw and scroll saw. SHHHH! Don’t tell them.
I’m not a regular reader but used your tutorial to add trim to my kitchen cabinets (and your painting tutorial) and it turned out great. Thank you!