
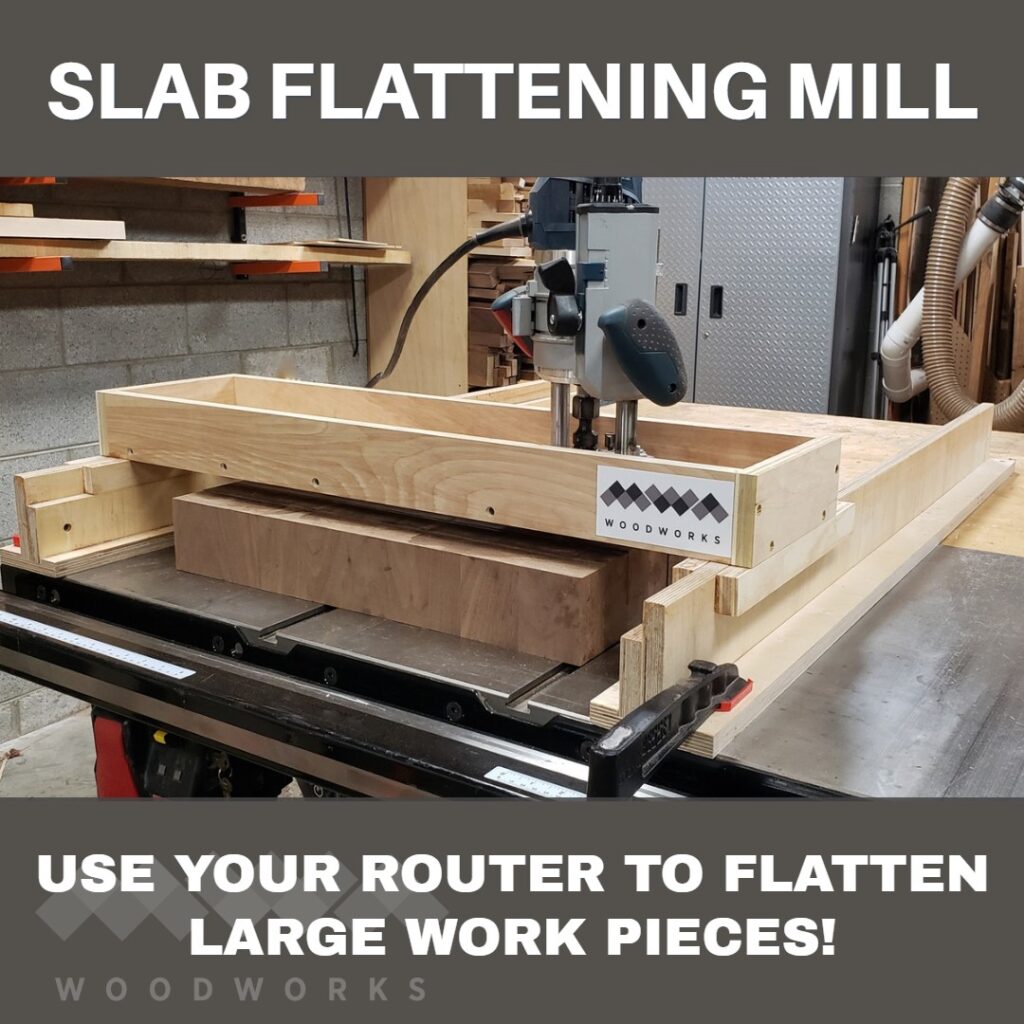
Follow along as I make a router sled/slab flattening mill. This is a great way for me to flatten work pieces that are too large to fit in my planer, drum sander or my CNC. With just 1/2 sheet of plywood and my router, I was able to surface and flatten some massive end grain butcher blocks!

DID YOU KNOW: You can follow me on these social media platforms!
Instagram · YouTube · Facebook · Pinterest

| Materials & Supplies* | Tools* |
| (1/2) 3/4″ Sheet Plywood | Bosch Plunge Router |
| 1 1/4″ screws | DeWalt Drill/Driver Set |
| shims | Router collet extender |
| 1 1/4″ Mortising Bit (surfacing bit) | |
| (4) 150 lb Mag Switch | |
| Amana Tool – 55227 Countersing Drill bit w/stop |
*I use affiliate links, please see details on my disclaimer.

Slab Flattening Mill Plans
Need to flatten a work piece that is too big for standard woodworking tools? You can get it done with your router and 1/2 sheet of plywood! This is a great cost effective way to flatten slabs or large butcher blocks.
This product is a DIGITAL DOWNLOAD. You can immediately download your product off the order receipt page after the purchase. You will also immediately receive an email titled “Your MWA Woodworks order is now complete” that contains the download link in the “Downloads” section of the email.

The Whole Enchilada Plan Bundle
The Whole Enchilada Plan Bundle! You want it all? You Got it! Get every plan I offer in one bundle at a savings of over 65%!
This product is a DIGITAL DOWNLOAD. You can immediately download your product off the order receipt page after the purchase. You will also immediately receive an email titled “Your MWA Woodworks order is now complete” that contains the download link in the “Downloads” section of the email.
Making the Router Sled Rails
This is really a simple build. A half-sheet of 3/4″ ply and your plunge router is about all you really need to make this router sled/slab flattening mill. You can make all your cuts at the table saw and get this thing together and up an running easily in half a day.
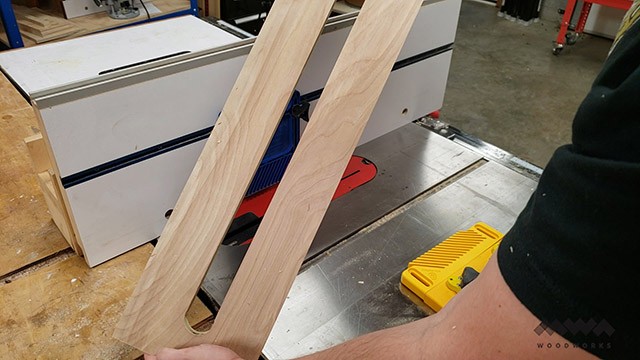
I cut six total 48″ strips (2) 4″ strips for the base of the rails, (2) 3 3/4″ outer rail parts and (2) 2 1/2″ inner rail parts.
The heights for the rails are up to you based on how much capacity you want under your sled. Just make sure the inner rails a 1 1/4″ thinner than the outer rails.
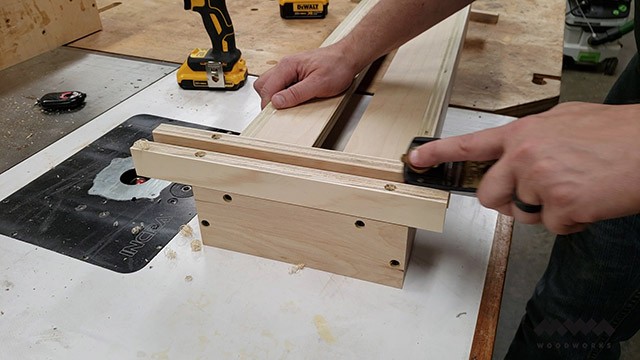
A 12″ scraps of 3/4″ ply is all you need to cut (4) 1 1/4″ rail guides.
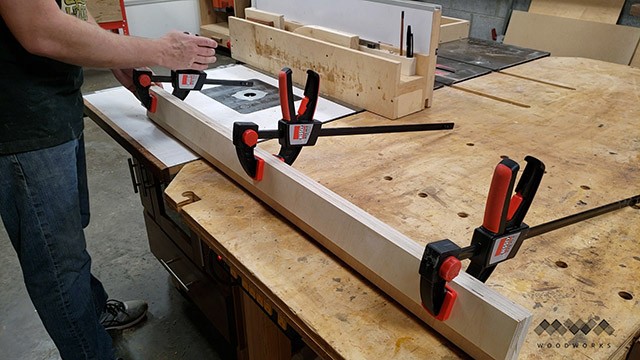
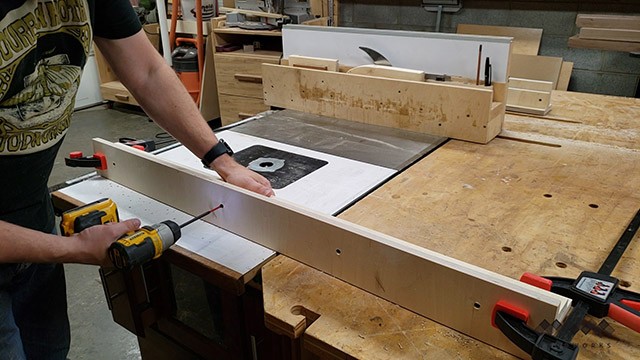
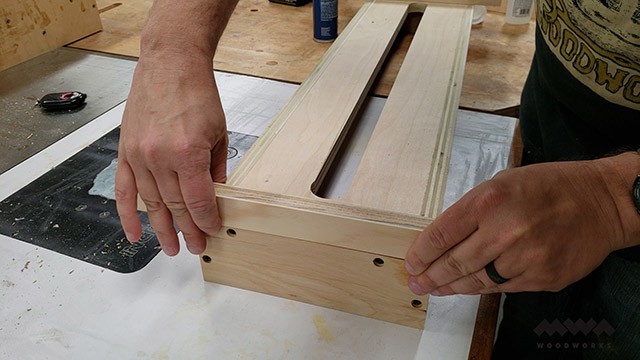
Carefully clamp one inner and one outer rail together, ensuring that the bottom edges line up perfectly.
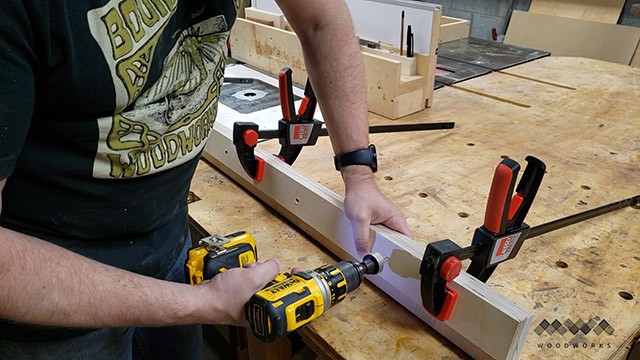
Pre-drill and countersink six holes along the inner rail. I used THIS router bit from Amana Tools to get this done.

Fasten the inner and outer rails with 1 1/4″ screws. I would not recommend glue for these rails. The water in the glue may cause warping in such thin strips of plywood.
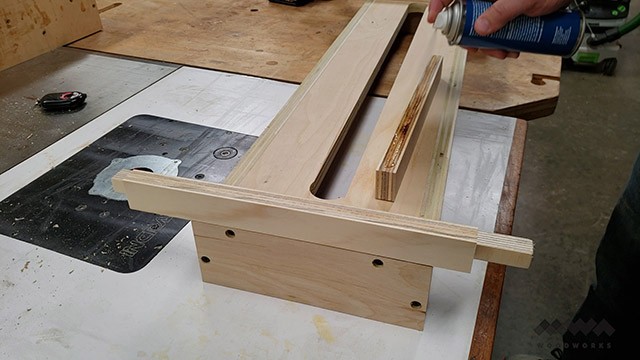
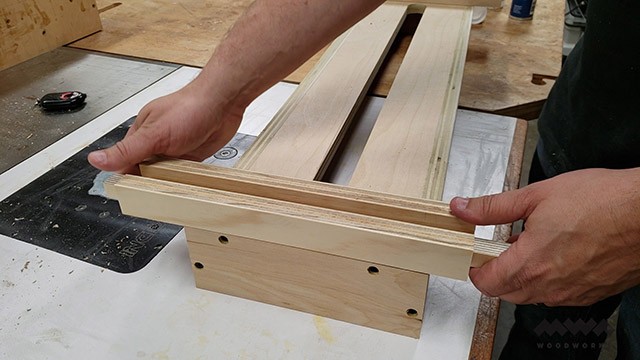
Cut a 1/16″ deep dado the width of your rails (1 1/2″) centered on the rail bottoms. This is to allow the rails to sit inside the dado and helps to ensure the rails stay straight.
Assembling the Rails
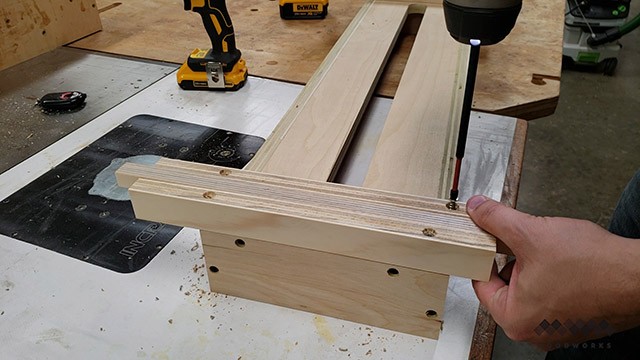
Fasten the rail bottom to the rail with screws (pre-drilled and countersunk).
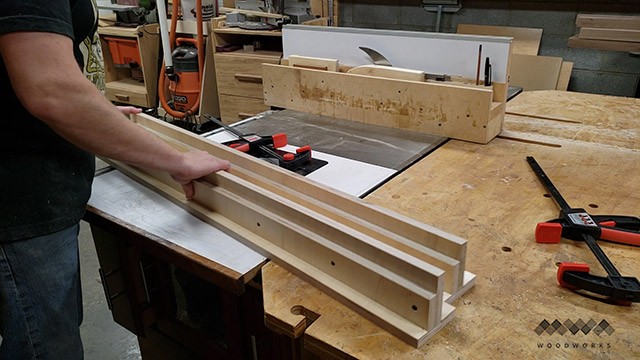
Now the rails are done! I would advise breaking the edges of the rails with a block plane which will make the sled ride more smoothly along the rails.
The Whole Enchilada Plan Bundle
The Whole Enchilada Plan Bundle! You want it all? You Got it! Get every plan I offer in one bundle at a savings of over 65%!
This product is a DIGITAL DOWNLOAD. You can immediately download your product off the order receipt page after the purchase. You will also immediately receive an email titled “Your MWA Woodworks order is now complete” that contains the download link in the “Downloads” section of the email.
Cutting the bottom of the Sled Carriage

To cut the bottom of the sled, use your router’s base to set the width of the cut.
Add 1/32″ to this measurement to allow just enough room to prevent binding when the router moves across the sled.
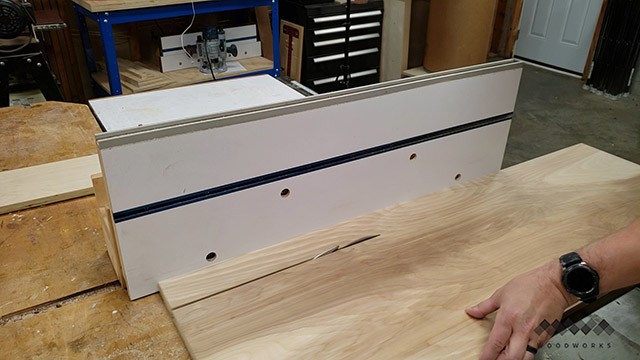
Next, cut out the sled sides. I made mine 3″ high.

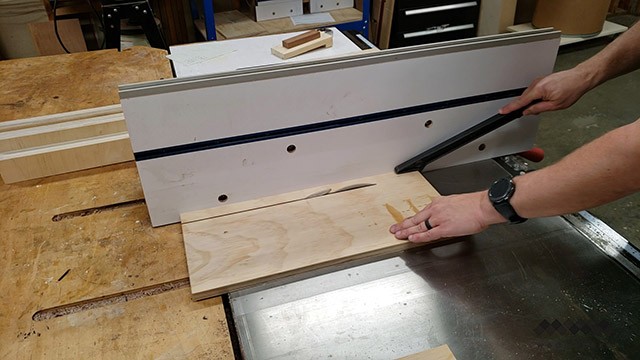
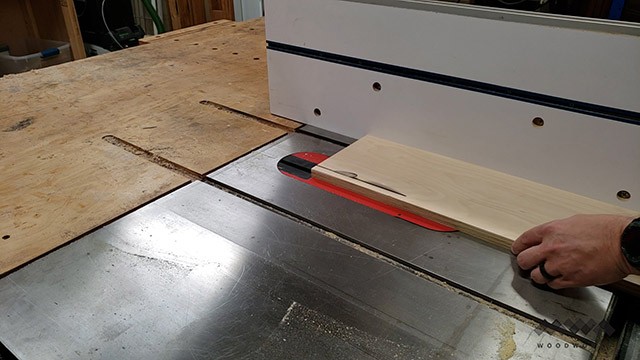
At the drill press, drill two 1 1/2″ holes at either end of the sled bottom. This will serve as the beginning and end of the slot.
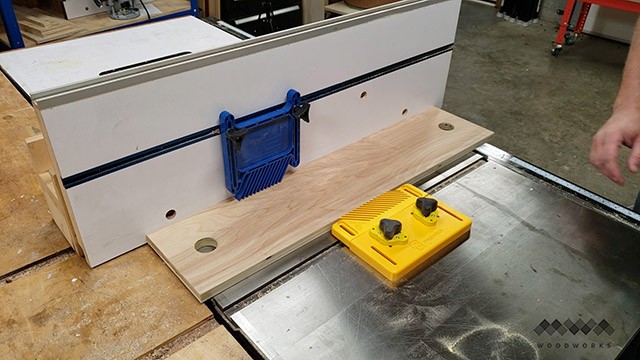
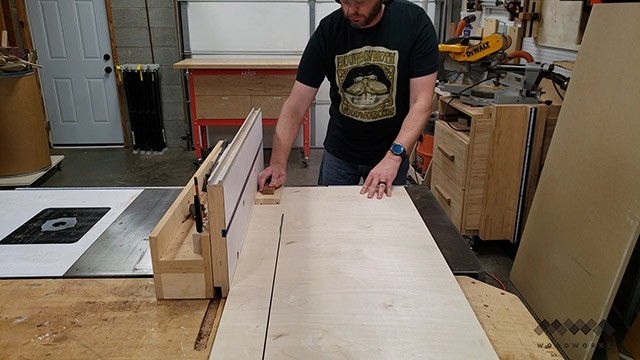
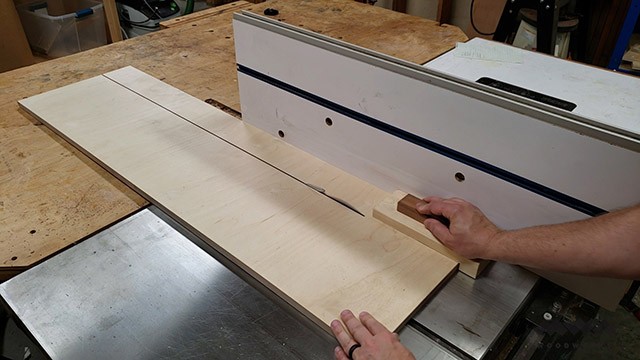
Use feather boards to keep constant downward and lateral pressure against the work piece.With the saw blade retracted, slide the work piece over the blade.
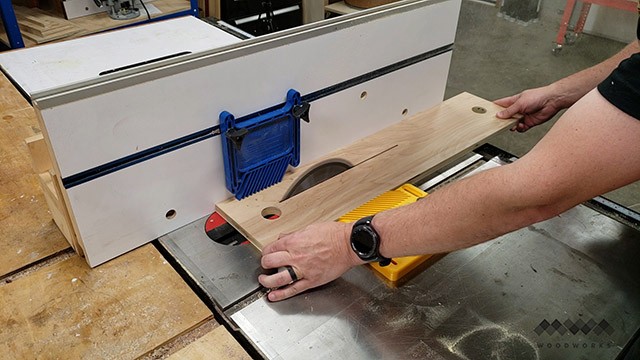
Turn on your saw and slowly raise the blade up through the plywood. ** PLEASE USE CAUTION** always be aware of where your hands are with regard to the blade since you are blindly raising the blade through the work piece.
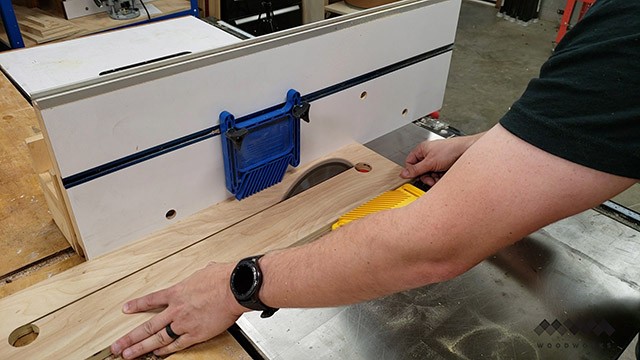
Now run the piece across the blade until you reach the holes on either end.
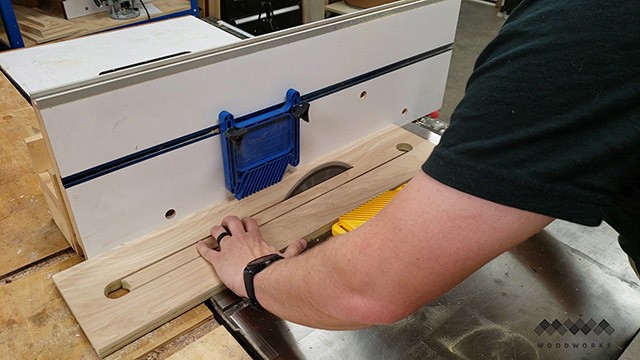
Repeat this for the other side. Make sure when you cut the other side that you secure the waste piece in the middle with your fingers so that it doesn’t wander into the blade and cause kickback. Once again, exercise caution with your hands and keep them well away from the blade.
With that done the bottom is complete.
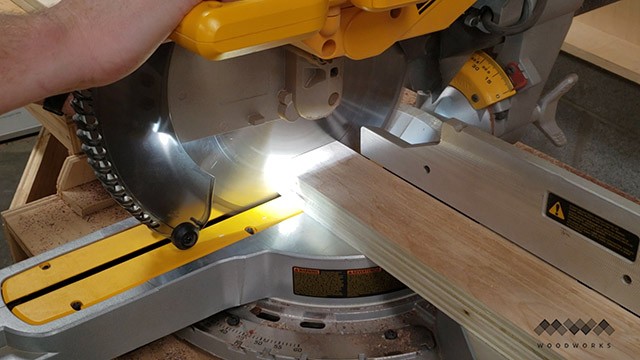
Now just cut the sides for the sled with a miter saw. I made mine 3″ high.
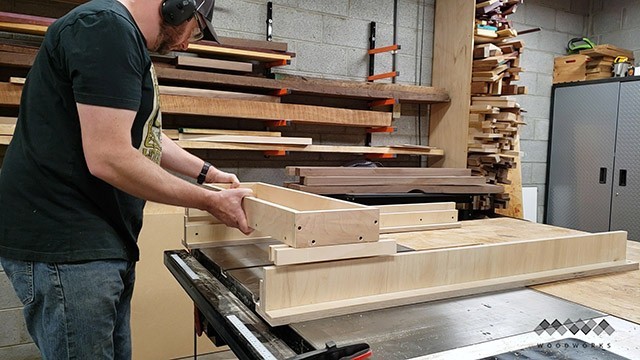
Assembling the Sled Carriage
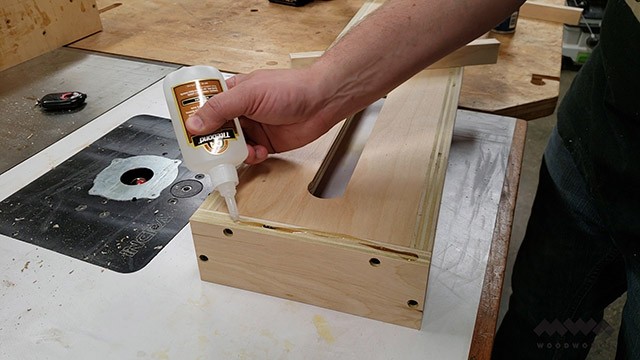
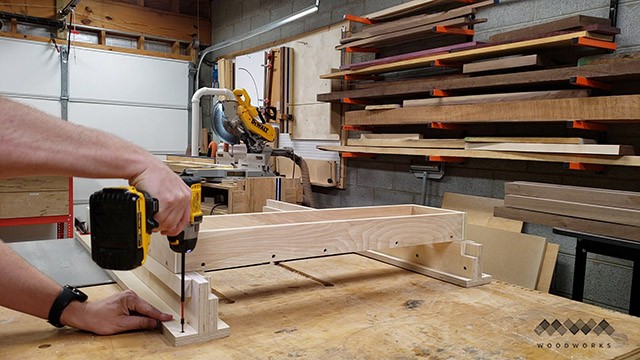
Clamp and screw the two long sides of the sled to the bottom. Make sure to pre-dril first.

Now fasten the ends to the base with screws.
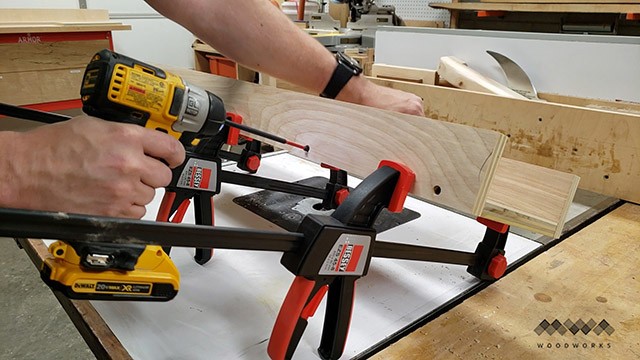
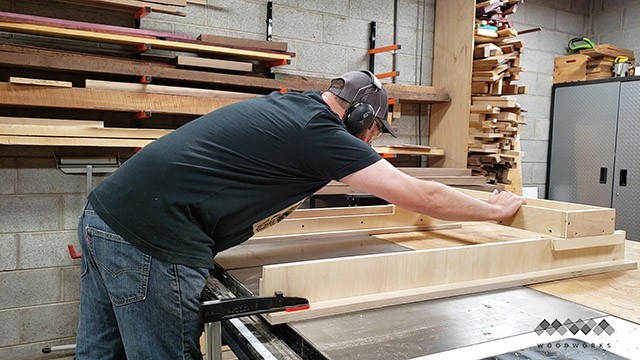
Next, use cyanoacrylate (C.A. glue) to hold the first rail guide to the edge of the base.
The CA glue is meant to hold the rail guides in place until they can be fastened with screws.
Now add a scrap piece of 3/4″ ply as a spacer and again glue the second rail to the sled snugly against the scrap piece.
Once the second rail is in place, move the spacer to the top to avoid it being glued in place.
Attach the runners using screws.
I broke the edges of the rail guides with my block plane to create less friction and make things slide better.
The Whole Enchilada Plan Bundle
The Whole Enchilada Plan Bundle! You want it all? You Got it! Get every plan I offer in one bundle at a savings of over 65%!
This product is a DIGITAL DOWNLOAD. You can immediately download your product off the order receipt page after the purchase. You will also immediately receive an email titled “Your MWA Woodworks order is now complete” that contains the download link in the “Downloads” section of the email.
Assembling the Router Sled
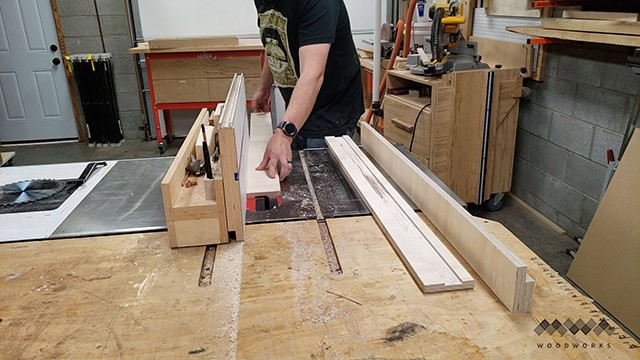
Now set the sled on the rails to get the spacing set correctly.
Clamp the two rails to your work surface. Then slide the sled to the other side, making your rails parallel to one another. I used my table saw because its the flattest work surface in my shop.
Because I couldn’t clamp the other end of my rails I had to screw them to the bench.
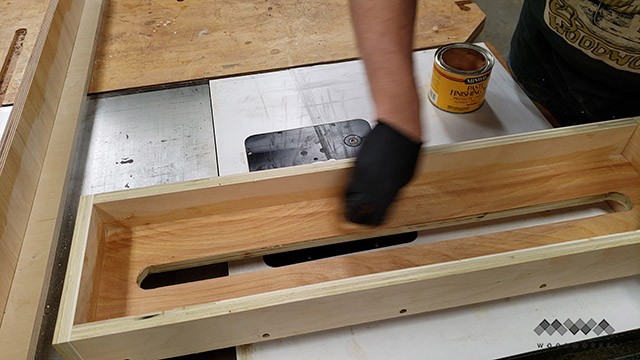
Use furniture polish to lube up the inside of the sled where the router will sit.

Also use the same wax to lube up the rails.

It turns out using paste wax is a bad idea.
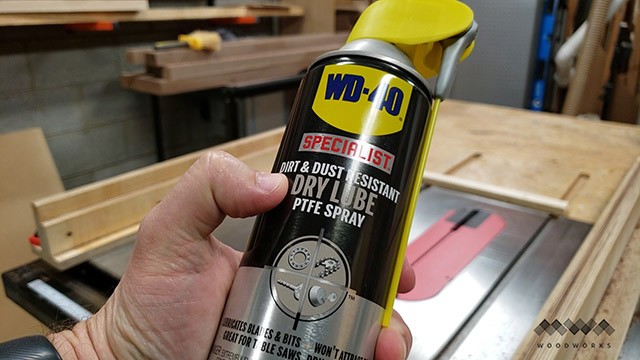
Instead, use dry lube. It wont attract the sawdust and gunk up the rails causing binding.
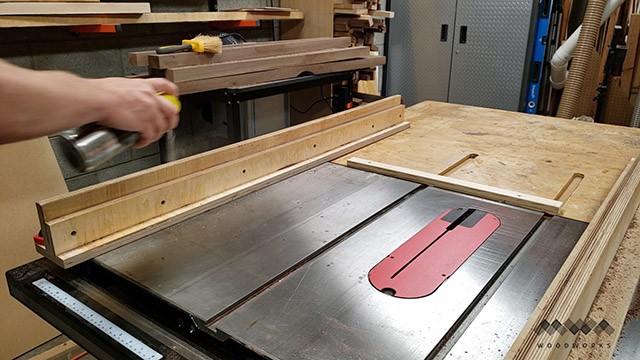
Just spray it on and it dries in seconds.
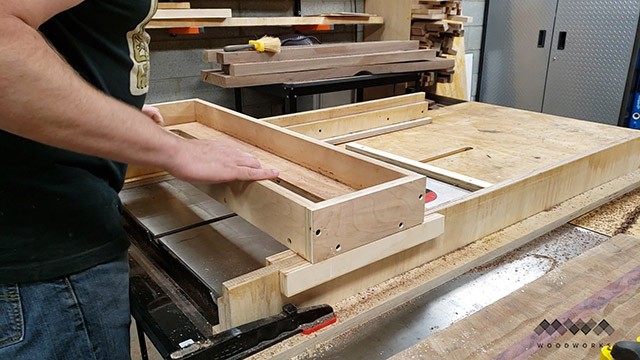
Now everything should be nice and slidy slidy!
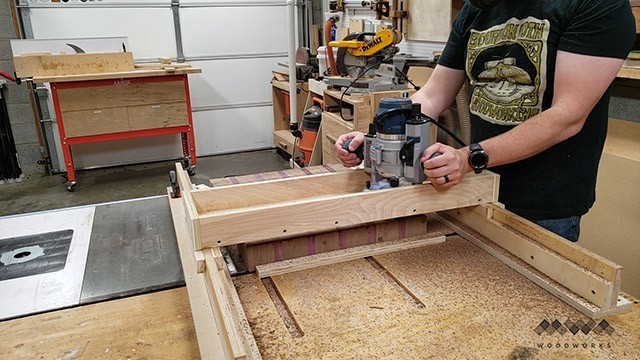
Operating the Router Sled
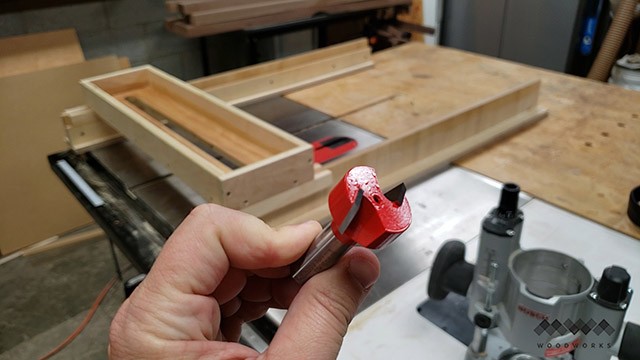
I used a 1 1/4″ mortising bit, but I could have used a surfacing bit just as easily. Anything with a wide flat cutting edge.
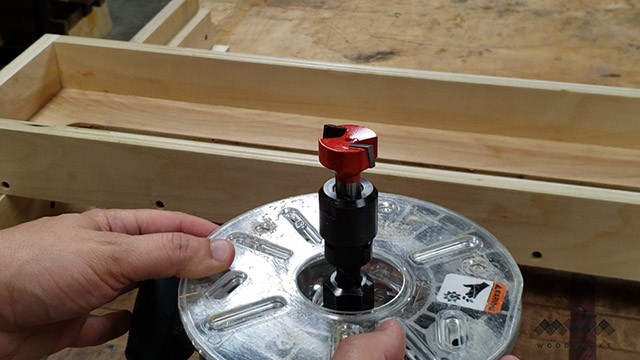
I also used a collet extension. This tool gives you the ability to extend all the way down to the workpiece.
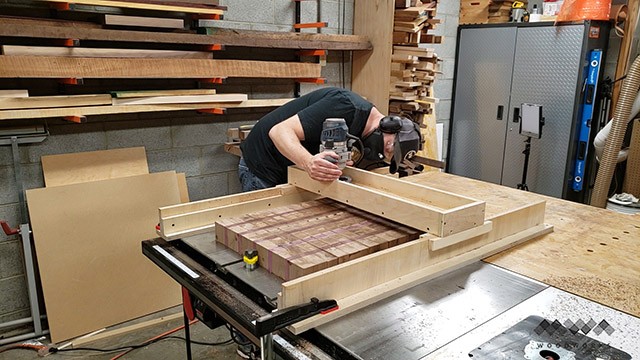
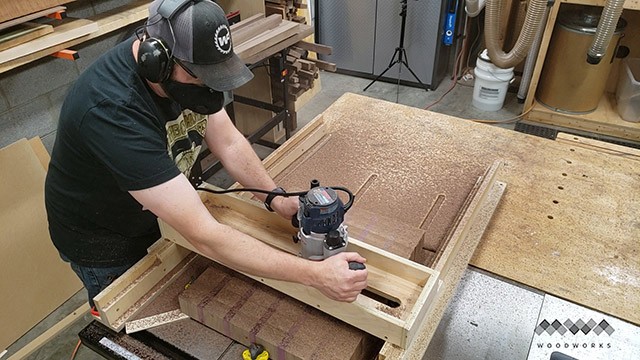
Now with the router OFF, find the lowest point on the surface of the material.
Just plunge down until the bit makes contact. This is the depth you will cut to.
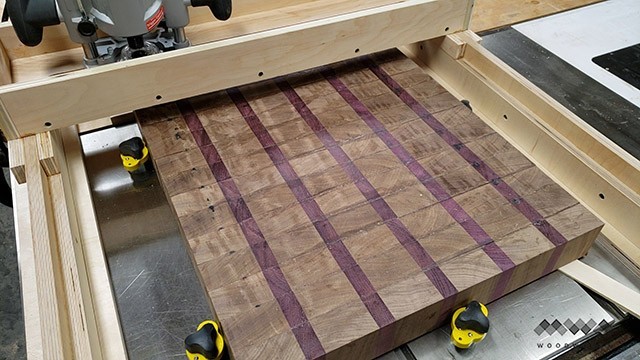
To hold my workpiece in place, I used 150 lb mag switches to keep the work piece from moving laterally. Since the work piece weighs over 40 lbs, there’s no need to fasten it down, it will stay in place. I also used a shim here to remove any rocking.
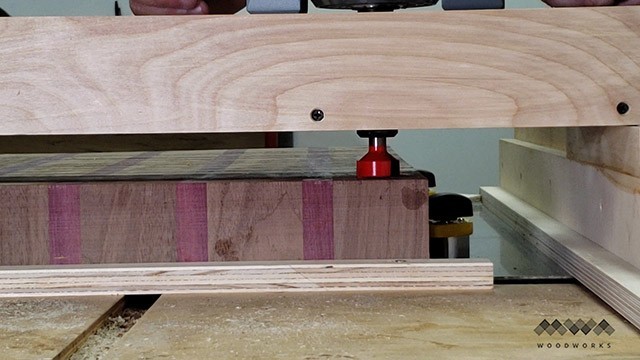
Make sure your router bit is away from the surface of the workpiece and turn the router on. Now slowly move onto the surface of the workpiece and make your first cut by slowly passing the router over the surface, adjusting it about 3/4″ on each pass.
Once you surface one side, flip your work over and repeat the process. Note, I didnt need the shim anymore because this side was now flat.
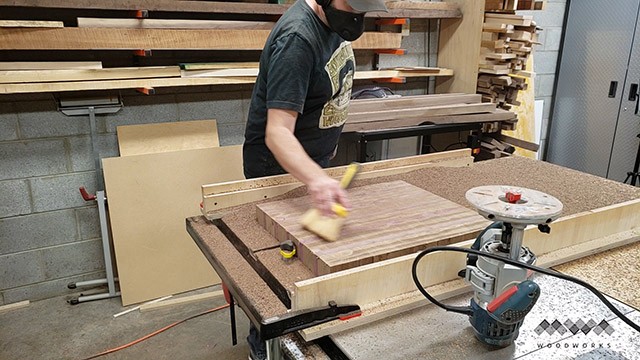
Once you’re done, remove the router and the sled and sweep off your work.
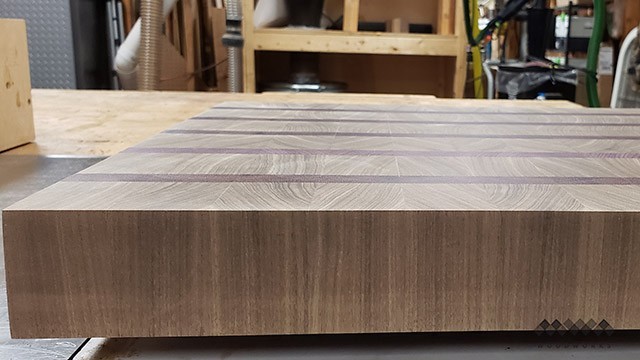
After a 60 grit sanding with the Rotex first to remove the mill marks and then progress in grit to 220 with a random orbit sander and you get a smooth flat finish.
The Whole Enchilada Plan Bundle
The Whole Enchilada Plan Bundle! You want it all? You Got it! Get every plan I offer in one bundle at a savings of over 65%!
This product is a DIGITAL DOWNLOAD. You can immediately download your product off the order receipt page after the purchase. You will also immediately receive an email titled “Your MWA Woodworks order is now complete” that contains the download link in the “Downloads” section of the email.


WOW just what I was looking for. Came here by searching for restaurant
This vid is sick
Nice set of instructions. Do you have any ideas about how one might add a dust collecting port? Seems like this will make a good mess :-). Thanks.
the way I’ve seen it done is to connect the dust collection port to the router and then add a “skirt” to the sled to contain the dust under the sled.
Greetings from Los angeles! I’m bored at work so I decided to check out your blog
on my iphone during lunch break. I really like the knowledge you provide here and can’t wait to take a look when I get home.
I’m surprised at how fast your blog loaded on my cell phone
.. I’m not even using WIFI, just 3G .. Anyways, superb site!
The best lube is a piece of parafin, my dad was a carpenter and his dad was a craftsman. Everyone always had a piece of paraffin. Use it on hand saws, table saws, fences or jigs, anything that needs lube. I forgot drawers, that’s a buggy, makes no mess.