
Cutting boards with minimal tools is a tutorial that will give you lots of advice tips & tricks to get you started making cutting boards with minimal tools! Every woodworker gets asked at some point to make a cutting board as a gift to someone special in their lives. Maybe its your sweet grandma or your wife or next door neighbor. But the beginner woodworker might feel like they don’t have the tools to successfully make a cutting board. Maybe you don’t have a jointer, a planer, a big ole cabinet saw, etc. But this tutorial’s aim is to show you that you absolutely can! I’ll walk you step by step through the process and I’ll only be using a table saw, a sander, a trim router and some clamps!

DID YOU KNOW: You can follow me on these social media platforms!
Instagram · YouTube · Facebook · Pinterest
| Materials & Supplies* | Tools* |
| Titebond 3 wood glue – https://amzn.to/3pHkHRs | Parallel Clamps –https://amzn.to/3hwJSDC |
| Condiment Bottles – https://amzn.to/3aZKsZf | Scraper- https://amzn.to/3o75jNP |
| Gorilla Grip Shelf Liner- https://amzn.to/2WZtn9C | DeWalt Trim Router- https://amzn.to/38ROyA7 |
| Cedar Pencils- https://amzn.to/3pGpsuB | Freud Chamfer Bit- https://amzn.to/3o6OFhx |
| Mirka Sand Paper- https://amzn.to/3ojw9lW | Freud Heavy Duty Rip Blade- https://amzn.to/352SuNg |
| Bosch Random Orbit Sander- https://amzn.to/2X4CRR8 |
*I use affiliate links, please see details on my disclaimer.
The Whole Enchilada Plan Bundle
The Whole Enchilada Plan Bundle! You want it all? You Got it! Get every plan I offer in one bundle at a savings of over 65%!
This product is a DIGITAL DOWNLOAD. You can immediately download your product off the order receipt page after the purchase. You will also immediately receive an email titled “Your MWA Woodworks order is now complete” that contains the download link in the “Downloads” section of the email.
Cutting Boards With Minimal Tools
Alright so I’m going to be using hardwoods for these cutting boards. I’ve got some walnut, some maple and some cherry all leftovers from other projects about 2 feet long.
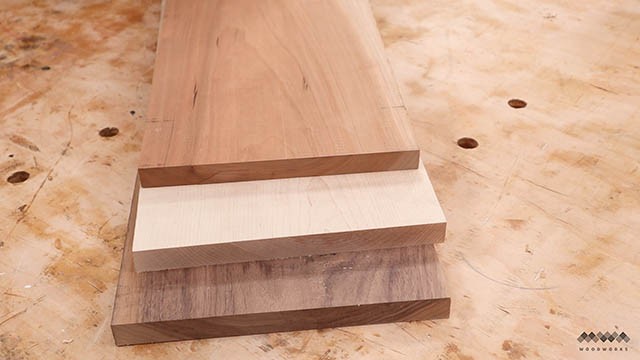
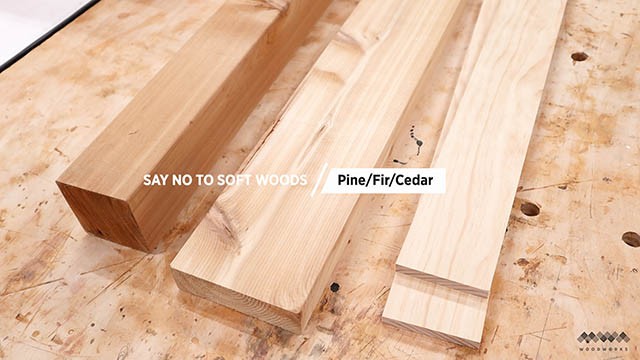
Definitely stick with hardwoods for this kind of project and stay away from stuff like pine, fir or cedar.
The Whole Enchilada Plan Bundle
The Whole Enchilada Plan Bundle! You want it all? You Got it! Get every plan I offer in one bundle at a savings of over 65%!
This product is a DIGITAL DOWNLOAD. You can immediately download your product off the order receipt page after the purchase. You will also immediately receive an email titled “Your MWA Woodworks order is now complete” that contains the download link in the “Downloads” section of the email.
Tools You Need
Cutting boards with minimal tools is all about that…. minimal tools. The biggest advice I have for people getting started is to seek out lumber dealers that offer pre-surfaced lumber. You can usually buy it from your lumber supplier for just a marginal added expense. My local hardwood lumber dealer charges 25 cents per board foot for pre-surfaced lumber. Most of the time it will also come with a straight line ripped along one edge. Again, that’s key because this allows you to skip the jointer/planer and go straight to the table saw to cut your boards. Once you get over the hurdle of not having a jointer and planer then its straight forward in terms of tool needs. To make these cutting boards I used only four major tools: a table saw, some clamps, a trim router and a random orbit sander.
Cutting Your Boards
I started by trimming off the rough edge of each board. This way I have two parallel edges for referencing and I know that each board is the same width the whole length of the board. That’s important for the next step in the process.
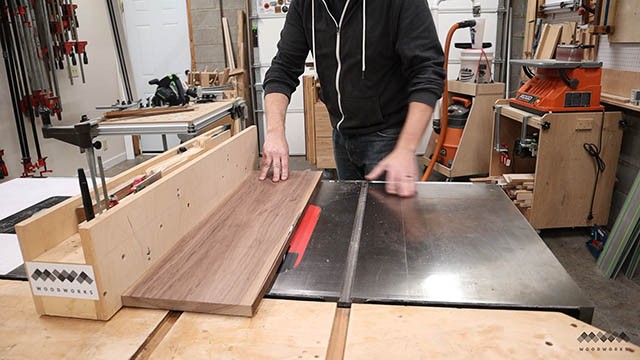
I want to cut some different sized strips from each board so I can mix and match them to create three different color combos. It’s safer to cut these strips on the opposite side of the blade from the fence. I like using this little trick for getting the same width strips repeatedly.
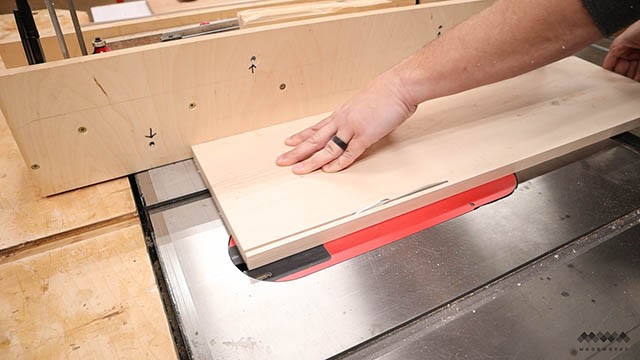
I just set one strip against the blade and then I adjust the fence until my board matches it. Easy peasy and I just repeat that process until I get a few strips from each board.
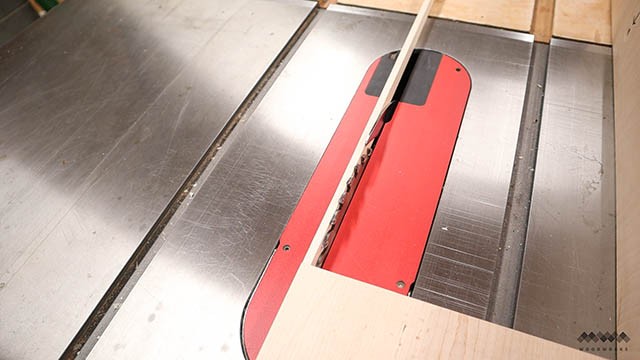
Next, I cutoff the top inch or so from each board. This will allow me to sandwich those strips in between.
The Whole Enchilada Plan Bundle
The Whole Enchilada Plan Bundle! You want it all? You Got it! Get every plan I offer in one bundle at a savings of over 65%!
This product is a DIGITAL DOWNLOAD. You can immediately download your product off the order receipt page after the purchase. You will also immediately receive an email titled “Your MWA Woodworks order is now complete” that contains the download link in the “Downloads” section of the email.
Cutting Boards with Minimal Tools: Assembly
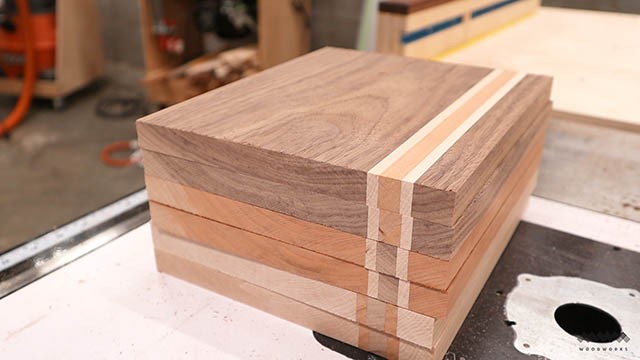
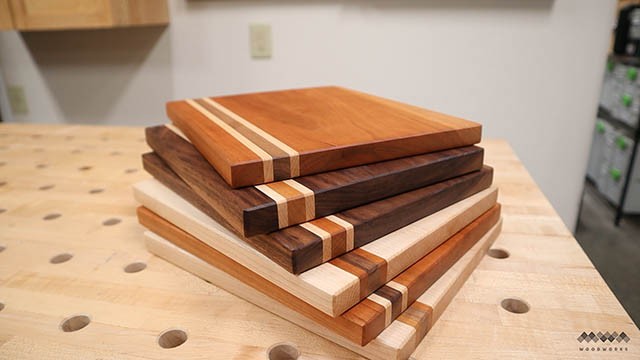
Alright, now to design the boards. Since I have three different hardwoods I wanted some of each kind to be in every board.
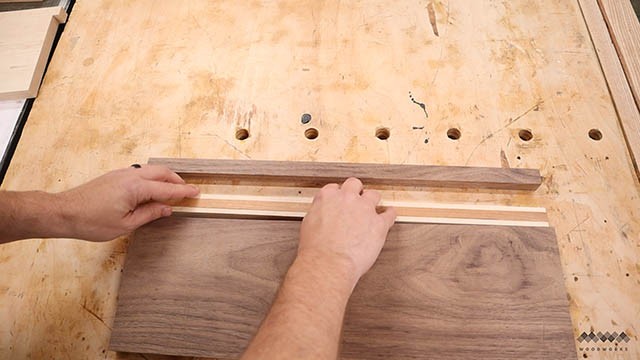
This walnut board will get two maples and a cherry. The maple board will get two cherries and a walnut. The cherry board will get two maples and a walnut.
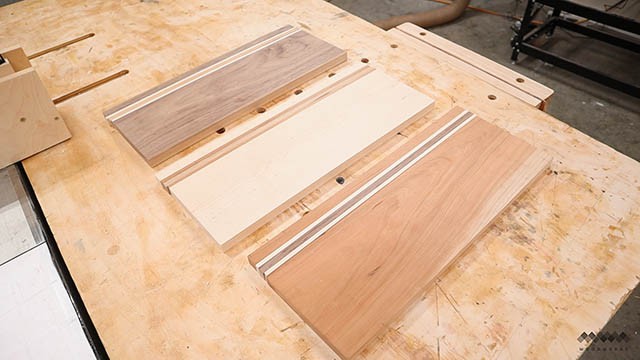
These colors go so well together and each board looks great. Most importantly each board only has 4 glue joints. That will help maximize my chances of getting nice flat boards and reduce my sanding time drastically.
The Whole Enchilada Plan Bundle
The Whole Enchilada Plan Bundle! You want it all? You Got it! Get every plan I offer in one bundle at a savings of over 65%!
This product is a DIGITAL DOWNLOAD. You can immediately download your product off the order receipt page after the purchase. You will also immediately receive an email titled “Your MWA Woodworks order is now complete” that contains the download link in the “Downloads” section of the email.
Gluing Up Your Cutting Boards
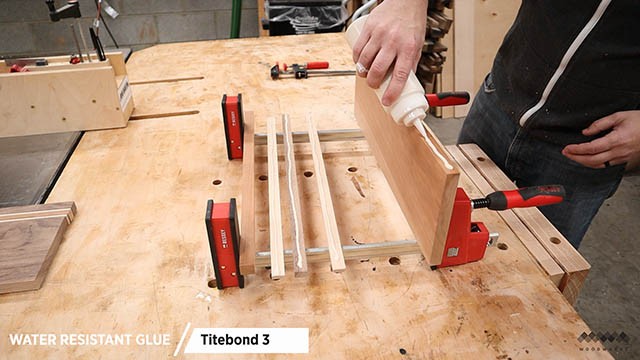
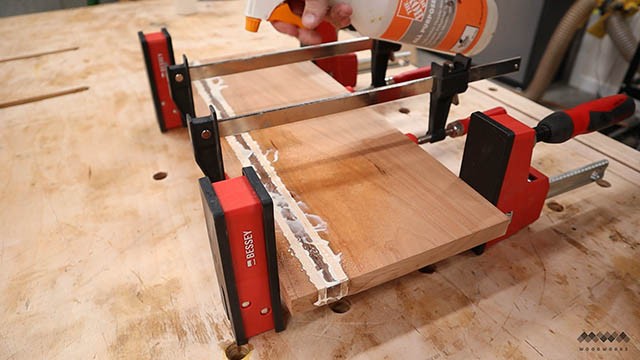
I have a few tips for the glue-ups, the first is use a water resistant wood glue when making cutting boards. There are a few, I recommend titebond 3, I’ve been using it for years and its great.
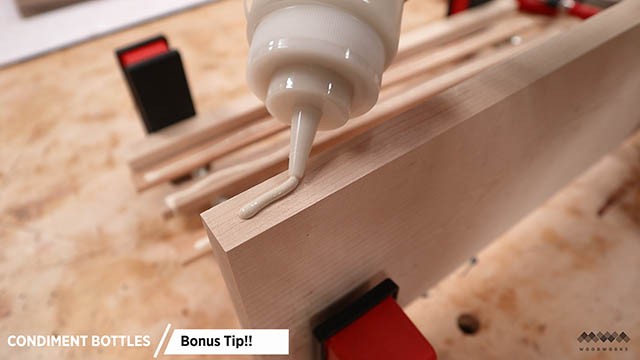
Also, we want enough glue, but not too much because we really need visibility to those glue joints to make sure they are nice and even. I’d use a glue bottle that can give a nice fine bead of glue.
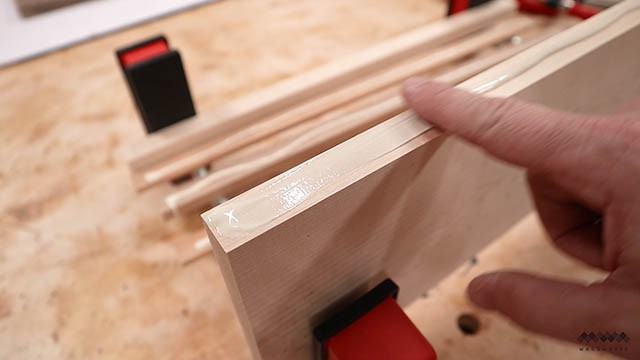
I love using condiment bottles just for this reason. You can use a brush or roller, but I’m just going to use the spreader I already have on my hand.
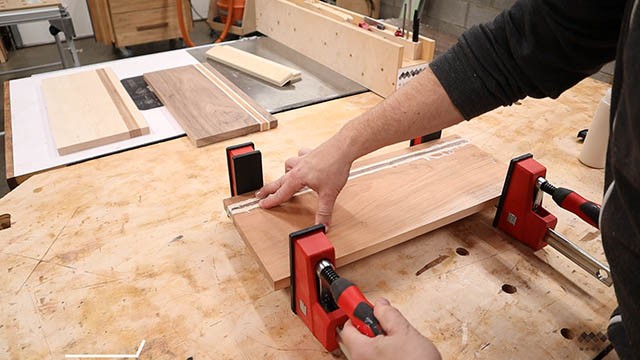
Once I got all my pieces glued up I began adding the clamps slowly. I’m trying to be as careful as I can. Things are going to want to slide around and up and down and I don’t want that. Because I’m using minimal tools I want to take this glue-up slowly. Keep an eye on those strips to make sure they all stay flat.
The Whole Enchilada Plan Bundle
The Whole Enchilada Plan Bundle! You want it all? You Got it! Get every plan I offer in one bundle at a savings of over 65%!
This product is a DIGITAL DOWNLOAD. You can immediately download your product off the order receipt page after the purchase. You will also immediately receive an email titled “Your MWA Woodworks order is now complete” that contains the download link in the “Downloads” section of the email.
More Glue-up Tips
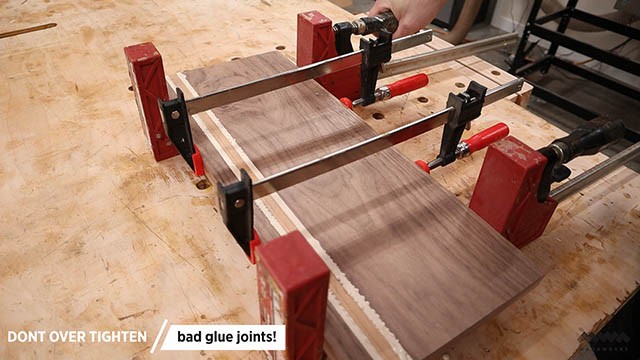
Another tip, you don’t need to crank down on the work piece here. We’re dealing with three small strips. They are pretty flexible so they shouldn’t need a lot of force to close the joints up. If you’re getting a nice line of squeeze out along each joint then you have enough clamping pressure. Cranking down too hard will starve the joints of glue and possibly lead to a failure down the road. It can also introduce tensions that will cause warping and you don’t want that.
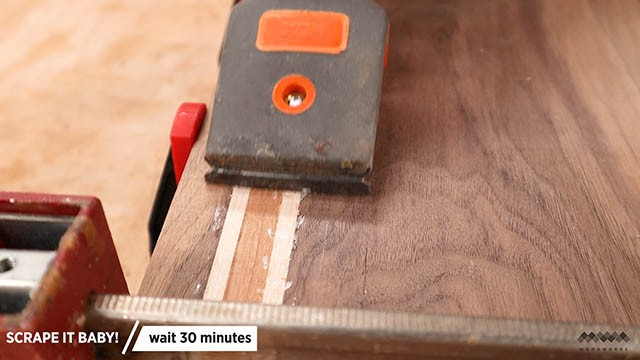
One way to check your joints is to clean off the excess glue now. I find that a little water help this. Now you can see clearly if all your joints are tight and also in line with one another. You also don’t have a ton of glue to sand off later once its dried.
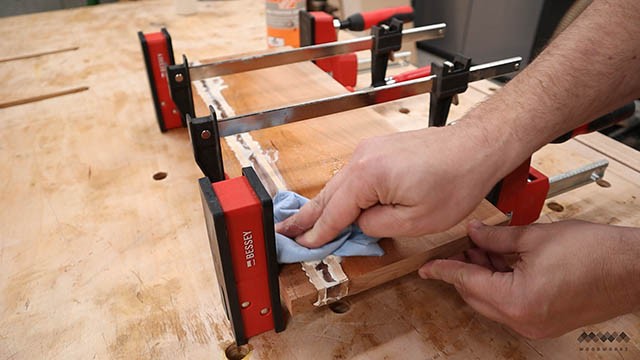
You don’t have to do this to the other side of the board. I have another trick you can use once the glue sits for about 30 minutes. Grab yourself a paint scraper and just run it along those joints and the glue will come off pretty cleanly. This is not nearly as messy as cleaning it while the glue is still wet.
OK, final glue up tip. One way you can help make sure your boards are all flat is to use clamping cauls. I like to just use strips of plywood with packing tape on one side to prevent the glue from sticking.
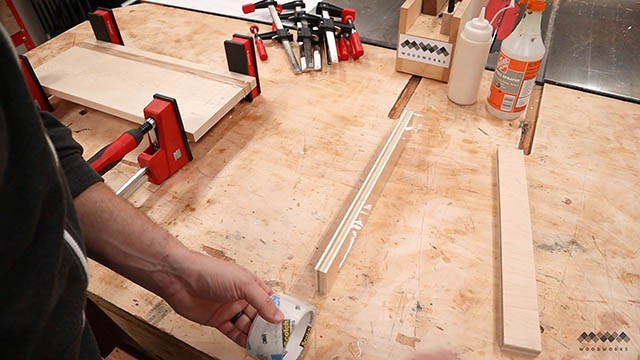
Just add a caul to each end of the board and clamp them down before you clamp the board together. Give those boards at least 8 hours in the clamps. I like to let them dry over night.

The Whole Enchilada Plan Bundle
The Whole Enchilada Plan Bundle! You want it all? You Got it! Get every plan I offer in one bundle at a savings of over 65%!
This product is a DIGITAL DOWNLOAD. You can immediately download your product off the order receipt page after the purchase. You will also immediately receive an email titled “Your MWA Woodworks order is now complete” that contains the download link in the “Downloads” section of the email.
Cutting Boards for Beginners
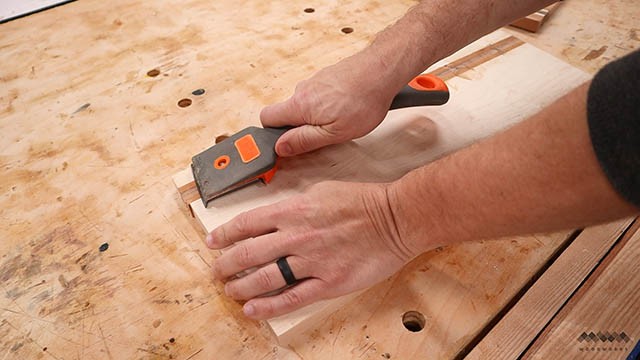
The next day I pulled them out of the clamps and scraped off any remaining glue with the scraper.
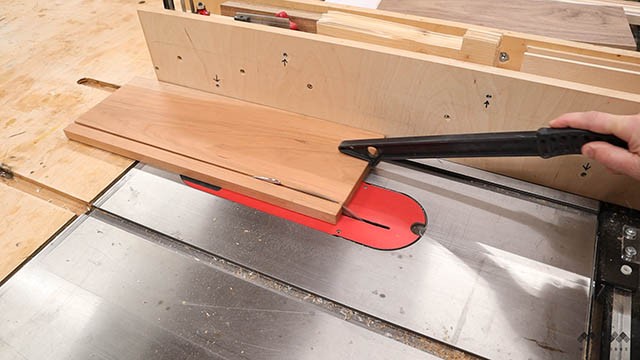
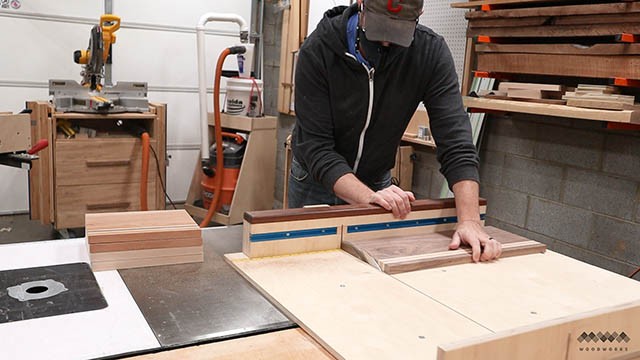
Next I trimmed these board to final width using my cross cut sled. I started by trimming the ends and then I cut each board to 10 inches in length.
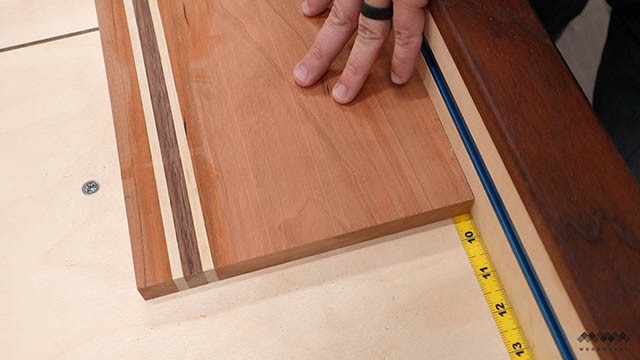
Another tip here is to always reference the same side of the board against the fence for every cut.
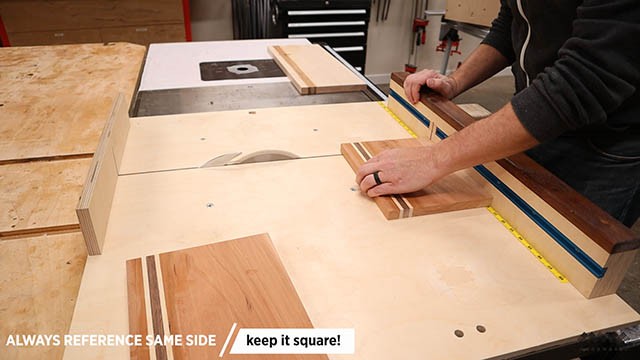
This will make sure each cut is square to that side of the board.
If you haven’t made a crosscut sled for your table saw yet you can also use your miter gauge to do this.
The Whole Enchilada Plan Bundle
The Whole Enchilada Plan Bundle! You want it all? You Got it! Get every plan I offer in one bundle at a savings of over 65%!
This product is a DIGITAL DOWNLOAD. You can immediately download your product off the order receipt page after the purchase. You will also immediately receive an email titled “Your MWA Woodworks order is now complete” that contains the download link in the “Downloads” section of the email.
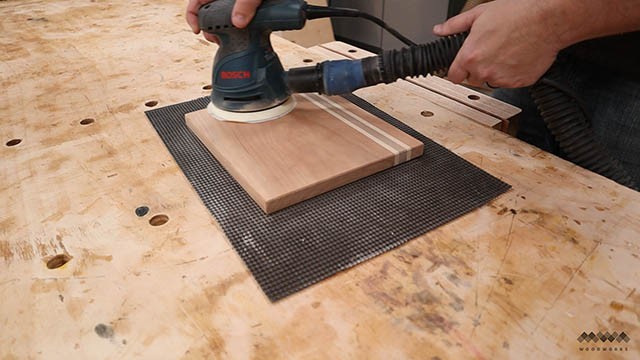
Cutting Boards with Minimal Tools: Sanding
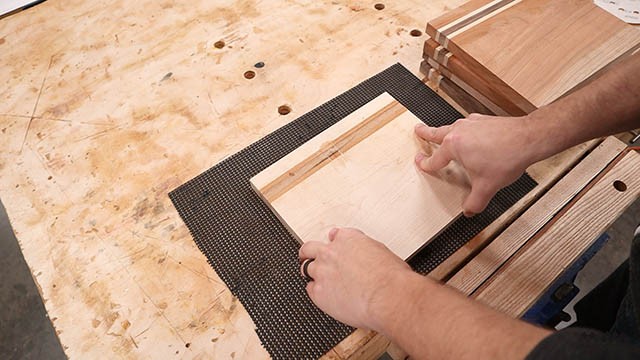
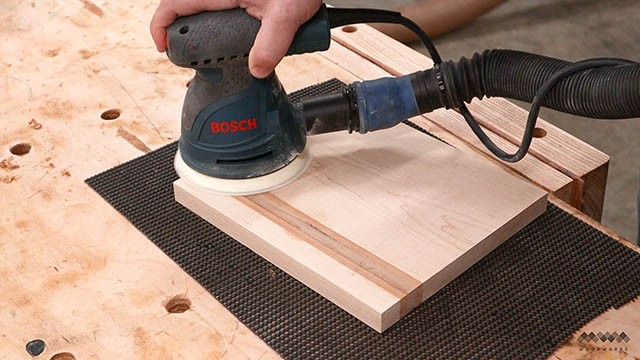
You can see here how grippy this shelf liner is. Since these boards aren’t very big they don’t have a lot of weight to keep them in place while I sand.
My first tip for sanding is to grab a pencil and mark up your boards. When you’ve sanded all the pencil marks off, this is a good indicator of when you can stop sanding and move on to the next grit.
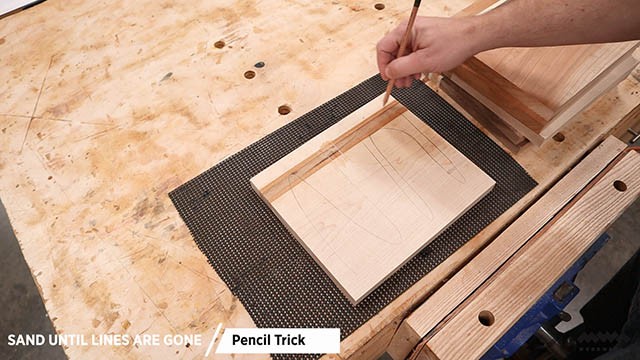
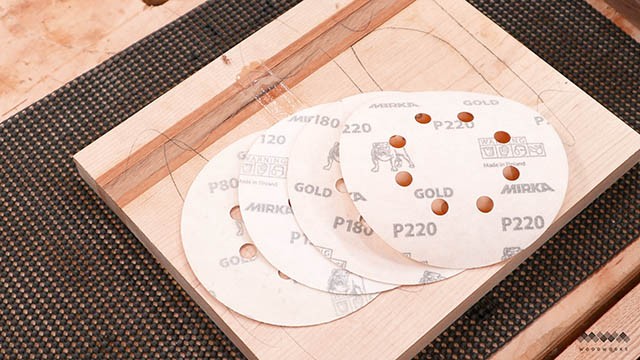
And for these boards I’m going to start sanding at 80 grit, then go to 120, 180 and finally 220. Mark up your boards between each grit. How much sanding you do here depends on how well your glue-ups went.
If your boards were flat then you don’t have to worry about sanding down any high spots where a strip of wood went astray.
The Whole Enchilada Plan Bundle
The Whole Enchilada Plan Bundle! You want it all? You Got it! Get every plan I offer in one bundle at a savings of over 65%!
This product is a DIGITAL DOWNLOAD. You can immediately download your product off the order receipt page after the purchase. You will also immediately receive an email titled “Your MWA Woodworks order is now complete” that contains the download link in the “Downloads” section of the email.
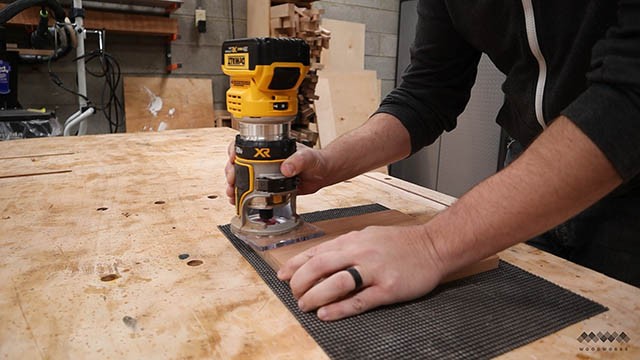
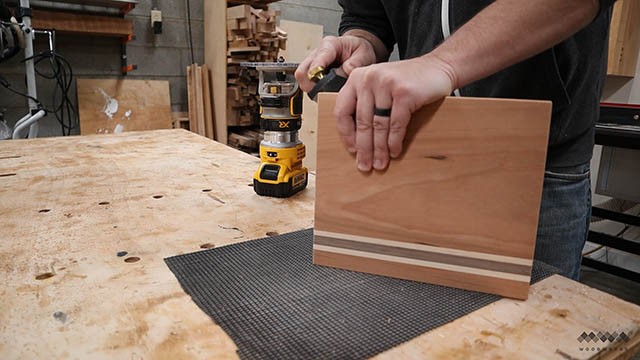
Edging The Cutting Boards
Now once I have everything sanded final grit, I need to take care of these edges and for that I’m going to use a chamfer bit in my trim router.
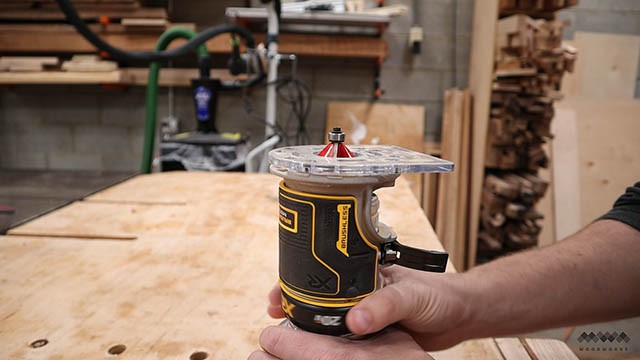
You can do chamfers or round-overs here.
You can also do this job with a hand plane if you don’t have a router. It wouldn’t take that much longer and there’s less chance of tear-out in the grain that routers can sometimes give you.
The Whole Enchilada Plan Bundle
The Whole Enchilada Plan Bundle! You want it all? You Got it! Get every plan I offer in one bundle at a savings of over 65%!
This product is a DIGITAL DOWNLOAD. You can immediately download your product off the order receipt page after the purchase. You will also immediately receive an email titled “Your MWA Woodworks order is now complete” that contains the download link in the “Downloads” section of the email.
Popping the Grain
The next thing I need to do is prep the boards for finish. I start by popping the grain with water. This causes all the little wood fibers I cut while sanding to stand up like the hairs on your arm when I’m cold.

This causes the board to feel rough or fuzzy. I also get that first glance of the grain color coming to life. I just spritz them with a spray bottle lightly. It doesn’t take that much water here.
Once they dry fully I knock the grain back down with my 220 grit sandpaper. The board instantly becomes smooth again. Doing this step prevents the board from getting that fuzzy feeling the first time you clean your board with water in the kitchen, a nice benefit!
The Whole Enchilada Plan Bundle
The Whole Enchilada Plan Bundle! You want it all? You Got it! Get every plan I offer in one bundle at a savings of over 65%!
This product is a DIGITAL DOWNLOAD. You can immediately download your product off the order receipt page after the purchase. You will also immediately receive an email titled “Your MWA Woodworks order is now complete” that contains the download link in the “Downloads” section of the email.
Finishing The Cutting Boards
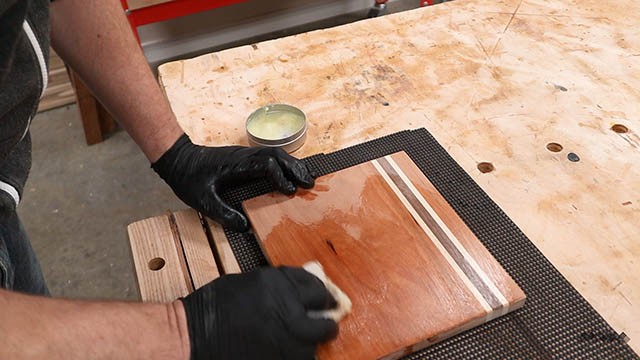
The final step is to apply the finish and I like using a paste made from mineral oil and bees wax. I rub a liberal amount of the past on each board coating all sides. You may have seen other videos where people bathe their boards in a tub of mineral oil. Please don’t do that. Totally overkill.
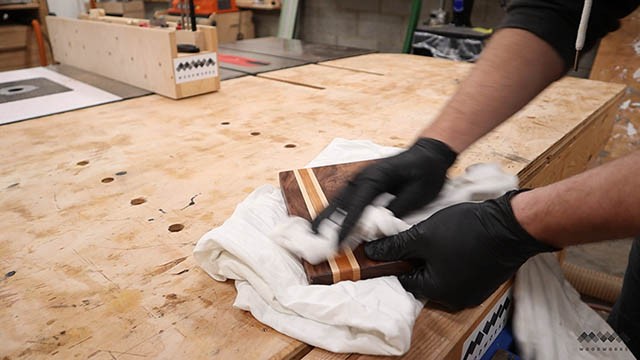
Long grain boards don’t soak up that much oil like end grain butcher blocks do.
Just let that paste sit on the boards for several hours and the wood fibers will take all the oil. It will leave the wax behind on the surface to harden. Then just buff them with a clean cotton rag until buttery smooth.


Great video and instructions. 2 quick questions. What is the final size of your boards? You mentioned 10” wide but what about the depth? I’m going to guess about 8”. Second, for edge grain cutting boards, would you also recommend the same finish as you did for this project, or would you recommend, say, mineral spirits only? Thanks.
yep 8×10. And Same finish on every board I ever made.